Links
Links give you access to all the information on the web, in the cloud and on your device so that you will ‘Get it done - In Time - Every Time’.
This Tutorial covers the following:
Using a Link.
Creating a Link.
Deleting a Link.
Sharing a Link to WarningZ from another App.
And then, in more detail, the types of links:
Contacts.
Actions.
Smart Actions.
Web Pages.
Notes.
Checklists.
Images.
Files.
Finally we will suggest how you can make files available from Apps, such as iBooks, that are not set up to be ‘document providers’ (they cannot be accessed by other apps) by moving files to a cloud service.
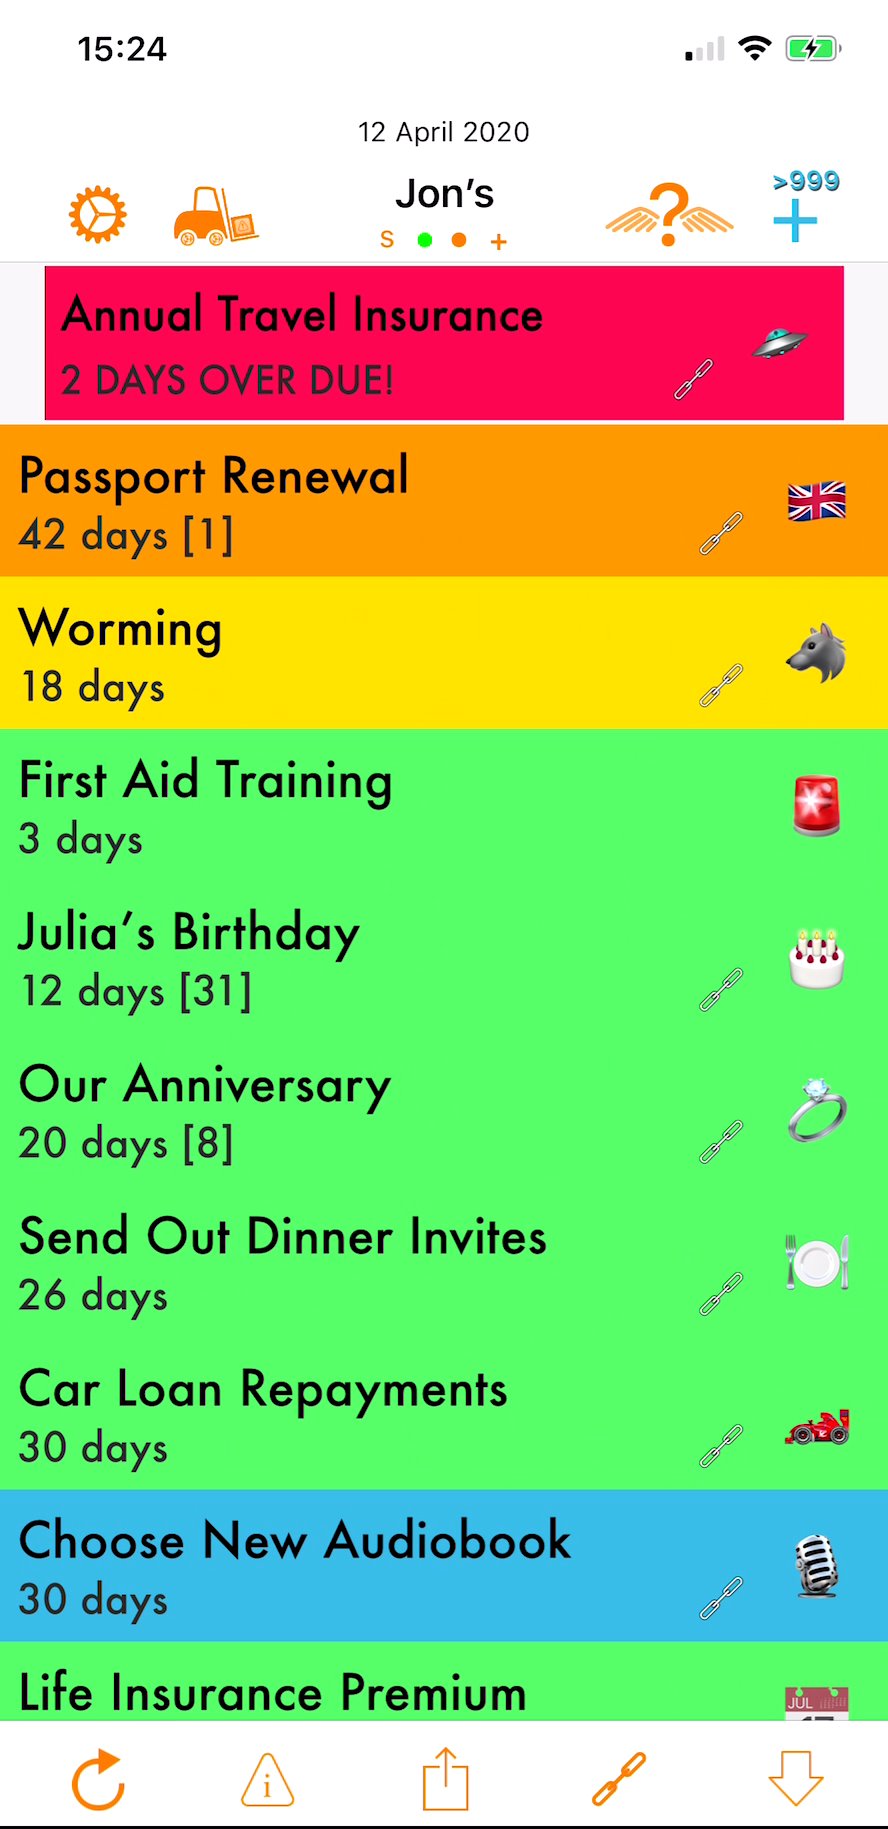
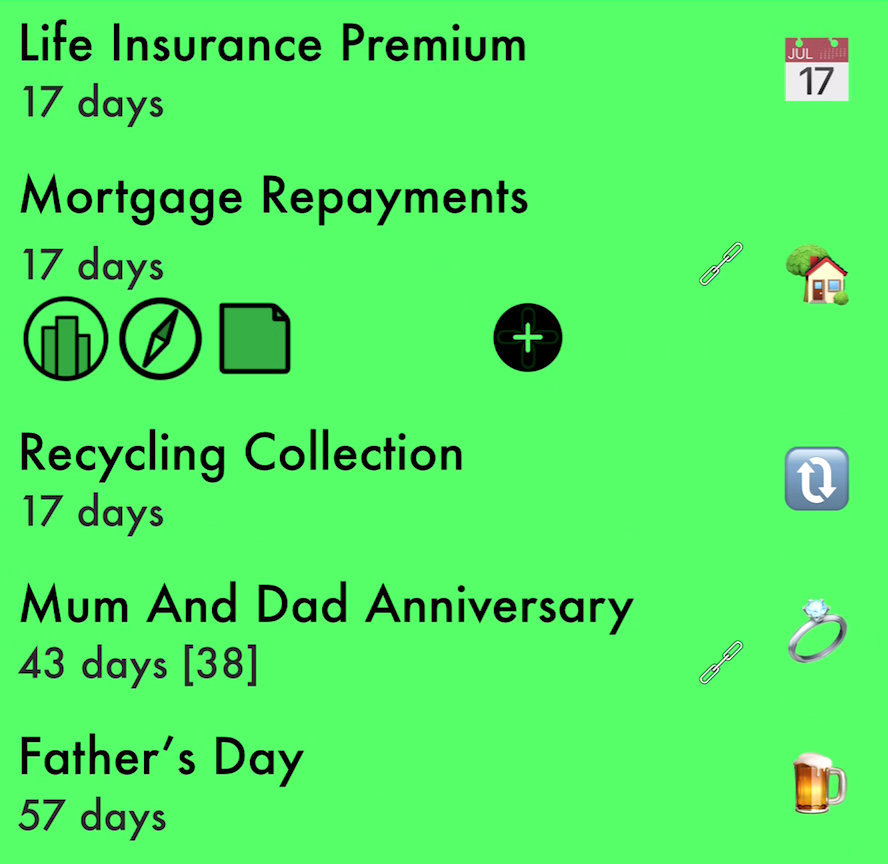
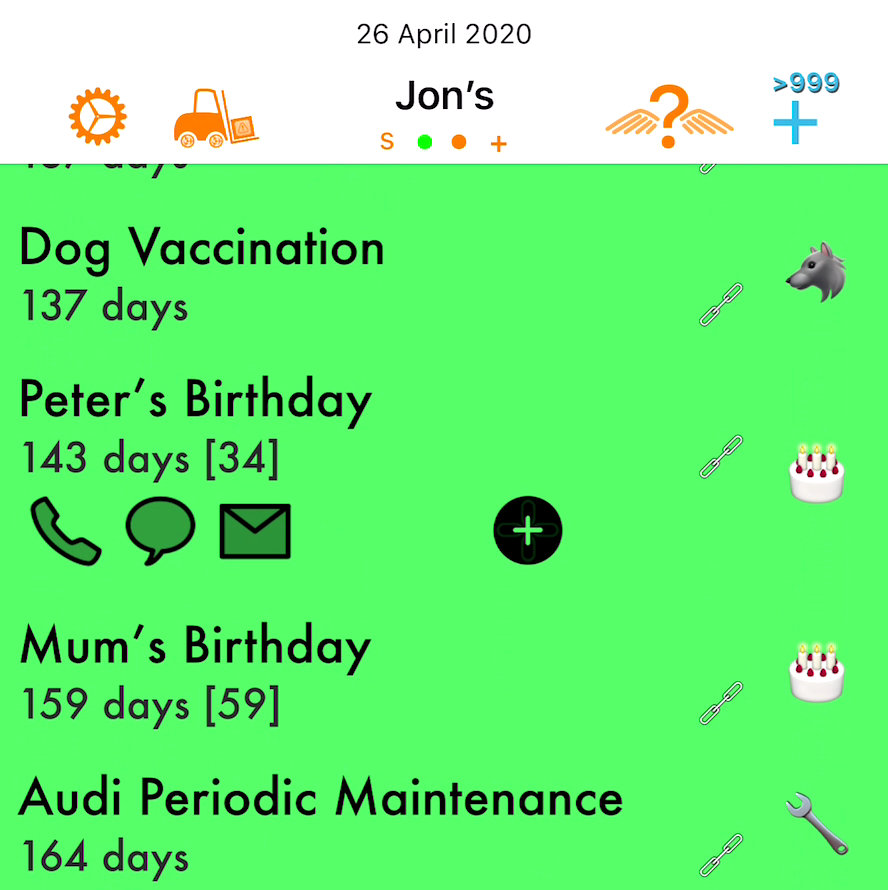
Links are not displayed on a WarnZ until you wish to access them. This keeps the 'Column View' uncluttered. Throughout this tutorial this screen is referred to as the 'Column View'. You can see which WarnZ have links by a 'link icon' displayed to the left of the Emoji.
When you need to use the links to complete a task or event, they can be 'revealed' as tappable icons on each WarnZ.
How to 'reveal' the tappable icons is shown in the 'Using a Link' section of this tutorial.
You can also access the links as a list on the 'View Links' page. This page will be referred to as the 'View Links' page throughout this tutorial.
Links are divided in to 2 types: Action Links - which enable you to complete the task or event. And: Information Links - which contain useful information.
The action links are:
Contacts
Actions - Phone calls (Landline or Mobile), Messages and Emails.
Smart Actions (combining links to create a 'ready to send' email or message).
Web Pages
Files
The information links are:
Notes
Checklists
Images.
Web Pages
Files
Web Pages and Files can be either Action Links or Information Links depending on what they access.
Links are added, edited and deleted on the 'Edit Links' page. The 'Edit Links' page is how this page will be referred to in this Tutorial.
This page is accessed by a number of methods explained later in this tutorial.
Using Links
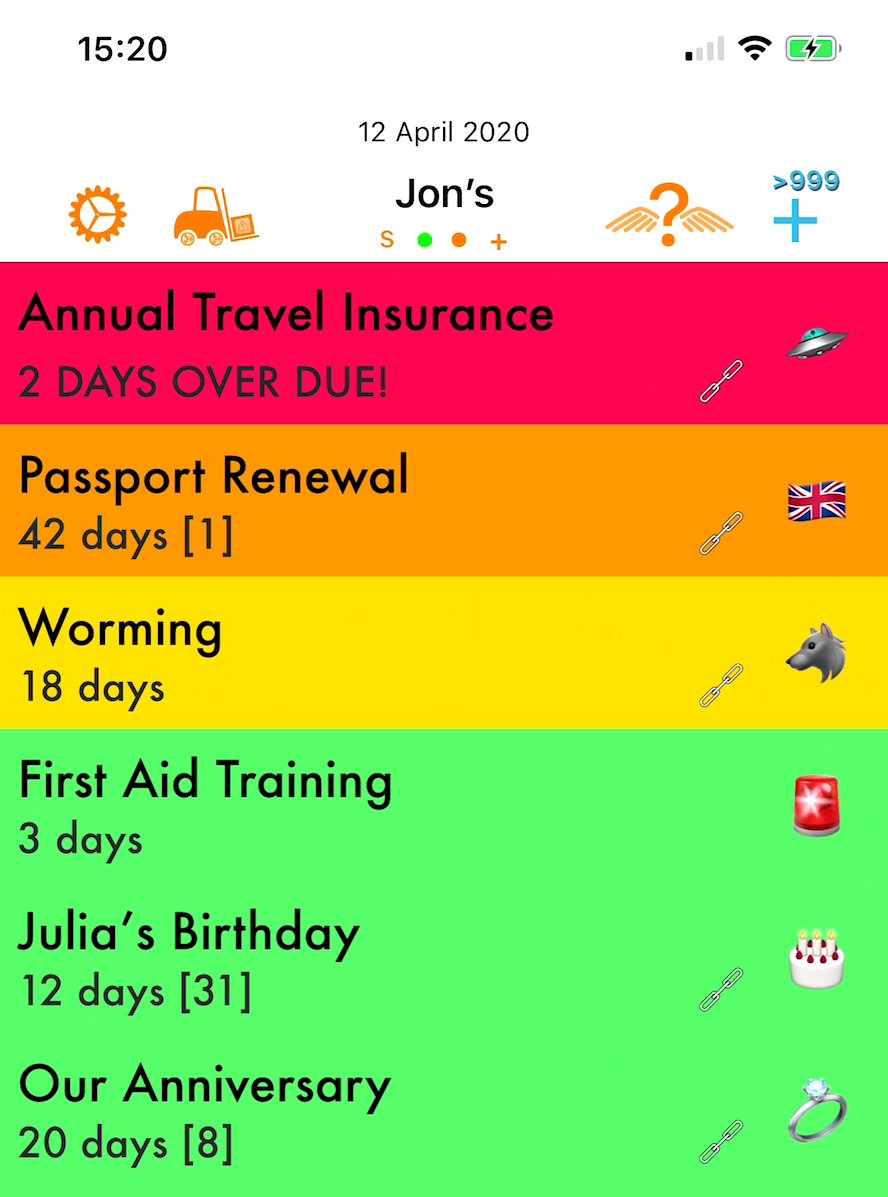
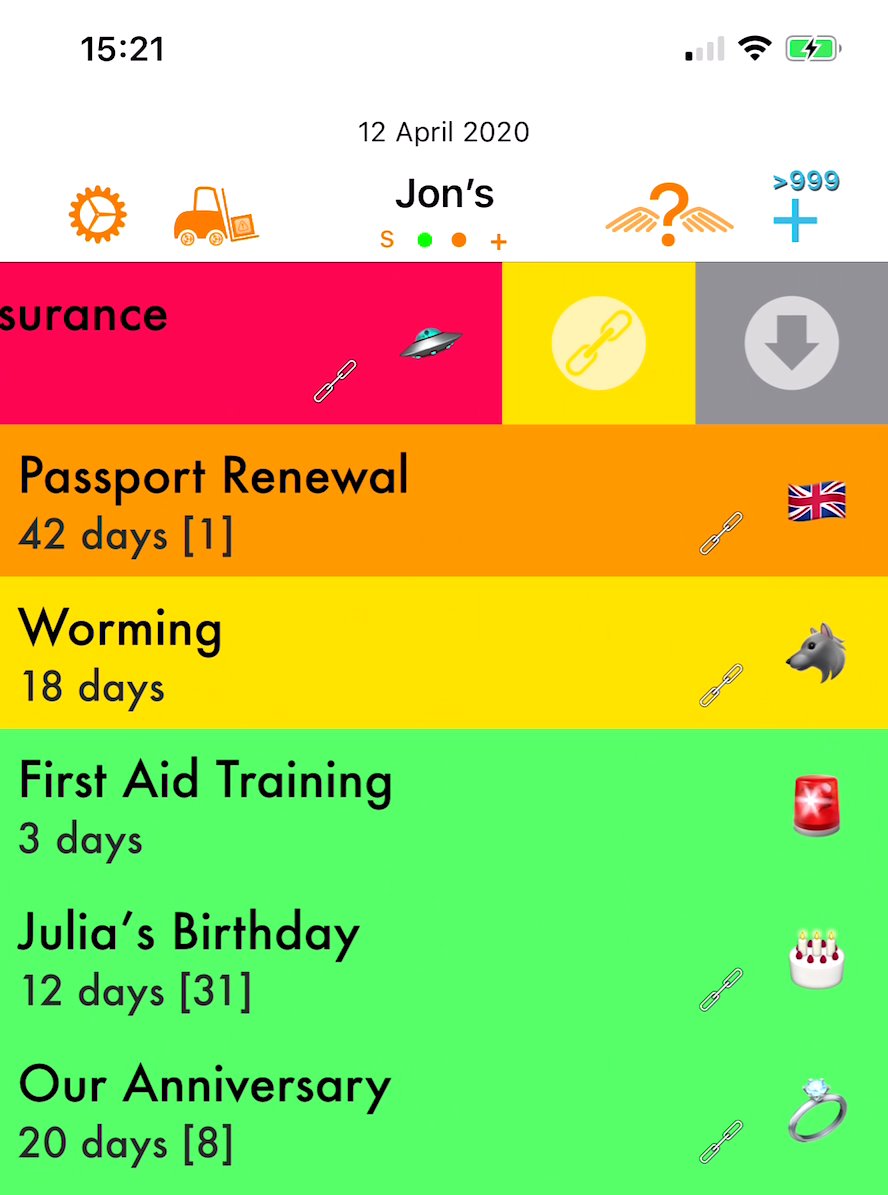
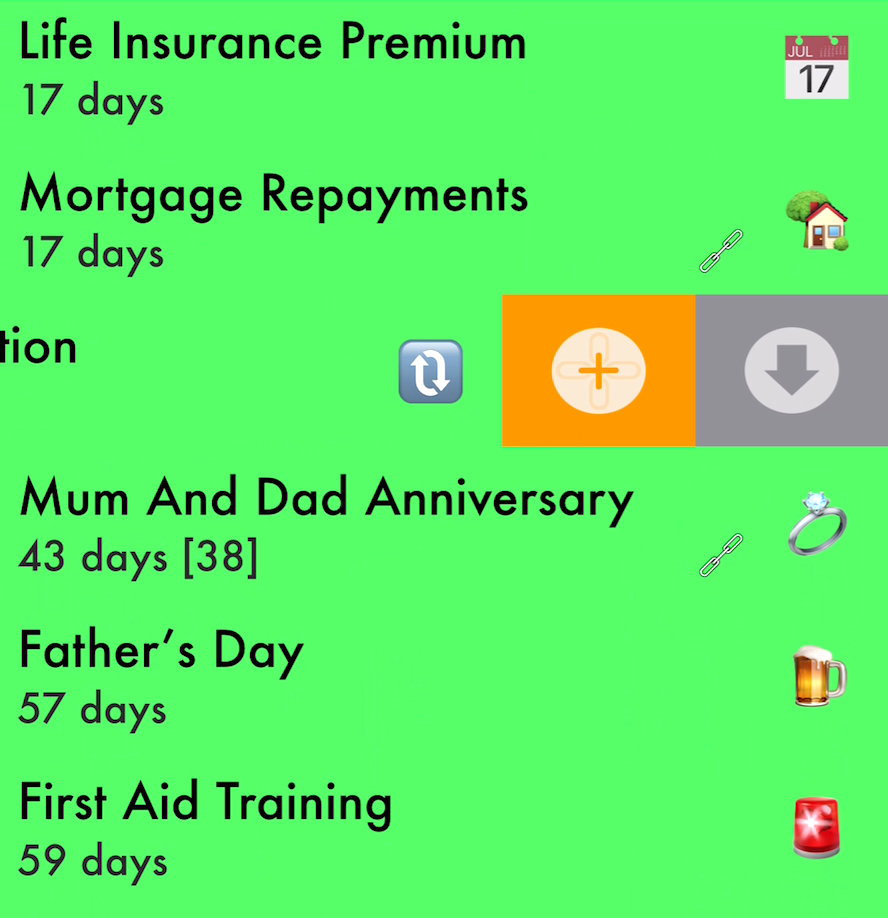
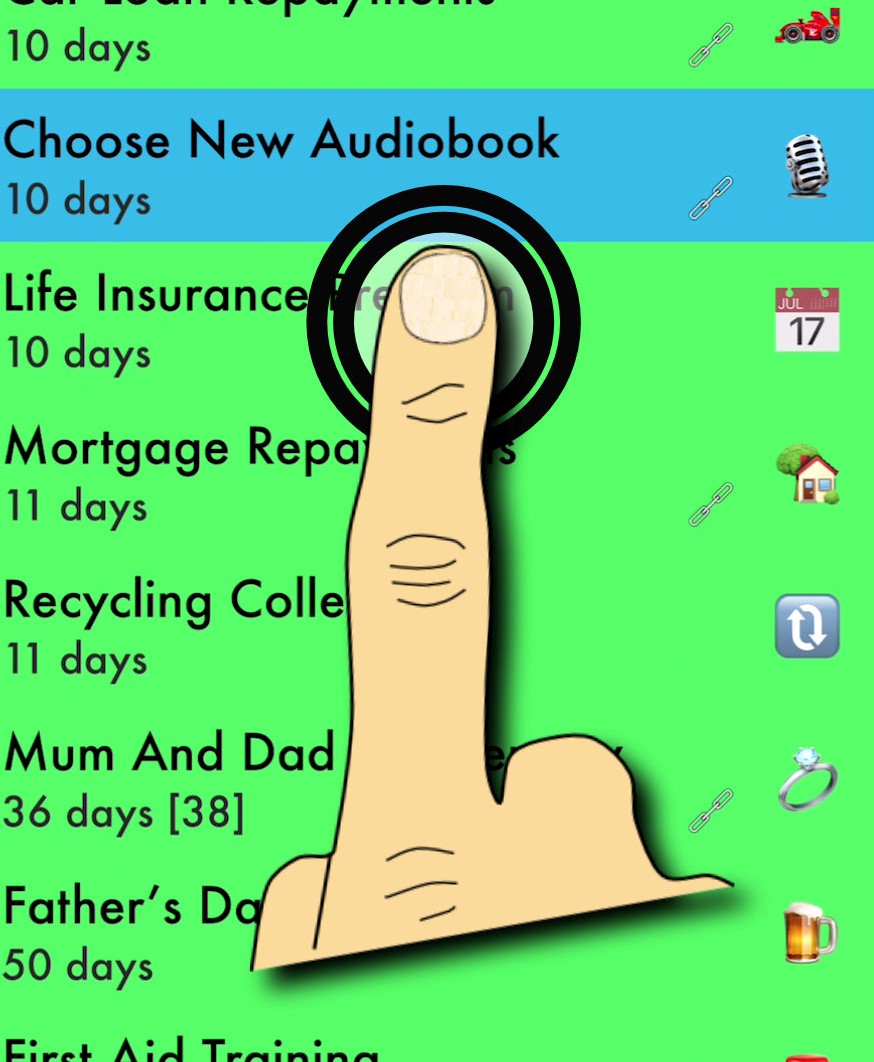
A WarnZ shows it has a link or multiple links attached by displaying a ‘link’ icon to the left and slightly below the emoji.

To reveal the links attached to a WarnZ: Swipe left.
2 buttons will drag in from the right. These are the ‘Show Links’ button and the ‘Archive’ buttons.
To display the links attached to a WarnZ: Tap on the ‘Show Links’ button (the link icon).
If you wish: You can customise the swipe buttons in 'Settings' so that the 'Reveal Links' swipe button is on the right of the 'Archive' swipe button. The 'Archive' button default position is on the right to mirror the iOS 'Delete' swipe action (as seen in Apple Apps such as 'Mail').
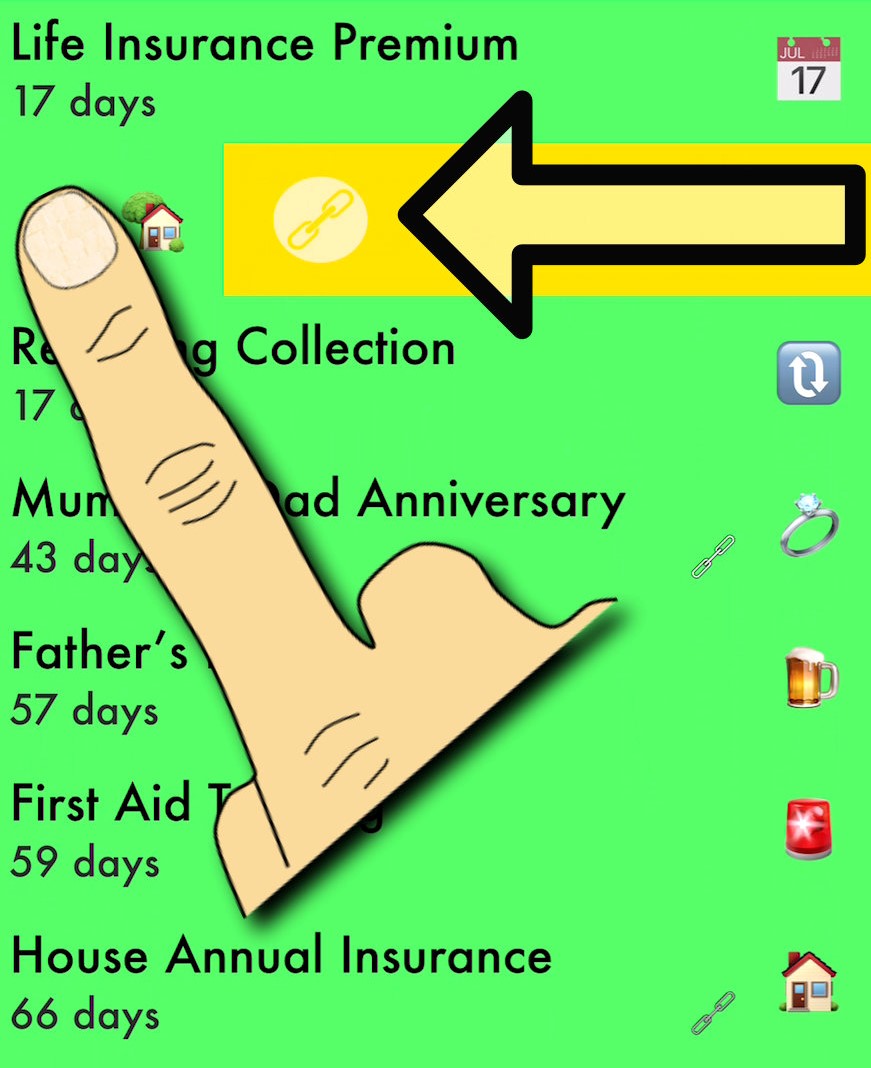
Reversing the buttons will allow you to display the WarnZ links with a long swipe. You will use the Links attached to a WarnZ more often than the Archive function, so reversing the buttons will allow access to the Links with a single swipe rather than a swipe and a tap.
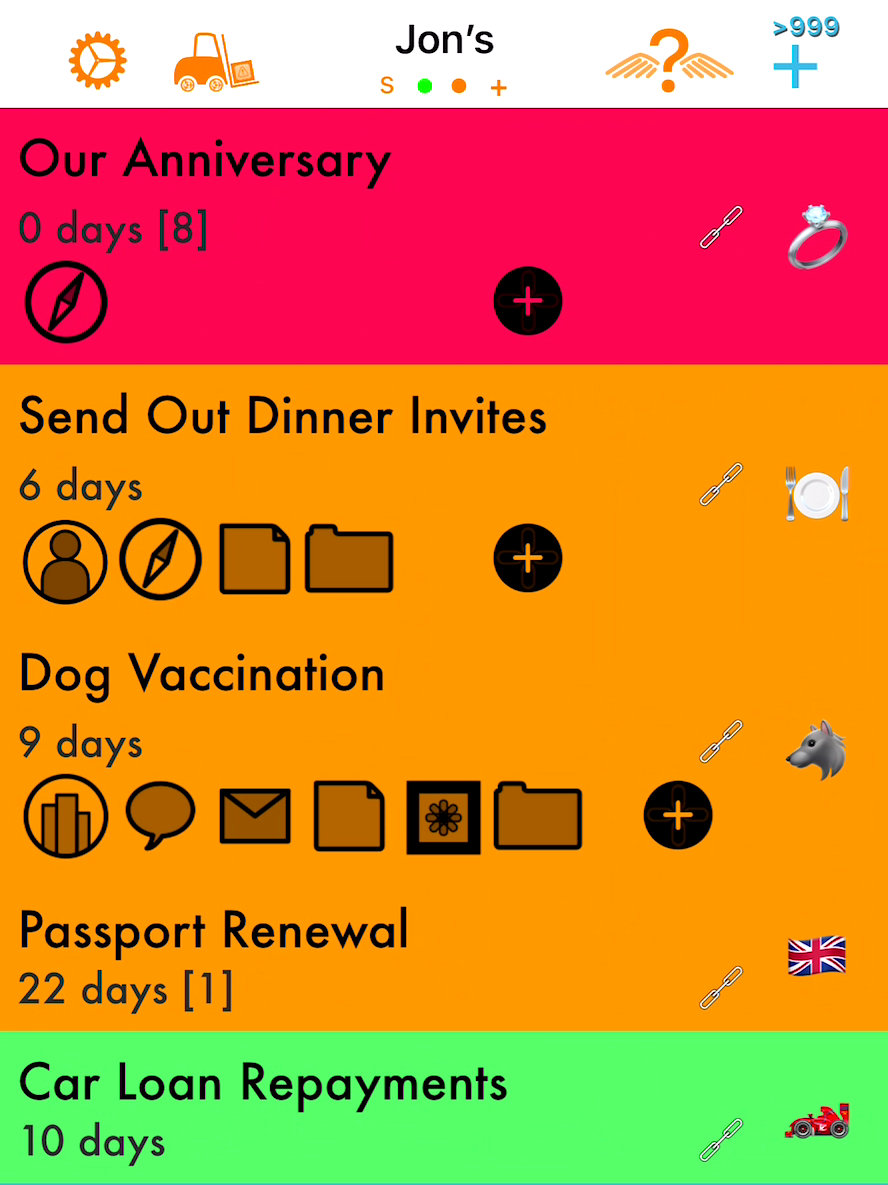
When activated the WarnZ will expand vertically and the links attached to the WarnZ are displayed as icons.
This WarnZ has a 'Business' contact card, a telephone number, and a link to webpage attached.
Tap a link icon to activate the appropriate action or to access the linked information.
There are other ways to display the links:
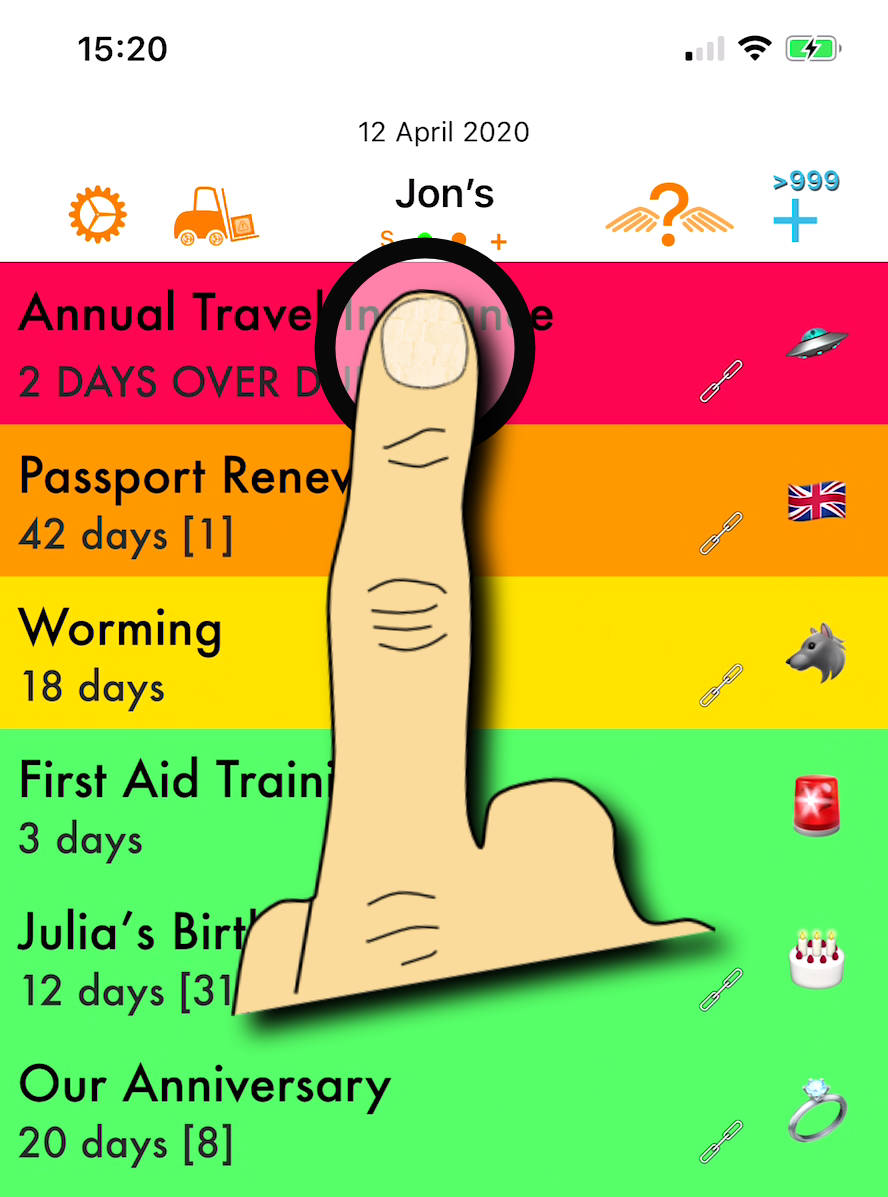
You can single tap on the WarnZ to select the WarnZ.
When selected the WarnZ will shrink and the 'Action' bar will show at the bottom of the screen. Tap on the 'Link' icon on the 'Action' bar.
As before the WarnZ will expand vertically to display the Links.
Tap a link icon to activate the appropriate action or to access the linked information.
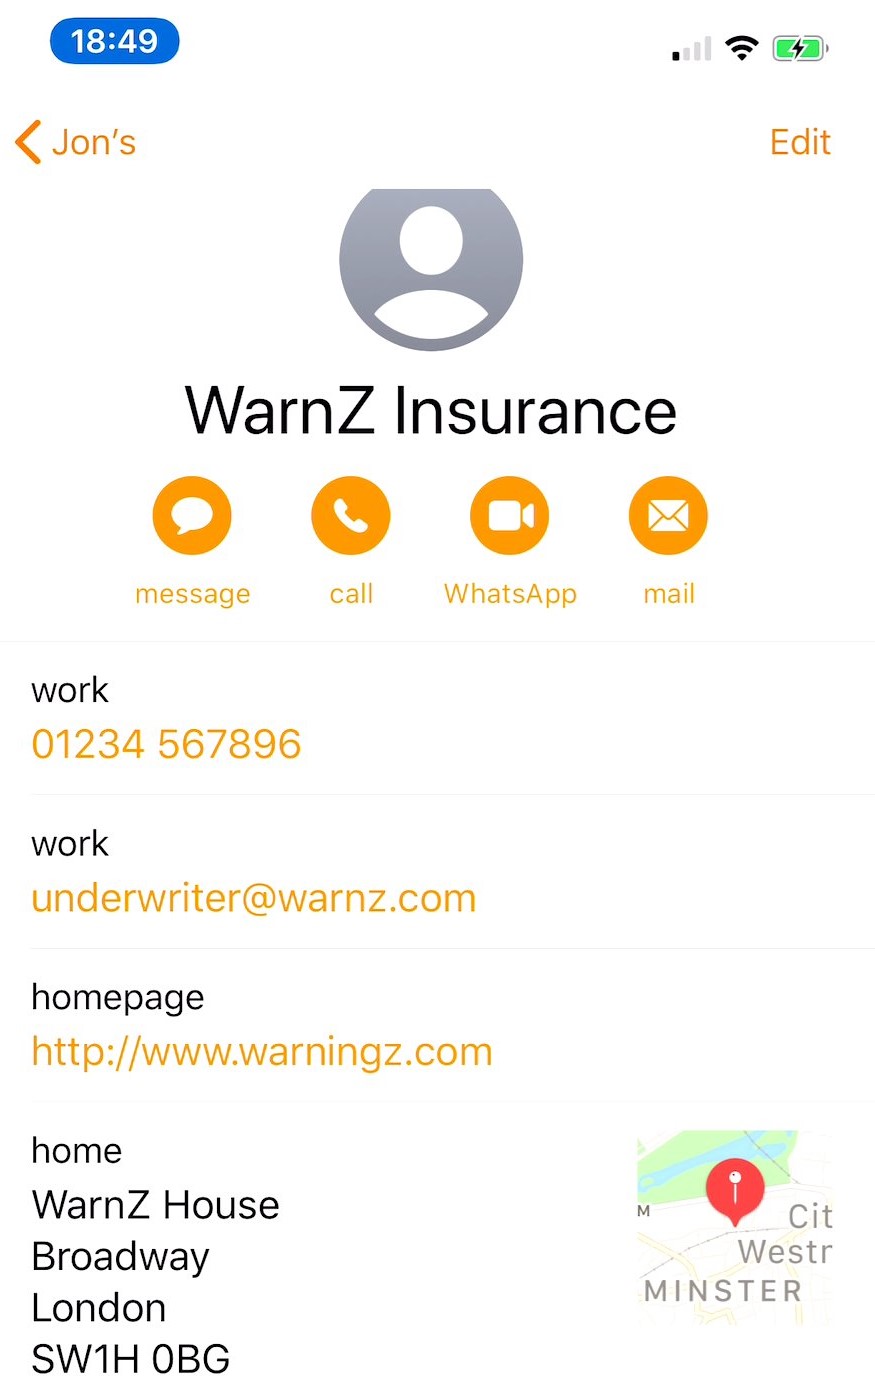
Tapping the 'Contact' icon will display the contact card for that person or business. In effect tapping on the icon has opened a view of the Contacts app and displayed the correct contact.
Tapping on the number will ring the contact. Tapping on the email address will create an email to the contact. And tapping on the address will open Maps to show their location, or so that you can get directions to that location.
The 'Call' icon will initiate a call to a telephone or mobile number saved as the link.
The web (Safari browser) icon will open the linked web page.
To add more links tap the + icon.
You can access a list of attached links (the 'View Links' page) for the WarnZ by tapping on the 'Link' icon on the WarnZ.
Or, if you have a 3D touch phone, you can access the 'View Links' page by using peek and pop by pressing anywhere on the WarnZ.
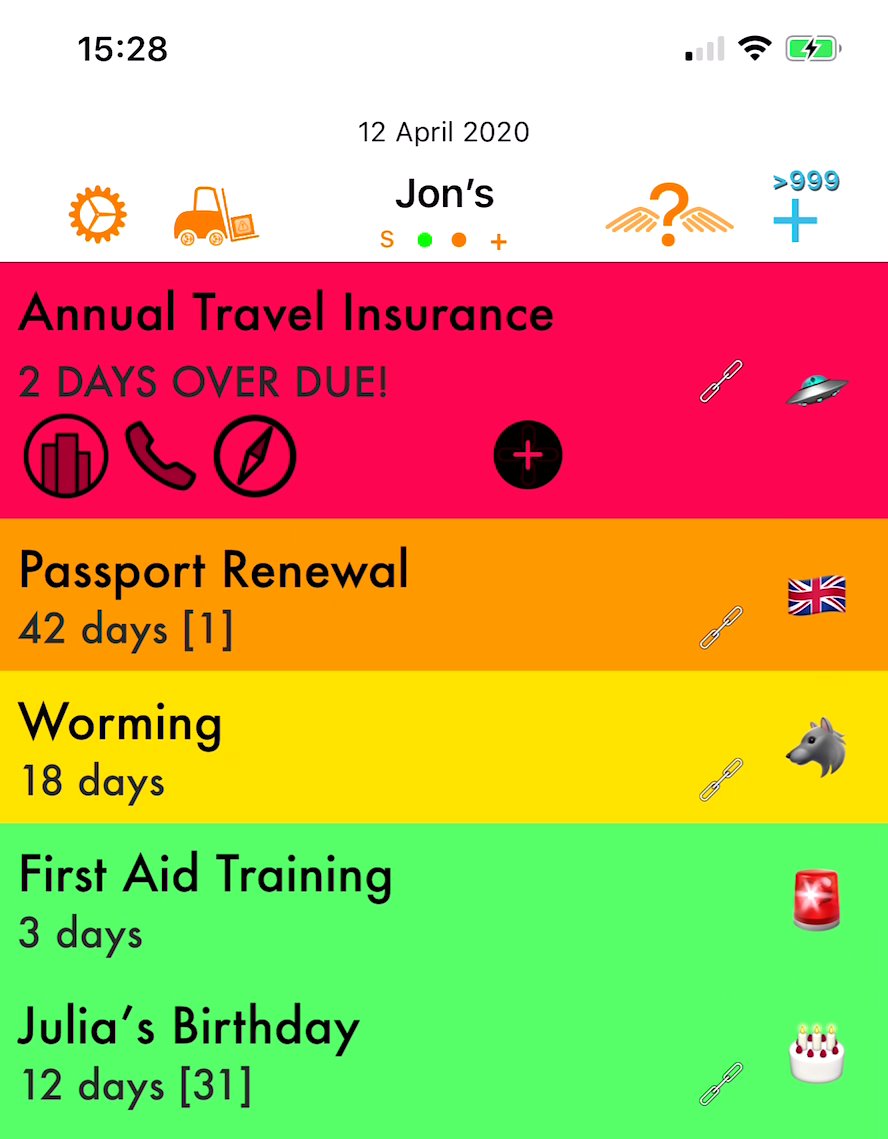
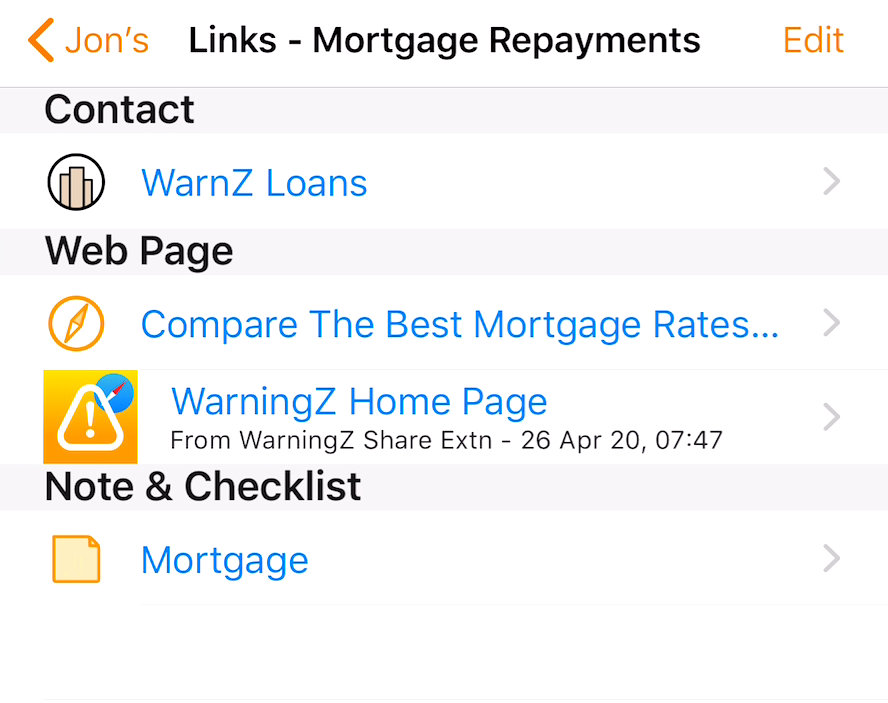
The 'View Links' page shows the links attached in more detail.
You can then access specific links by tapping them.
You can add new links or edit existing links by tapping 'Edit'. This will open the 'Edit Links' page.
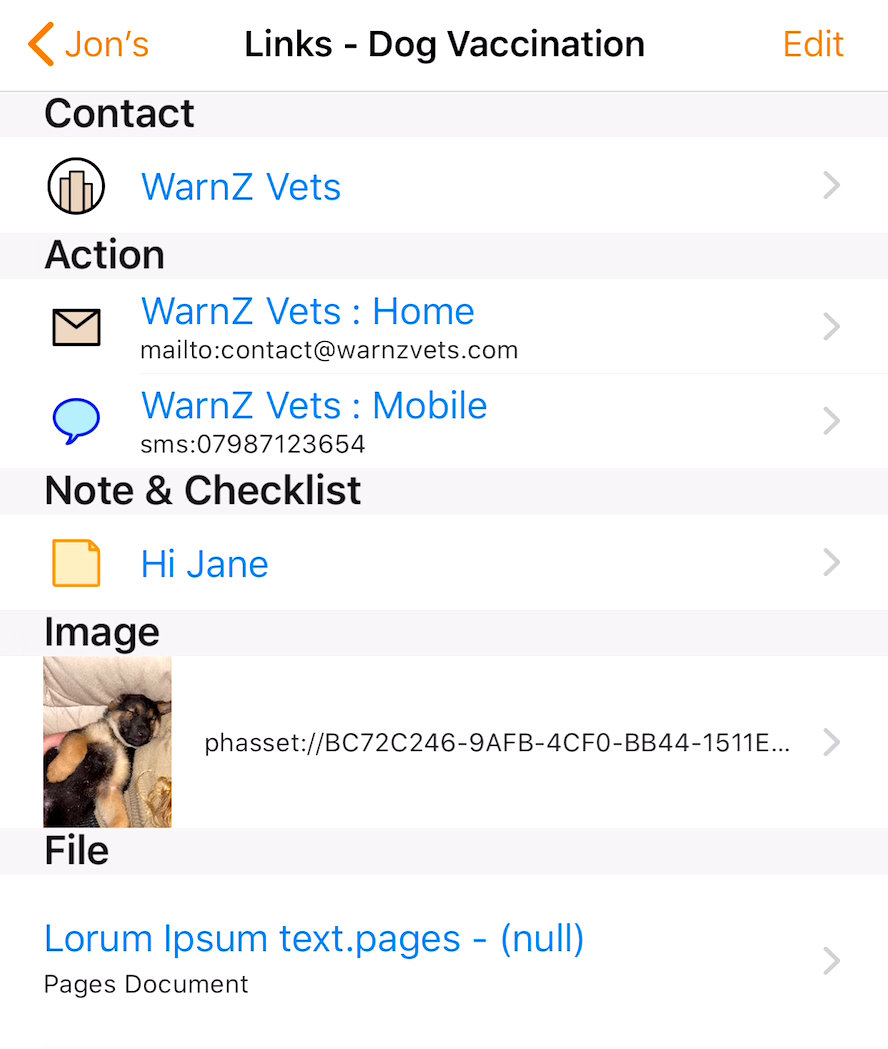
The 'View Links' page can be used to see in detail which links are attached to the WarnZ. This is useful when you have more than one link of the same type attached.
You can add as many link of each type as you wish to complete the task! (Paid version only).
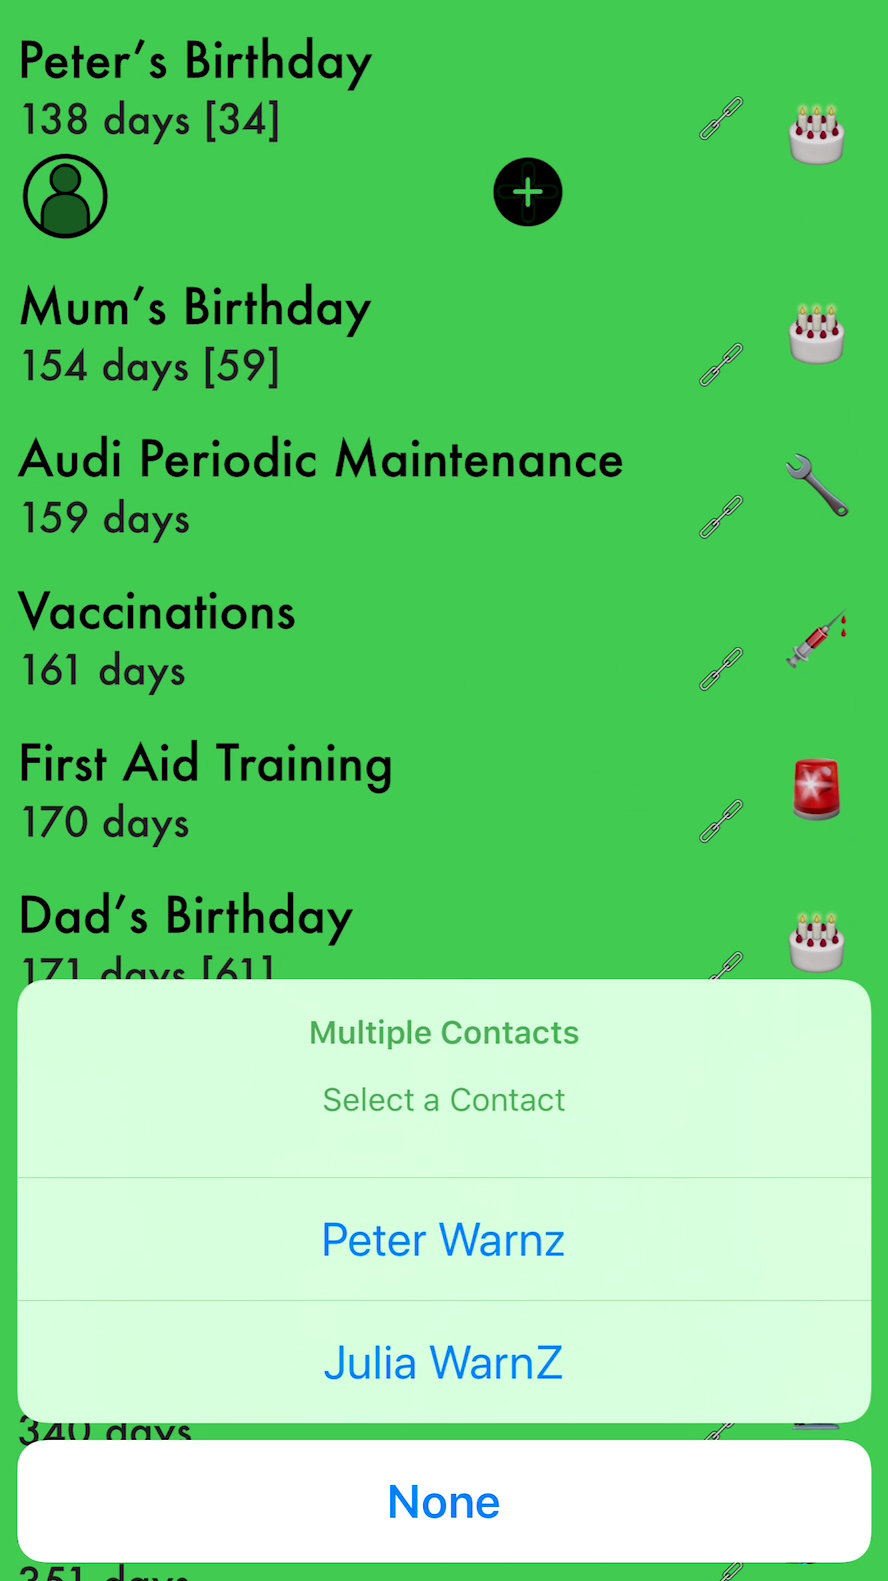
When accessing links by using the icons in 'Column View', if you have multiple links of the same type attached, you will be presented with a 'Chooser' so that you can selected the link you need.
You can have multiple WarnZ displaying their links in 'Column View'.
To hide the links swipe left and tap on the links icon.
Creating Links
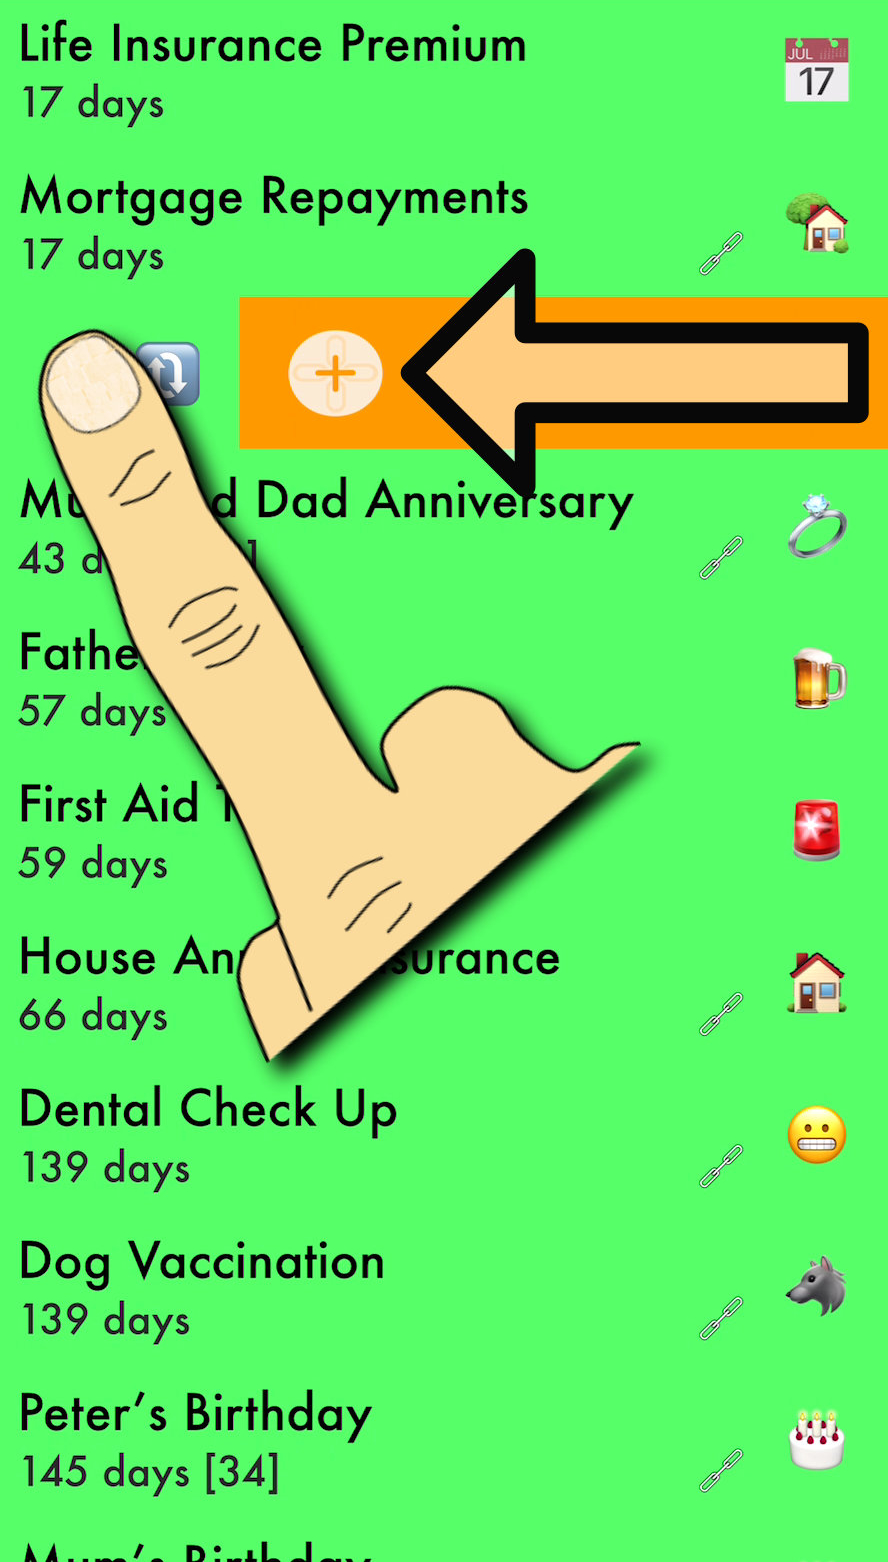
To create a link on WarnZ that has no links attached: Swipe left on a WarnZ on the 'Column View' page to reveal the 'Add Links' button and tap.
(Note: the add link button is coloured amber and shows a + if no links have been added to the WarnZ ).
If you have changed the order of the 'Archive' and 'Link' buttons in the settings(so that the 'Link' button is on the right) you can long swipe left to add a link.
Either action will open the 'Edit Links' page.
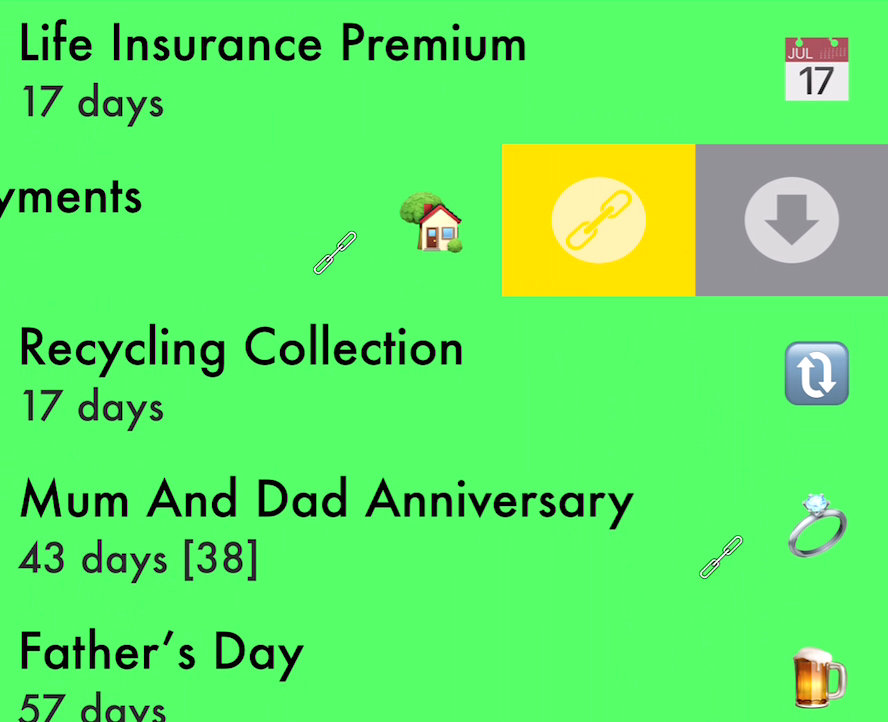
If the WarnZ already has a link attached (shown by the link icon to the left of the Emoji) swipe left and tap on the 'Links' button to reveal the links on the WarnZ.
(Note: The colour of the Links button is now yellow and shows a link icon to indicate the WarnZ has links attached).
If you have reversed the order of the buttons (in settings) you can long swipe left.
With the links revealed; then tap on the + icon to the right of the 'link' icons to open the 'Edit Links' page.
Alternatively: You can single tap the WarnZ to select it and then tap the link icon on the 'action' menu bar at the bottom of the screen.
This will display the link icons. To add a link tap on the +. This will take you to the 'Edit Links' page.
Further: Tap on the link icon (if the WarnZ already has a link attached).
Or you can (if you have a 3D touch enabled phone) 'peek and pop' on the WarnZ.
Either action will open the 'View Links' page.
On the 'View Links' page to access the 'Edit Links' page: tap on the 'Edit'.
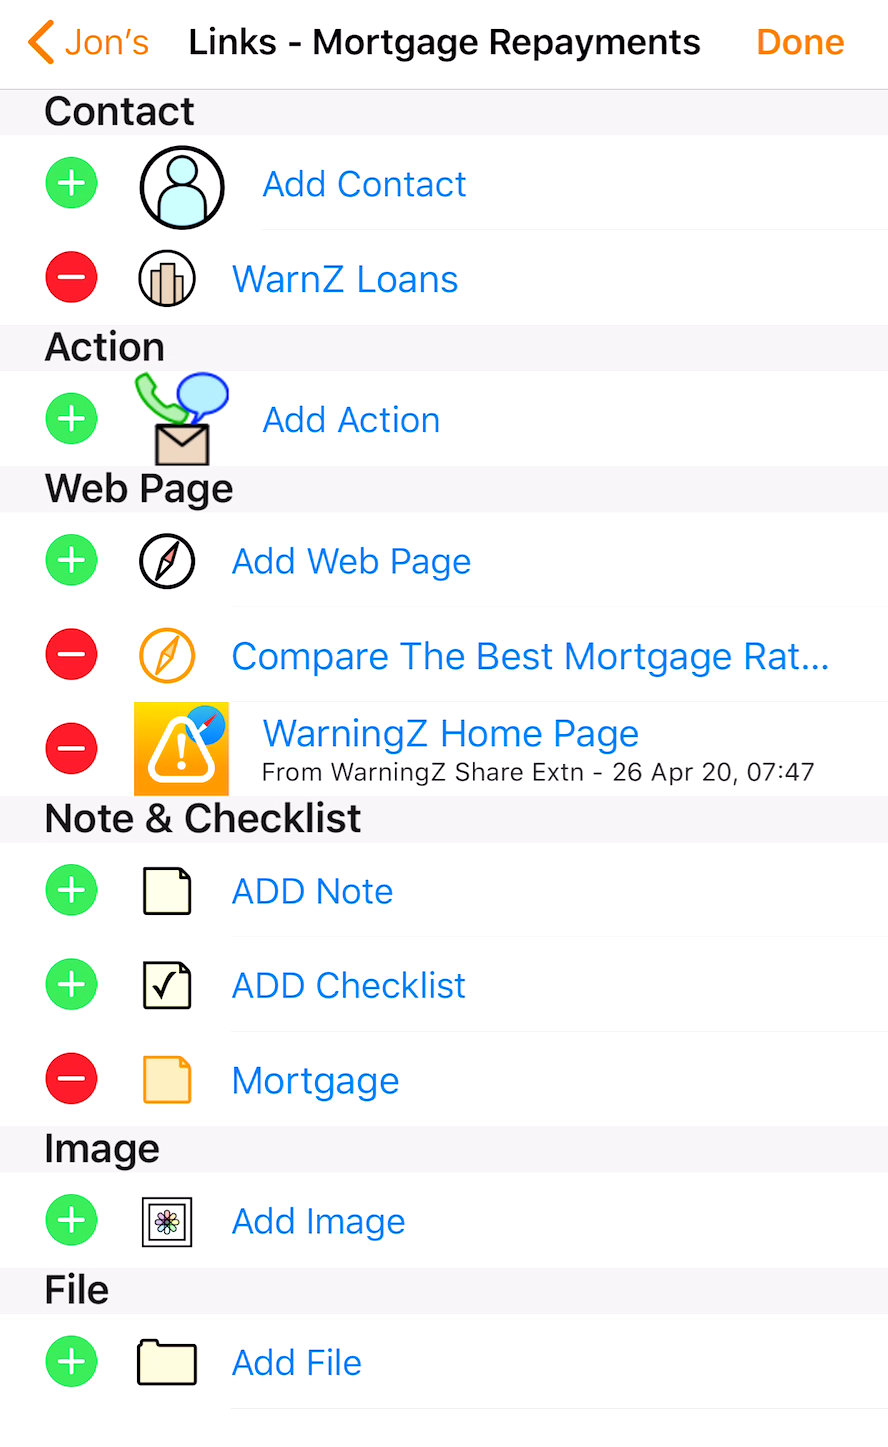
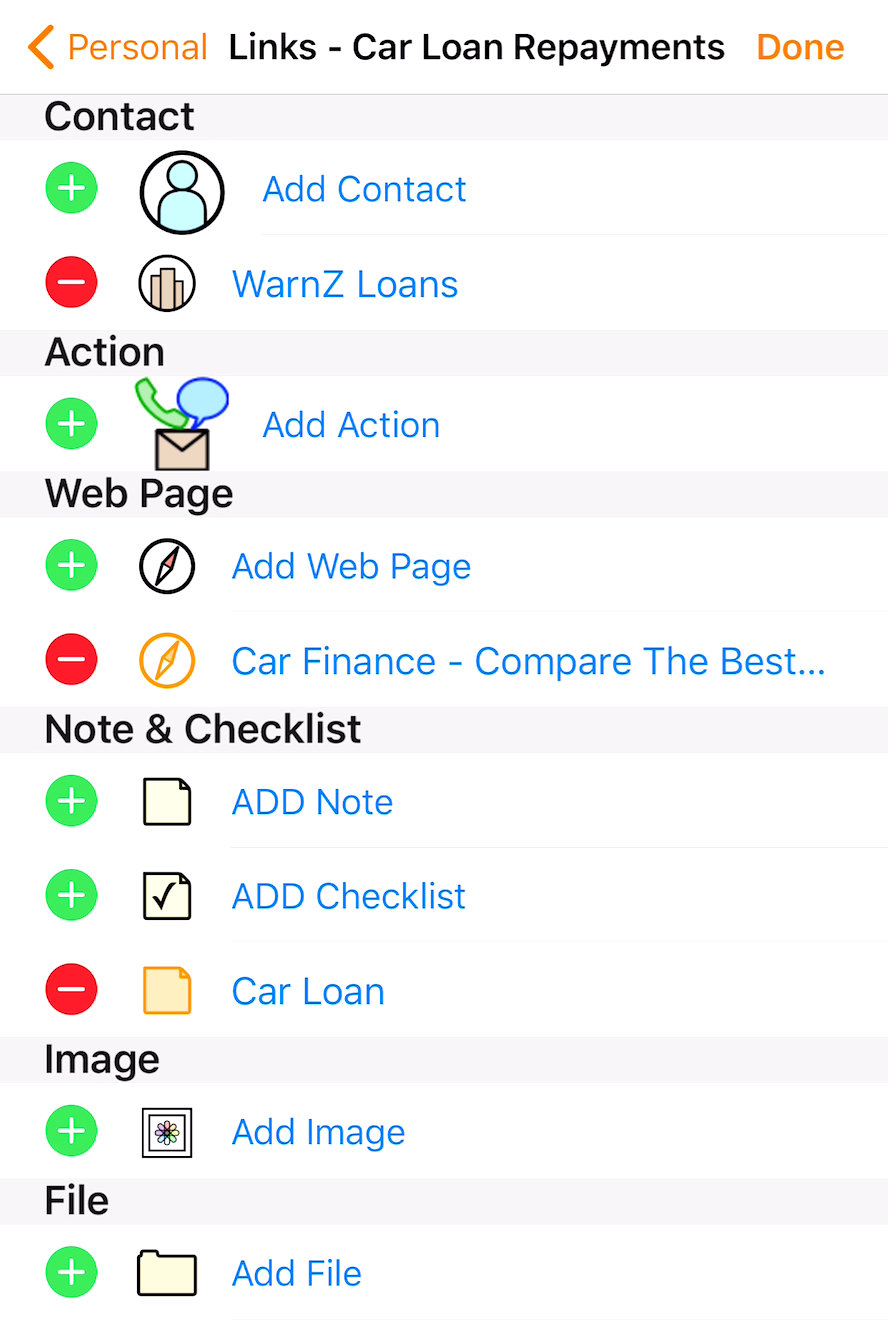
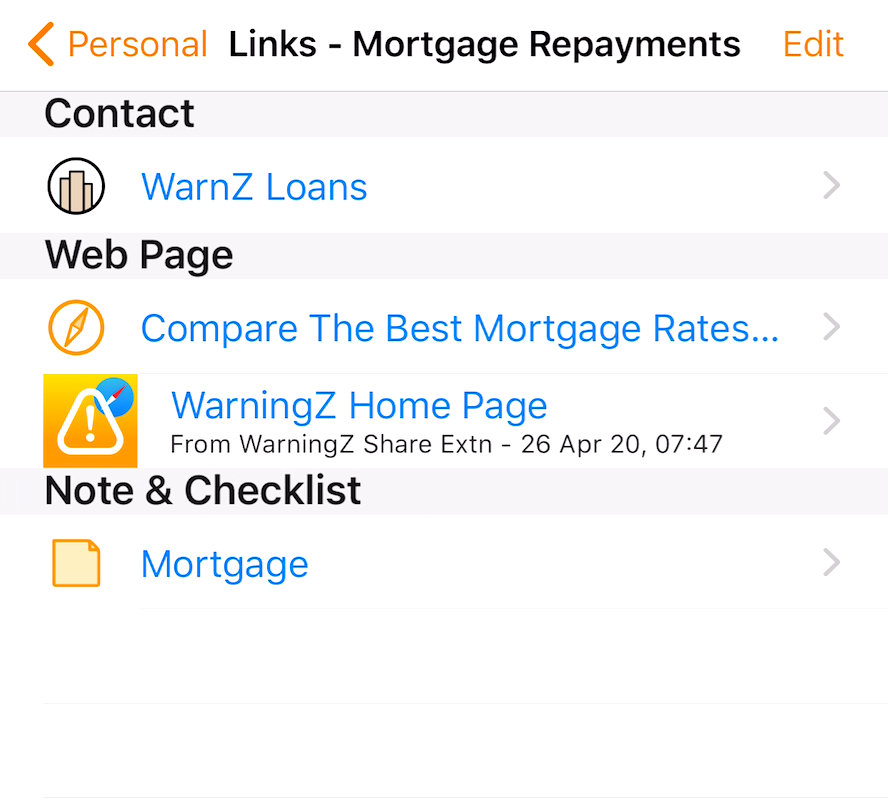
The 'Edit Links' page with 2 web links attached.
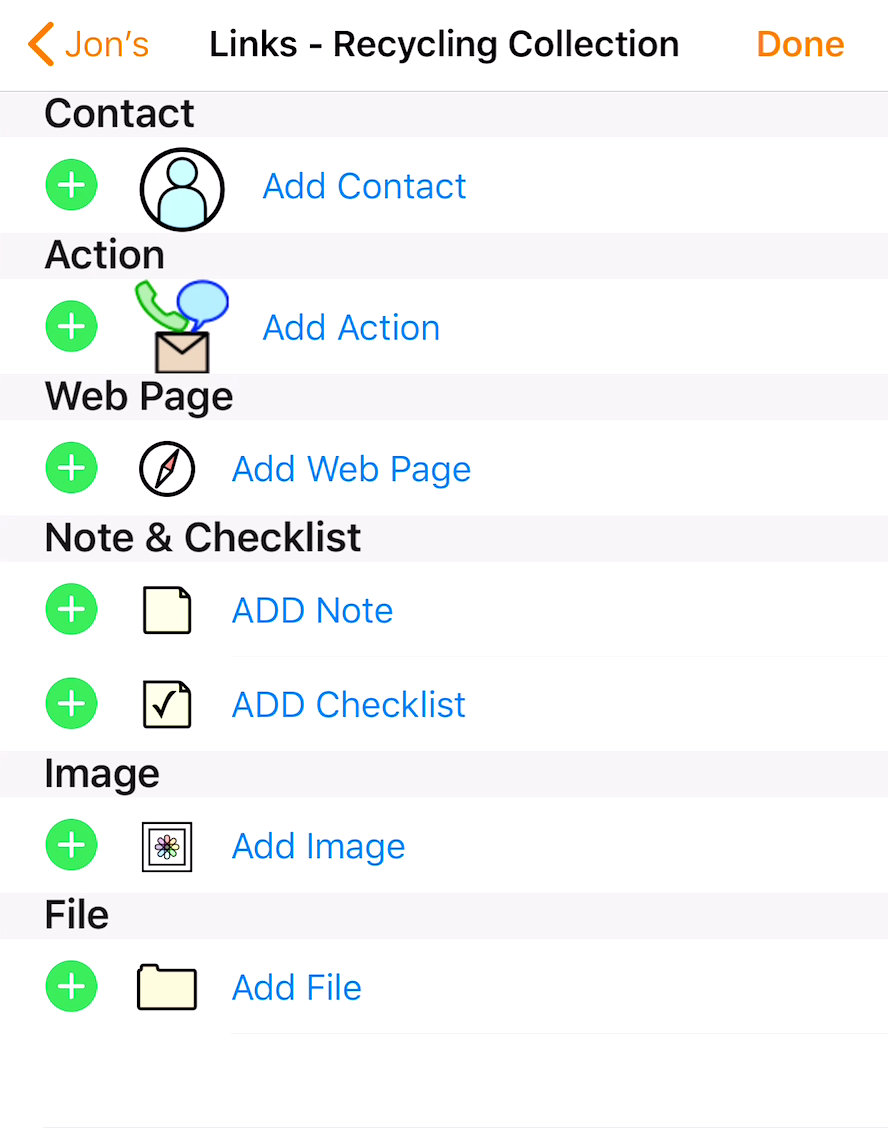
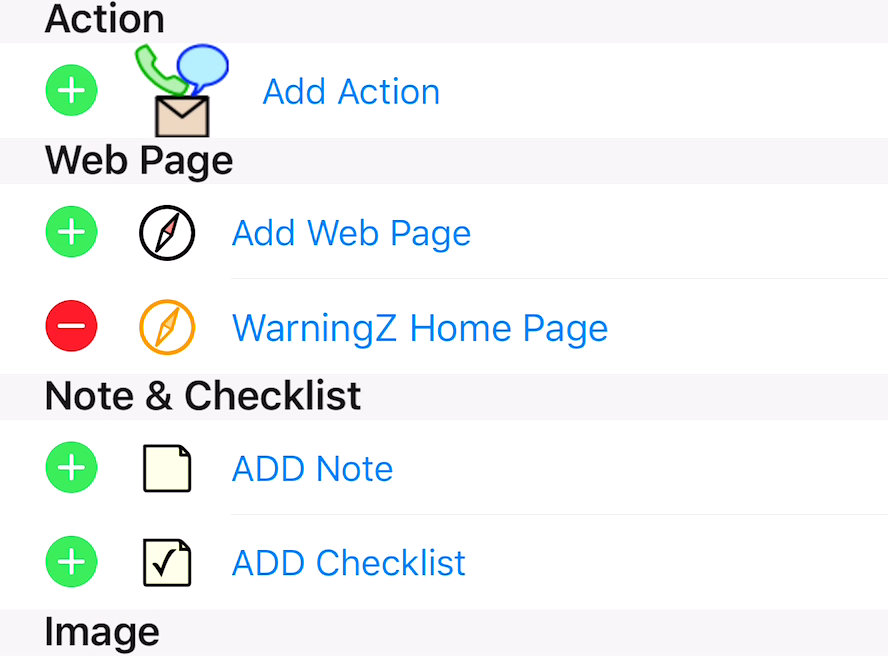
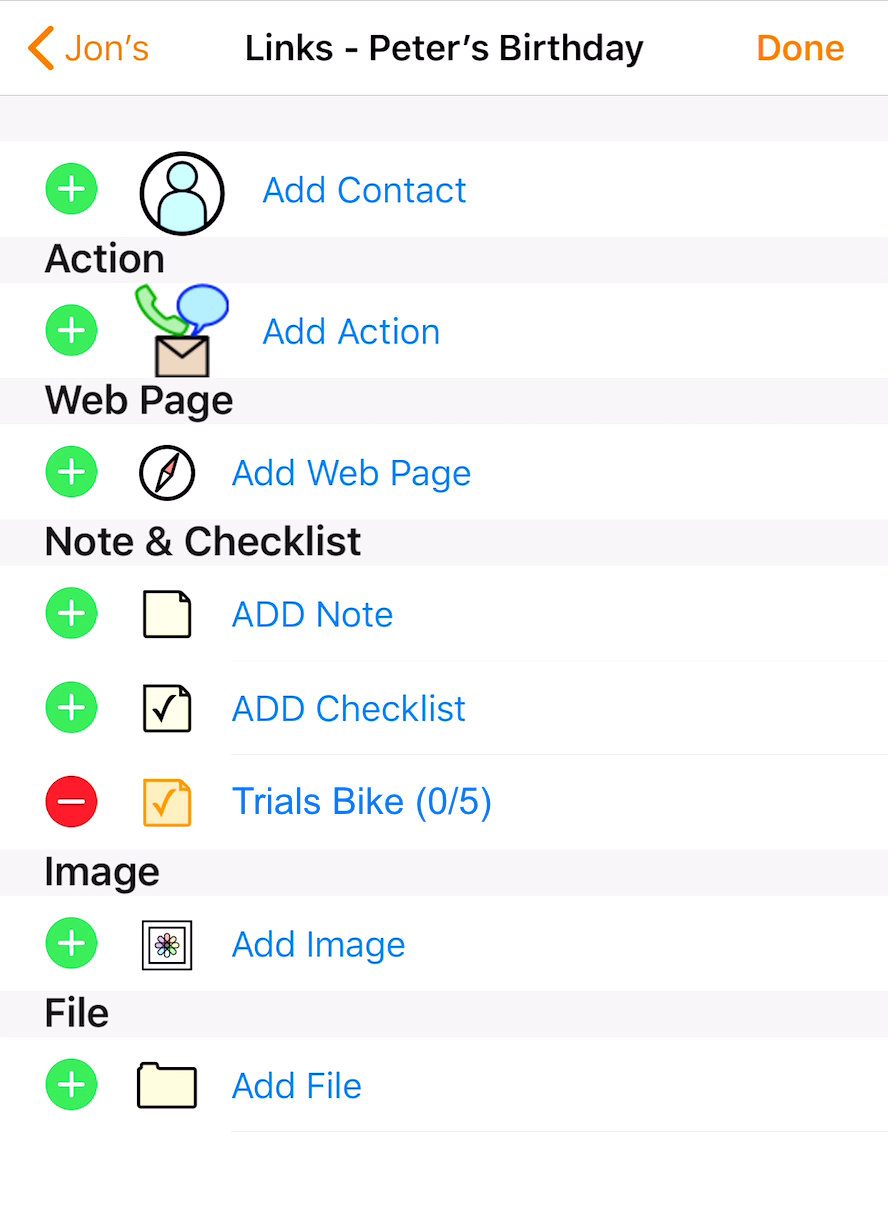
To add a link tap on the green + icon next to the link you wish to create.
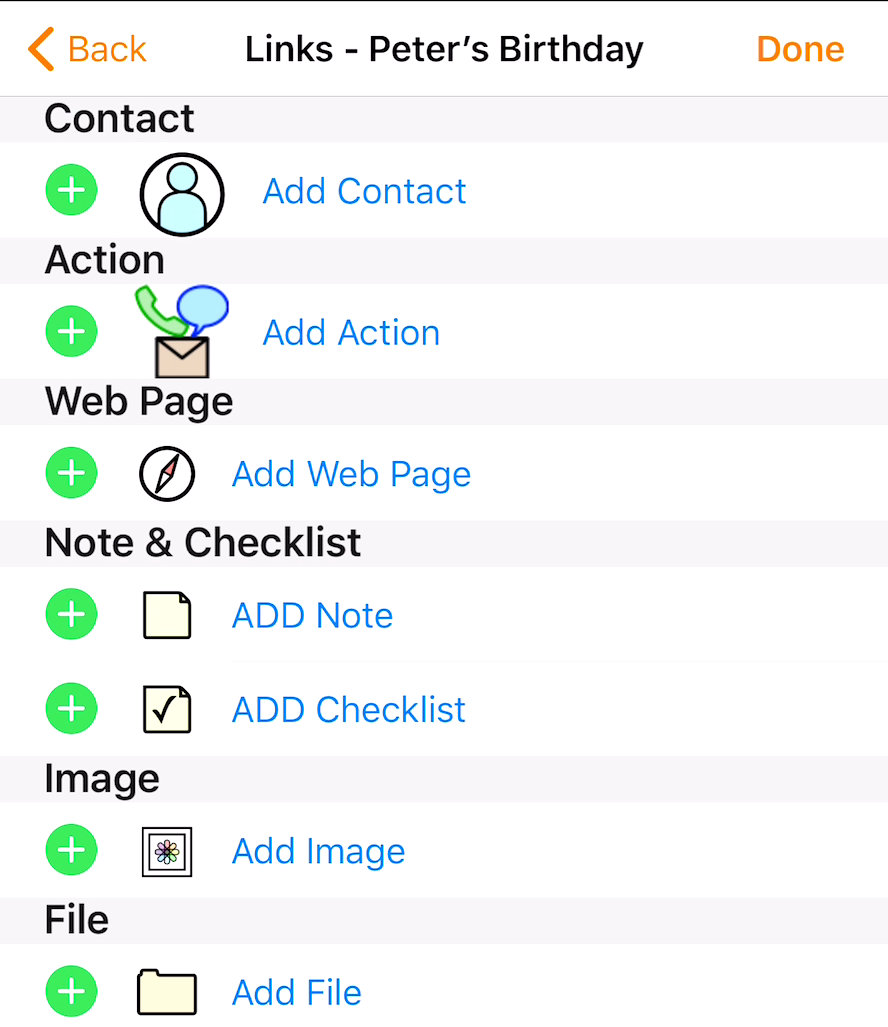
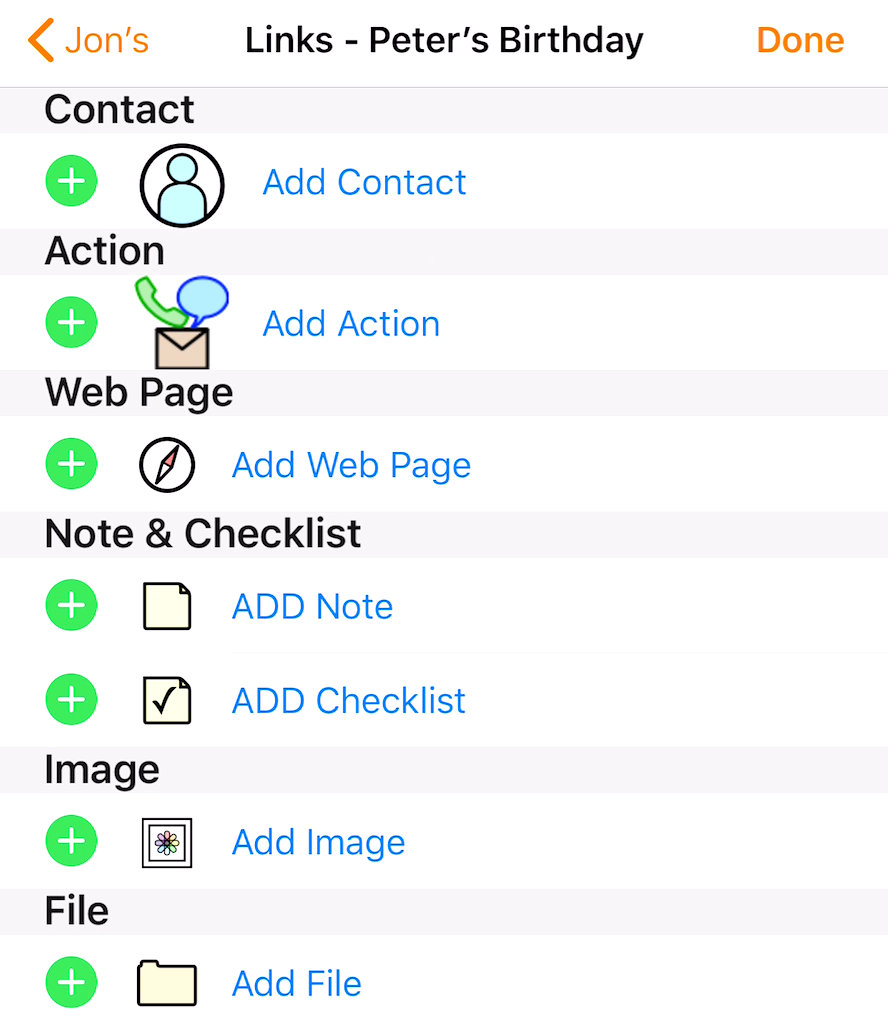
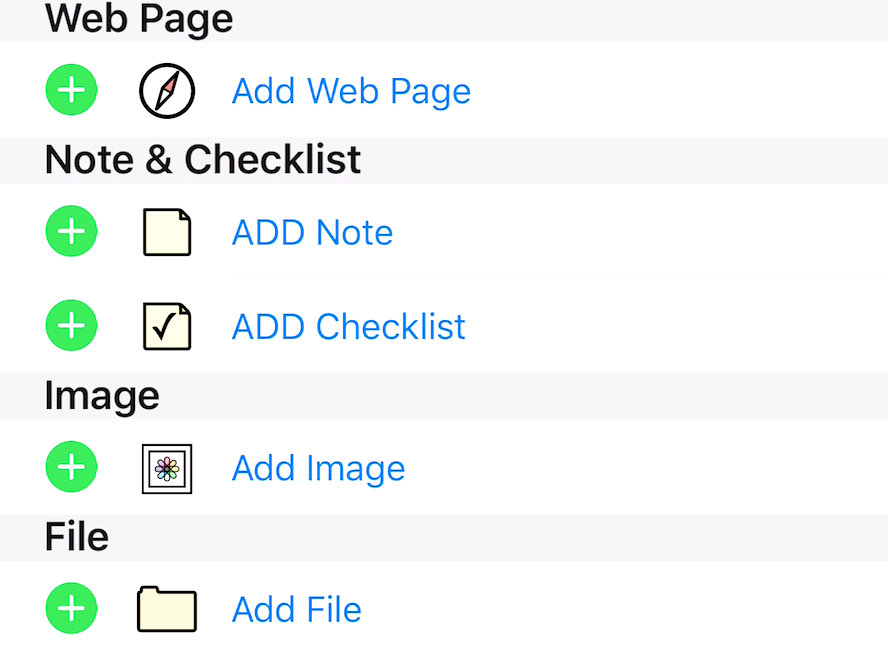
You can add multiple links to:
Contacts
Actions (Phone, Message, Email)
Web pages
Notes
Checklists
Images
Files
Each type of link is covered later in this tutorial.
Once you have added your links tap ‘Done’ to return to the 'View Links' page.
Tapping '<back' or '<column name' (where 'column name' is the title of the 'Column View' page) will return you to the 'Column View'.
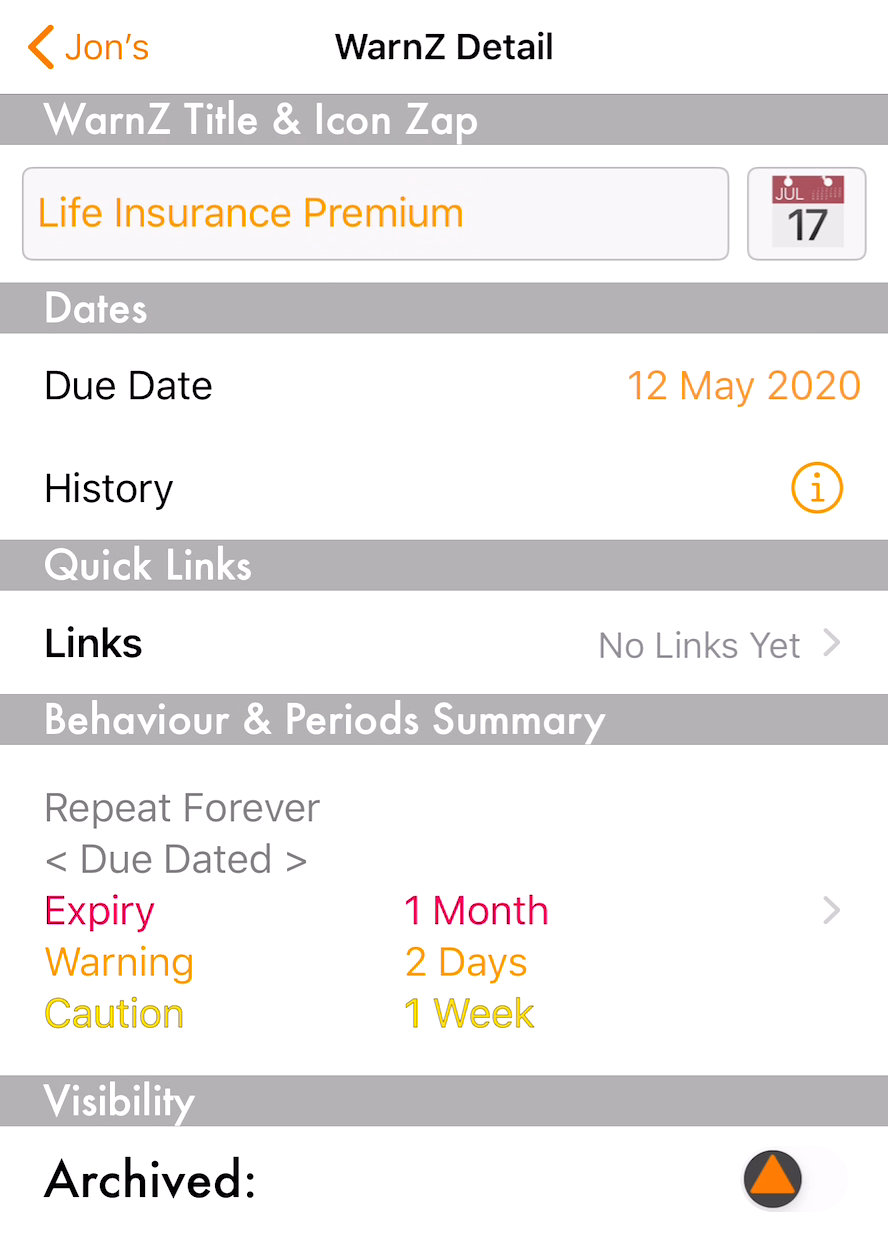
There is one final way to add links and this is via the 'WarnZ Details' page. This method would normally only be used when you first create the WarnZ. Generally it is easier to use the methods detailed earlier in this section.
You can find out more about the WarnZ Details page in the 'The WarnZ Details Page' tutorial.
In the 'Quick Links' section tap on the 'No Links Yet >' to open the 'Edit Links' page.
If links have already been added the 'Quick Links' section will show how many links and tapping on the (for example) '6 Links >' will open the 'View Links' page.
To open the 'WarnZ Details' page double tap on the WarnZ.
Or single tap on the WarnZ to select it. Then tap on the 'Warning Triangle' on the 'Action Bar' at the bottom to open the 'WarnZ Details' page.
Deleting Links
To delete an unwanted link navigate to the 'Edit Links' page as shown in the previous section. To delete a link tap on the red - (minus) sign next to the link.
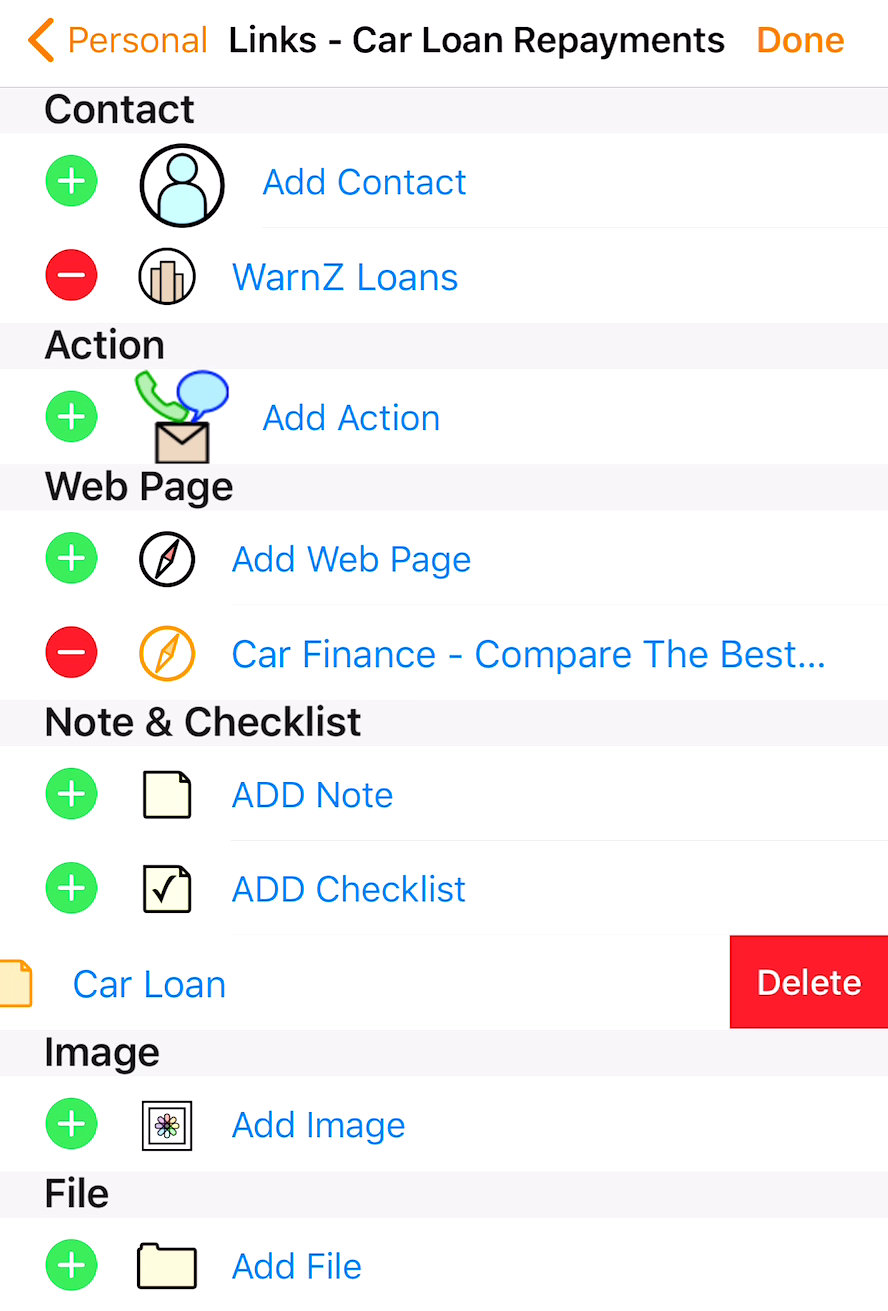
This will display a 'Delete Button'. Tap the 'Delete' to complete the deletion of the link.
Sharing Links to WarningZ

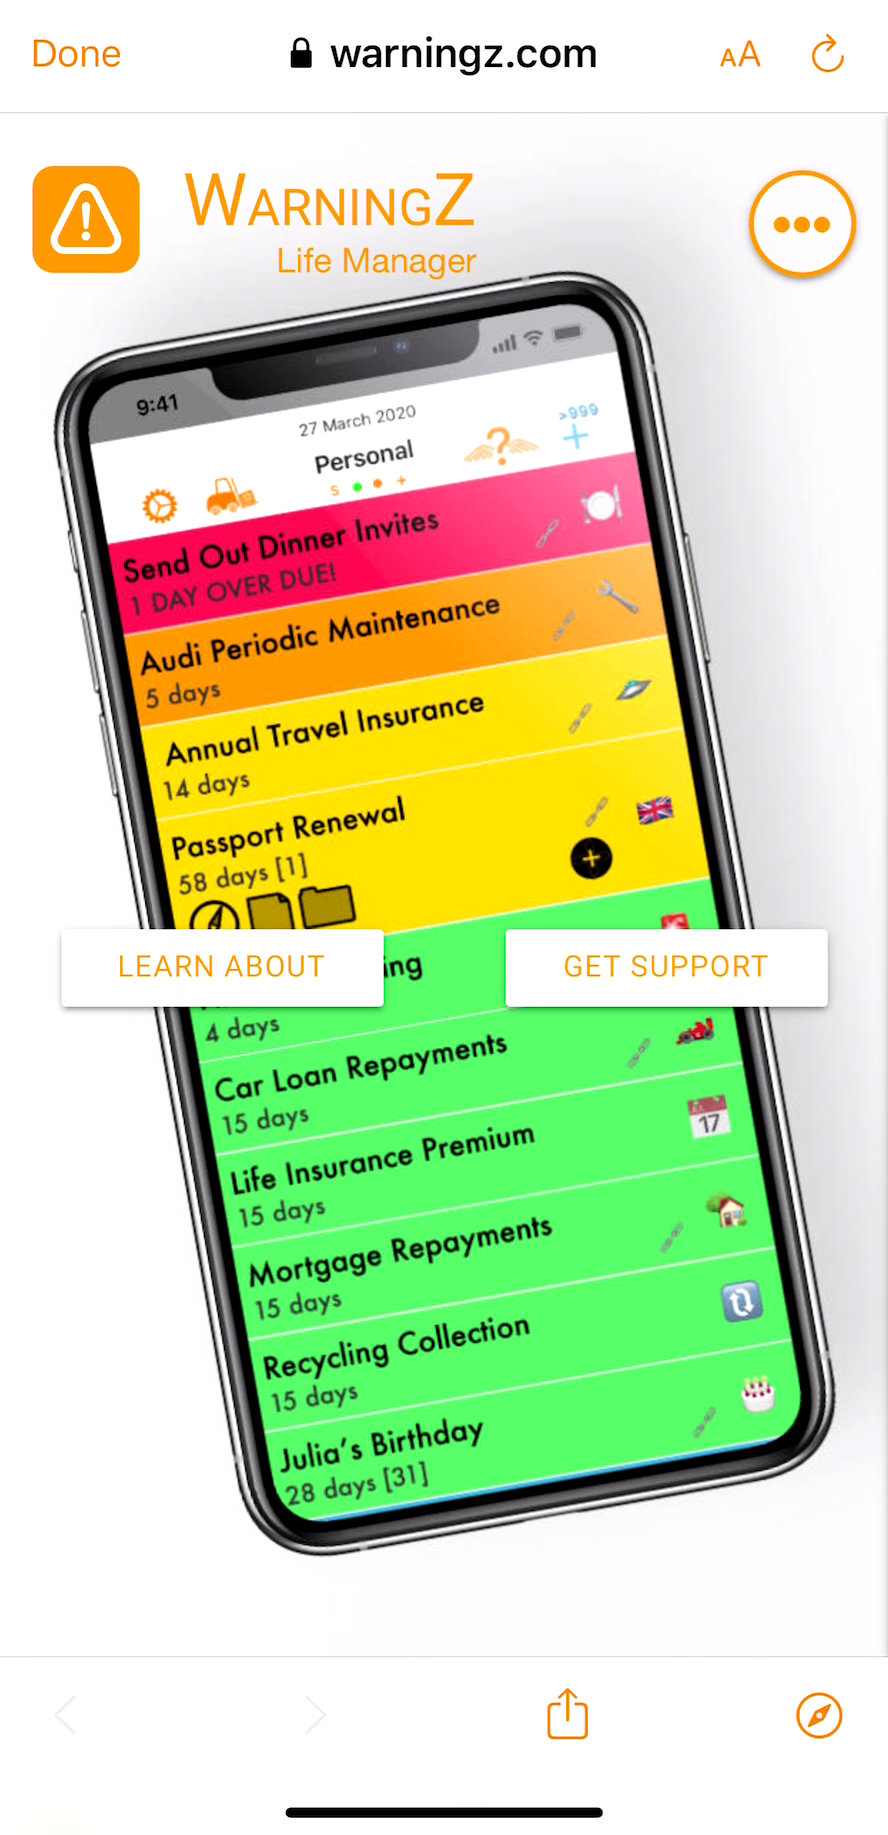
WarningZ and iOS provide a clever sharing function. All iOS apps and most third party Apps allow you to 'share to' WarningZ. This means when you find any useful information (webpages, contacts, files, pictures etc.) you can share the item to WarningZ, adding it as link on a WarnZ without having to open the WarningZ App itself.
For example: If you have found a something on Amazon that would make a great present for someone. Share it to WarningZ and add it to the WarnZ that notifies you of their approaching Birthday. Then get notified in time to buy it and post it in time for their birthday.
Or: Working on a new file for a project that but you don't have all the information to complete it. Share it to WarningZ and attach it as link to the WarnZ that notifies you of the approaching deadline for the project. Then get notified in time to complete the work before the deadline.
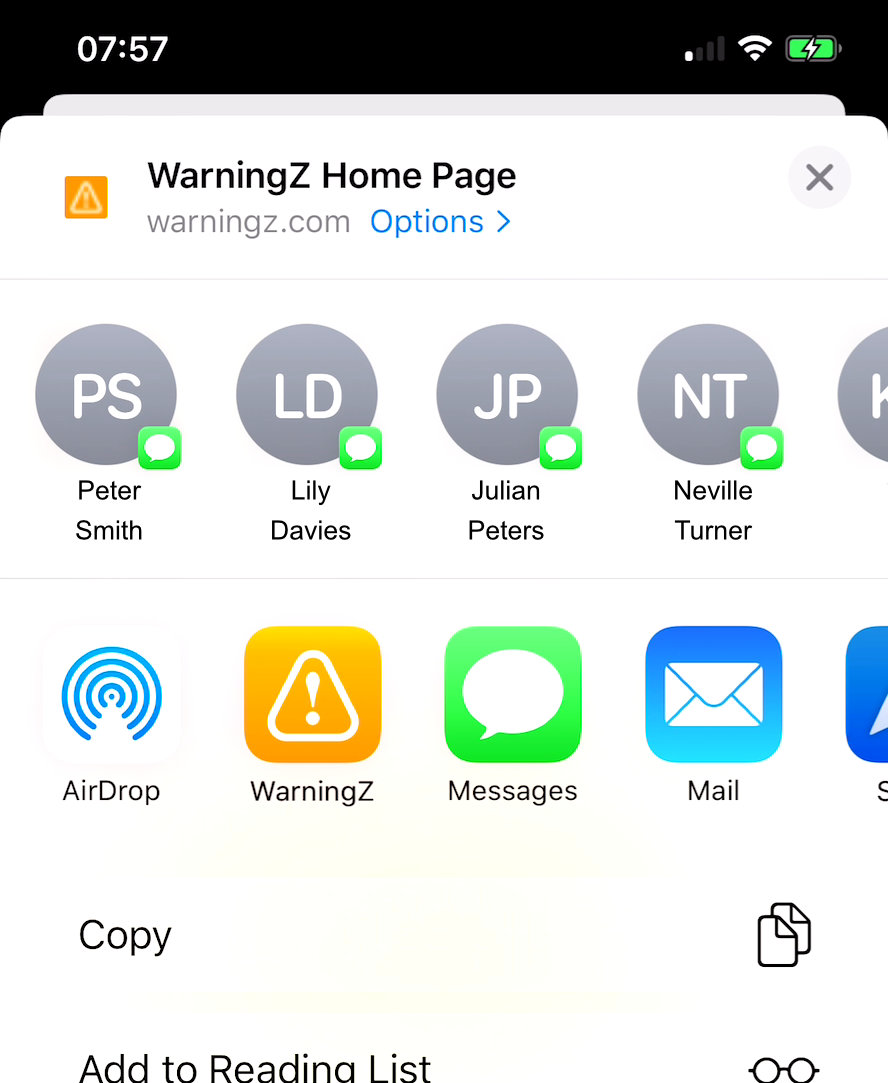
To share to WarningZ look for the share icon. It is normally on the navigation / action bar at bottom of the screen...but not always. Tap to start sharing to WarningZ.
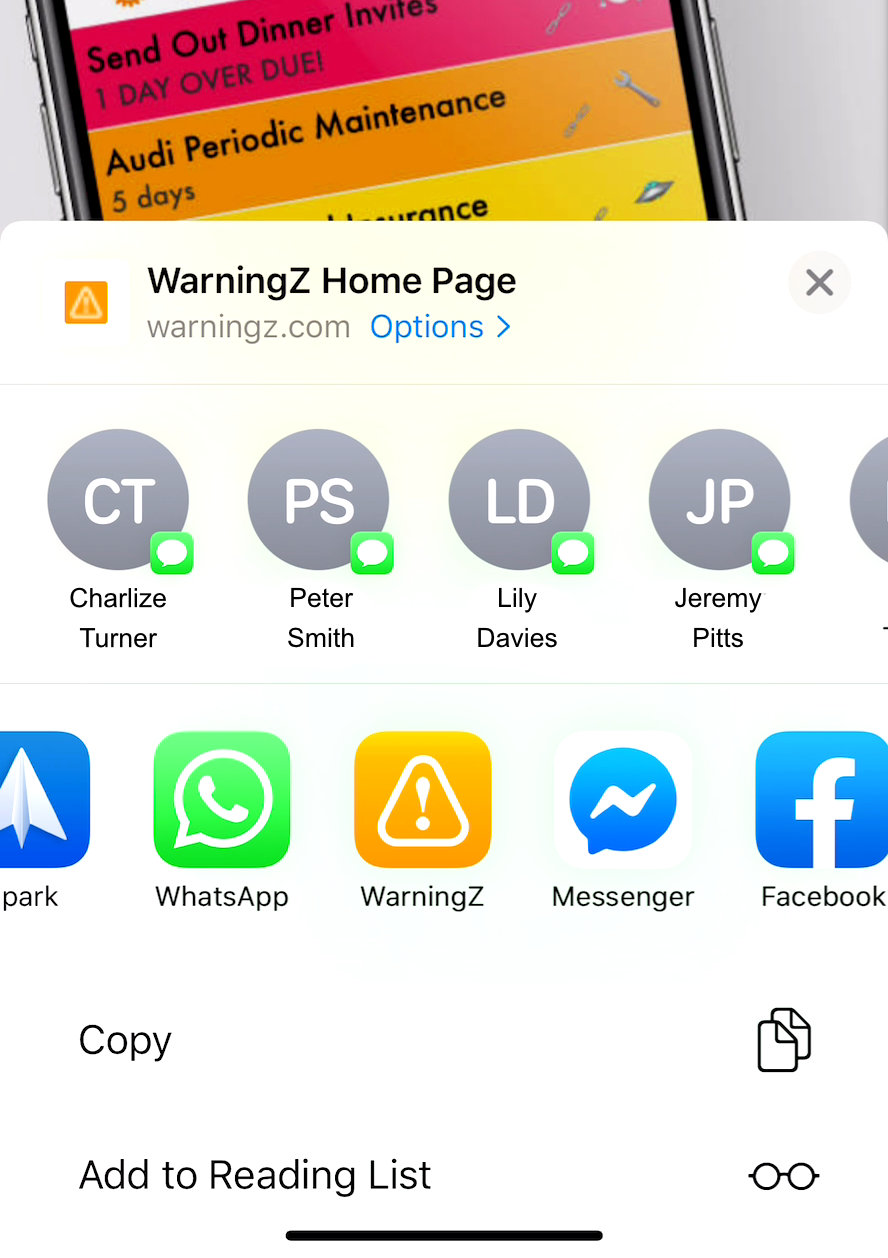
This will open the 'Share Menu'. Look for the WarningZ icon amongst the App icons. You may have to swipe left to find it. (If it is not shown tap here to find out how to add it). Tap to the WarningZ icon to share to WarningZ.
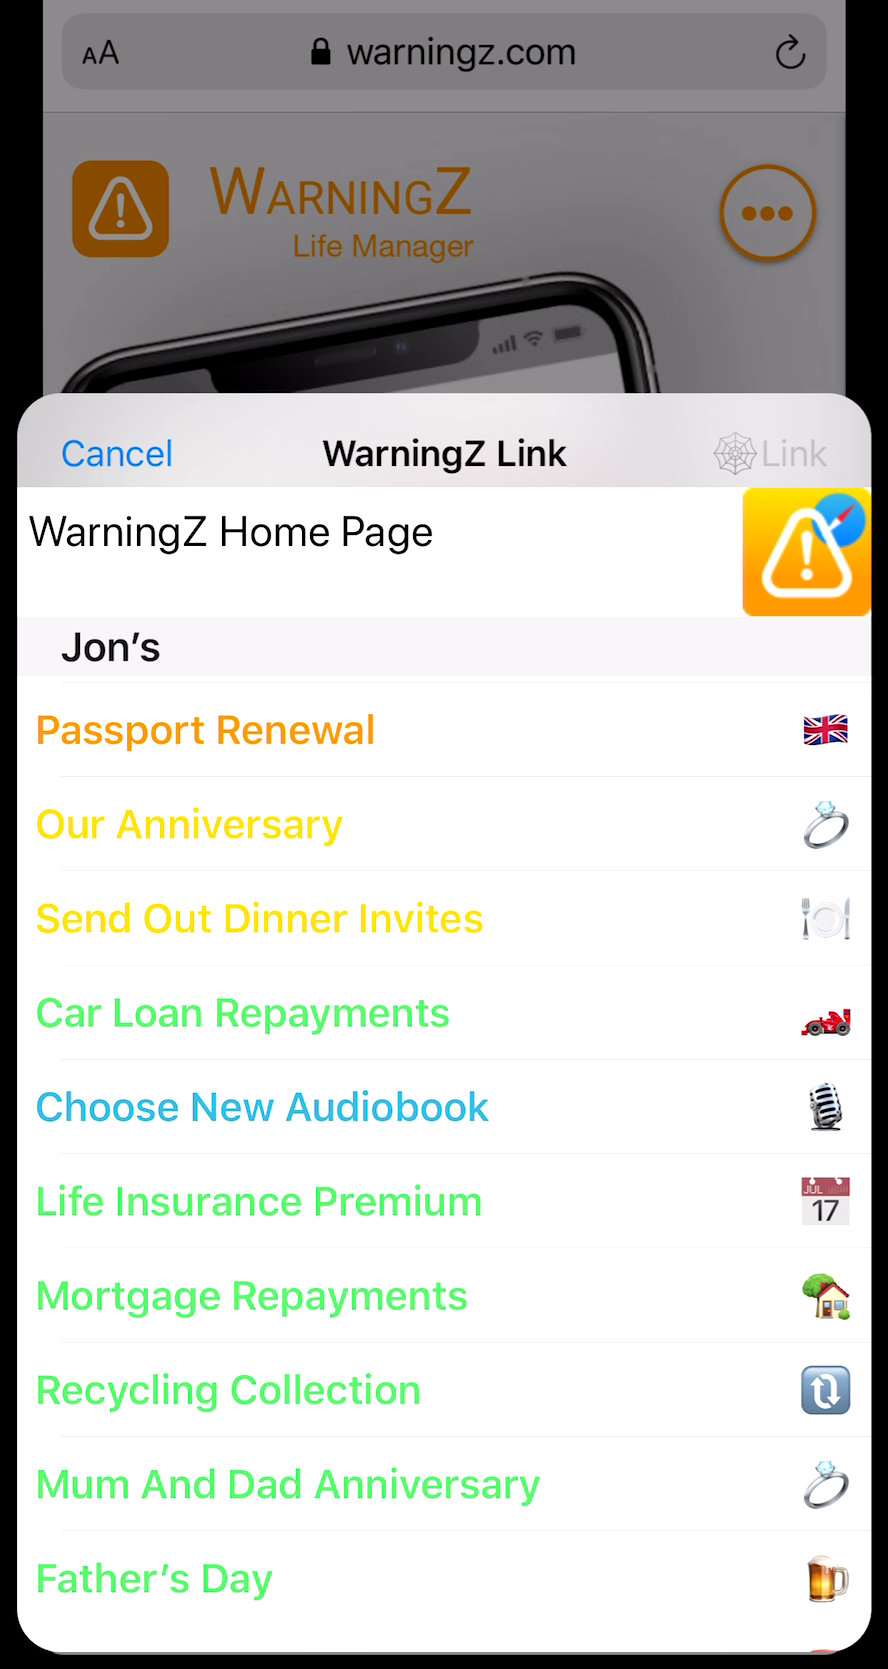
The WarningZ Link page will open showing the WarnZ in the same priority order that they are shown in the WarningZ Column.
Depending on the link you may have to 'Name' the link. In this example: WarningZ has used the Web Page Title to name the link for you.
If you have multiple columns of WarnZ then scrolling down the list will bring up the next column.

Tap to select the WarnZ to which you wish to attach the link. When selected the WarnZ will have a grey background and the 'Link' text at the top right becomes active! Tap 'Link' to attach the item to the WarnZ.
Note: The text for this operation states 'Link'. This is to attach a web page. Sharing other items may have different text. For instance; attaching an image or photo will say 'Add Image'.
The link has been added to the the selected WarnZ. This is how it is displayed on the WarnZ Links List page when you launch WarningZ. It will include the information that the link was shared to the WarnZ (rather than added from within WarningZ) and the date it was added.

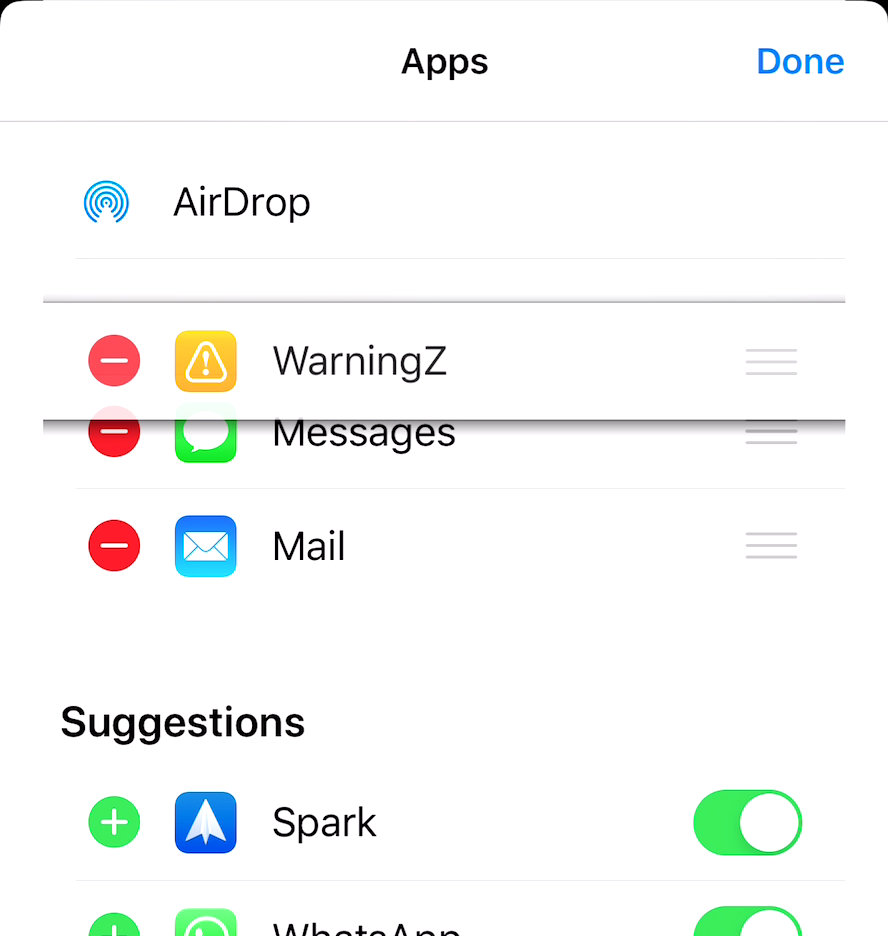
If, having tapped the share icon, the WarningZ icon is not visible amongst the other App icons: Swipe left until you find the 'More' icon (arrowed). Tap.
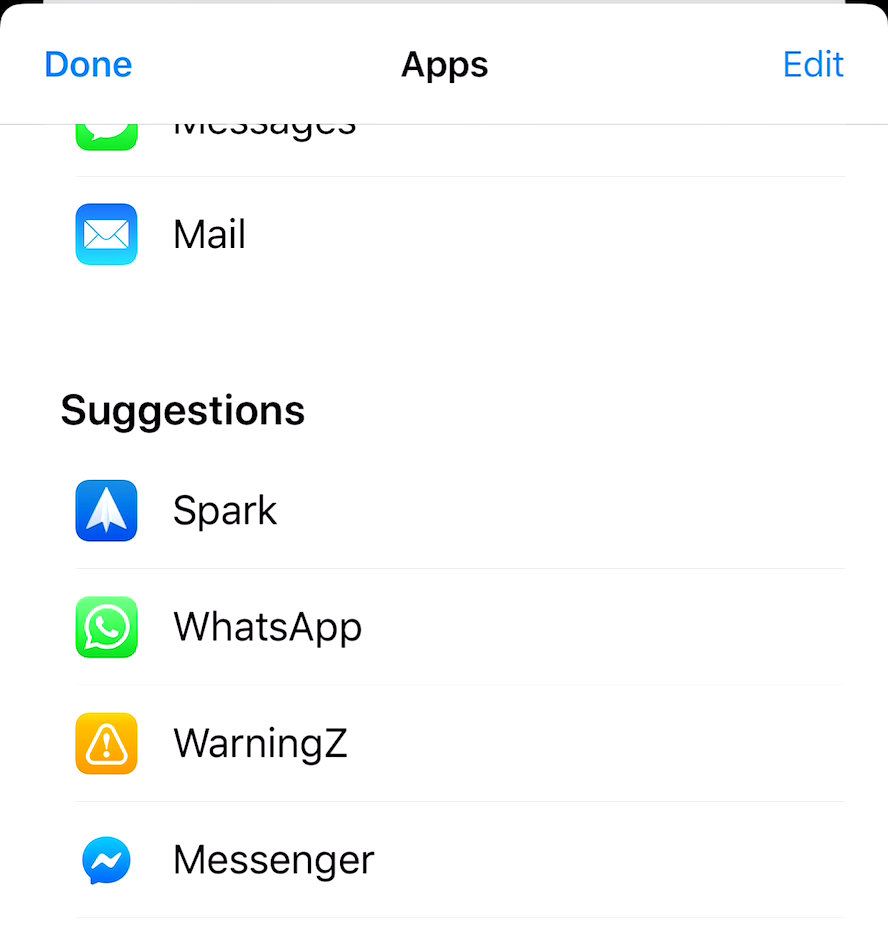
The WarningZ icon will be shown under the App 'Suggestions'. Tap 'Edit' on the top right of the page.

To add WarningZ to the share list select the 'switch on'.
If you would like Warning to a be a 'Favourite' sharing action. Tap the green + to add WarningZ to the 'Favourites section'.
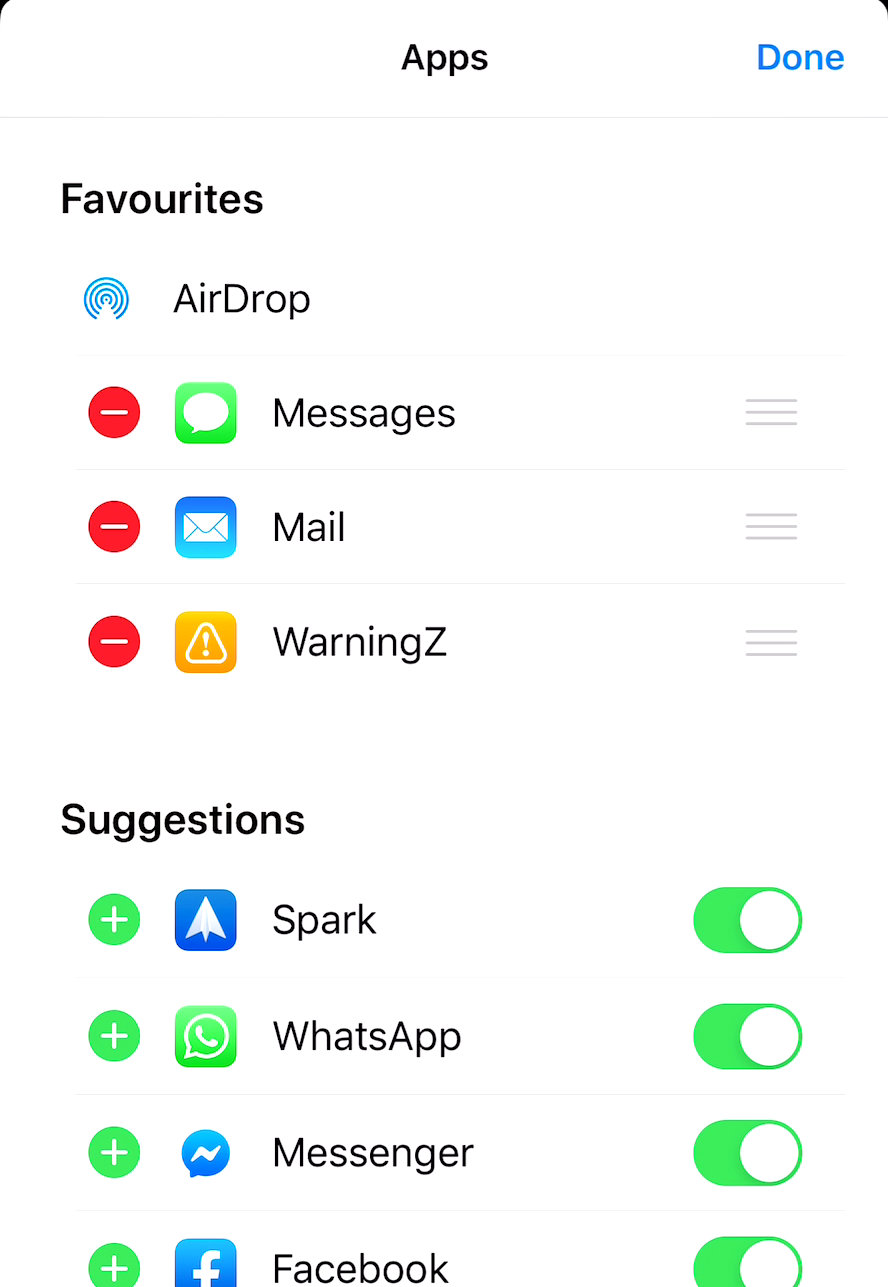
WarningZ is added to the Favourites section.
You can re-order the items in the 'Favourites' section. Tap and hold the 3 parallel lines on the right to 'drag' the position of the WarningZ icon. Release to drop.
The WarningZ share icon is now set so that it is immediately available on tapping the share icon.
Back to Sharing to WarningZ.
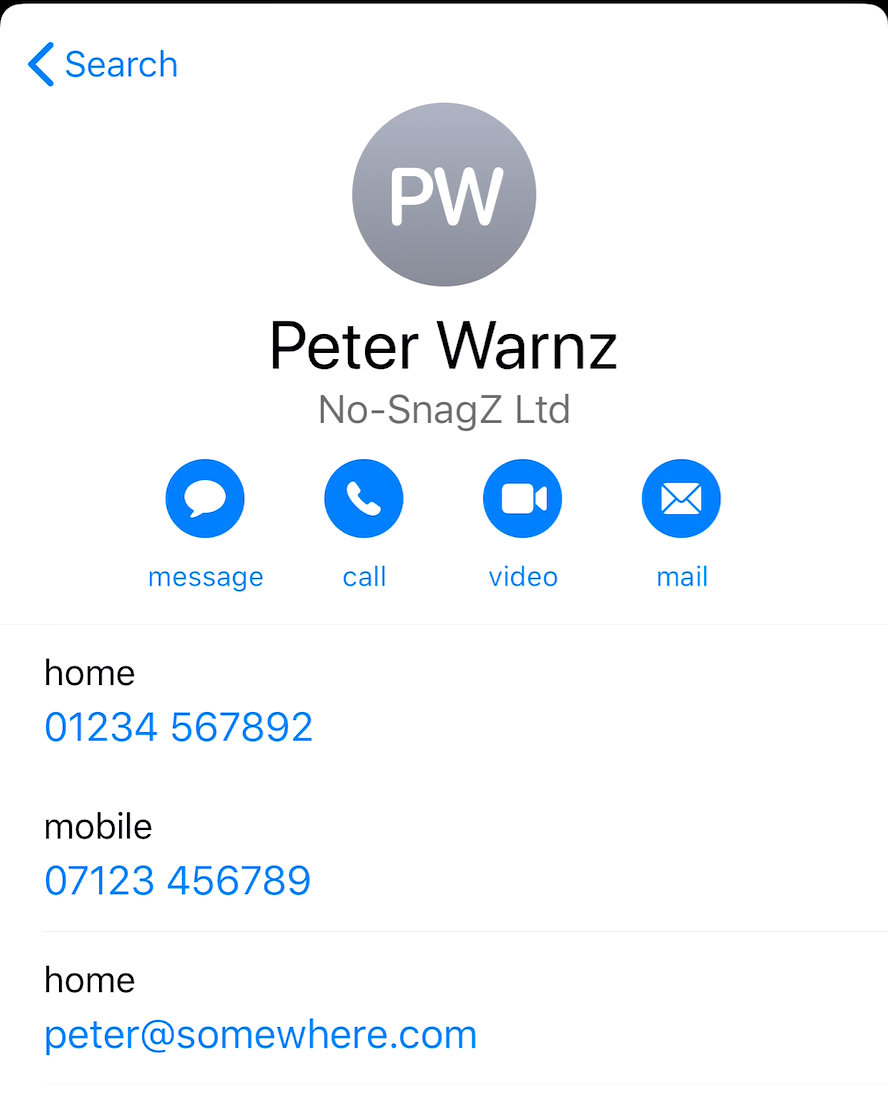
Contacts
To add a contact to a WarnZ (on the 'Edit Links' Page) tap on the green + icon to open your device’s Contacts list.
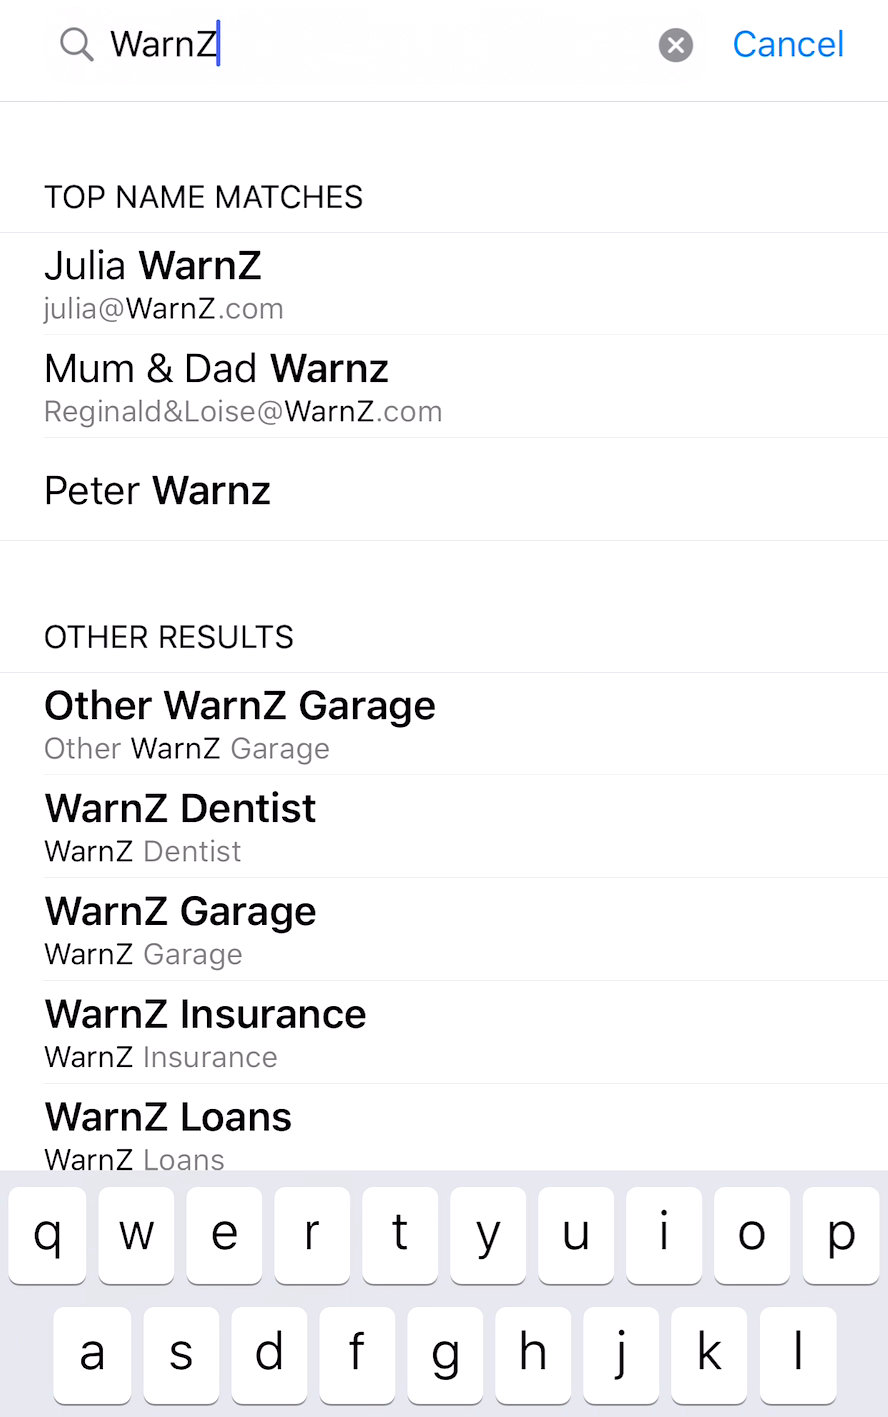
Scroll to or use the contact search to find the contact to be added.
Tap on the contact to add it to the WarnZ.
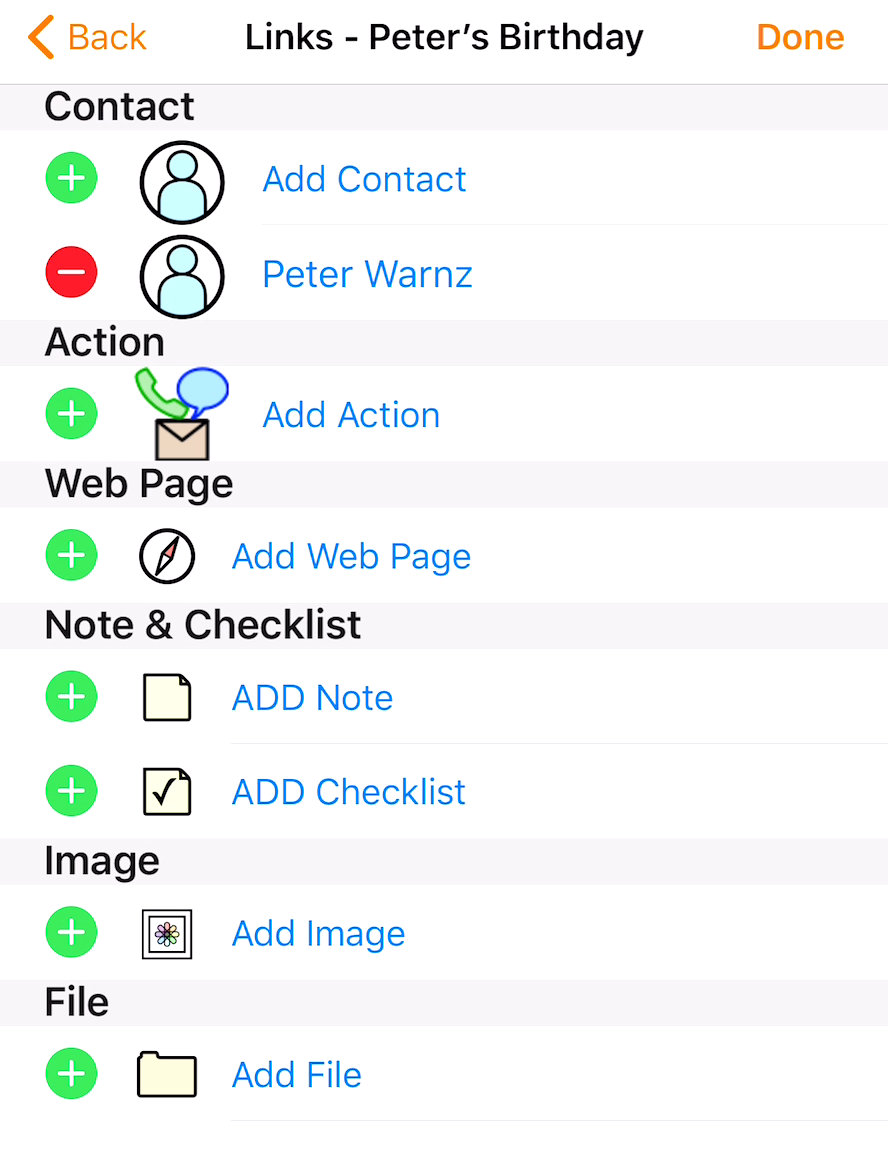
The contact is added on the Links Edit page.
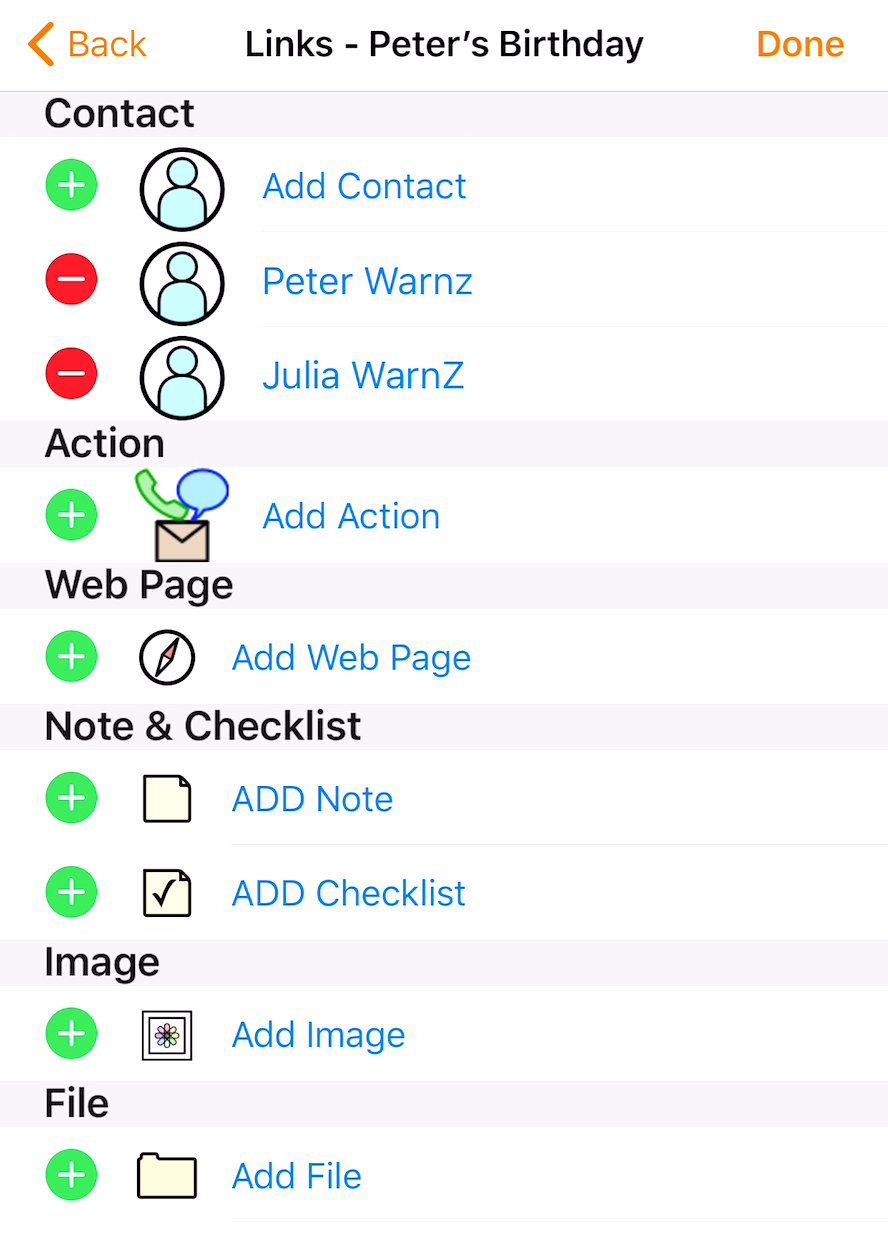
You can add multiple contacts to any WarnZ.
To return to the 'View Links' page and use the links tap 'Done'
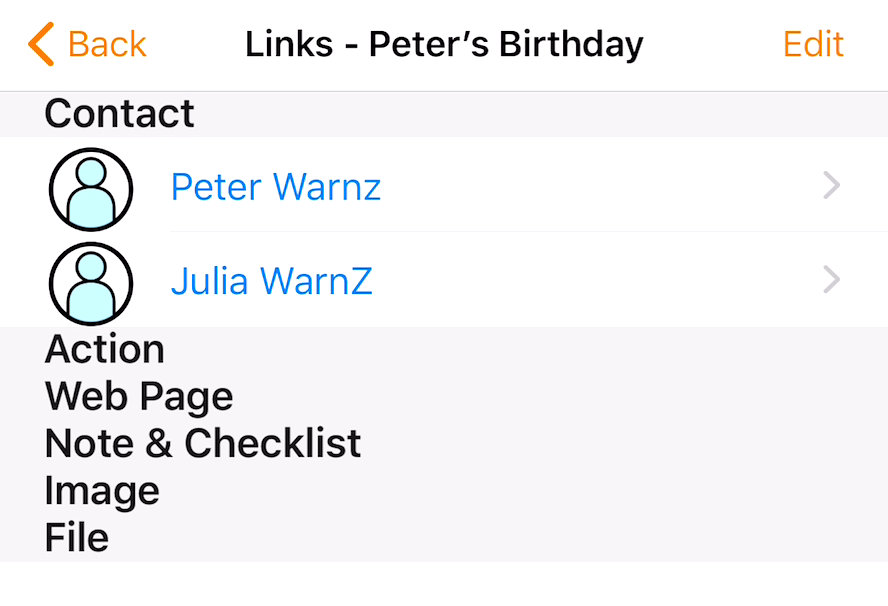
On the 'View Links' page: tap on your chosen contact to open their contact card.
You can access the links on the WarnZ (in the 'Column View') as icons by using the swipe actions (see the 'Using Links' section of this tutorial).
With multiple contacts added when you tap on the ‘Contact’ link icon on the WarnZ you will be presented with a ‘chooser’ to select which contact you wish to access.
Actions
To add an ‘Action’ to a WarnZ tap on the green + icon to the left of the ‘Add Action’ icon.
Actions are added from your Contacts app. You cannot add an action number manually. It is important that each item in your Contacts has the correct label as WarningZ uses the label to correctly assign an action. For instance: mobile numbers must either be labelled as 'iPhone' or 'Mobile' (not 'Work', 'Main' or 'Other') for WarningZ to add messaging action links.
Choose a contact from the contact list; then select either a landline number, a mobile number or a email address from that contact’s details.
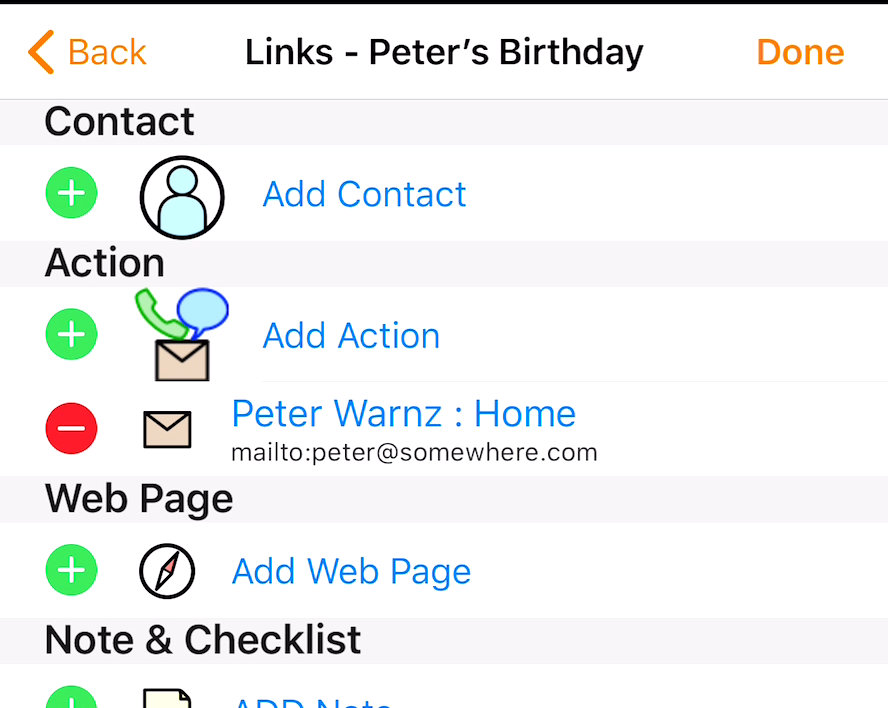
If you select the email address then it is is added to the 'Edit Links' page.
The email link creates a ‘Smart Action’ link if other links are added to the WarnZ.
Smart Action Links are covered later in this tutorial.
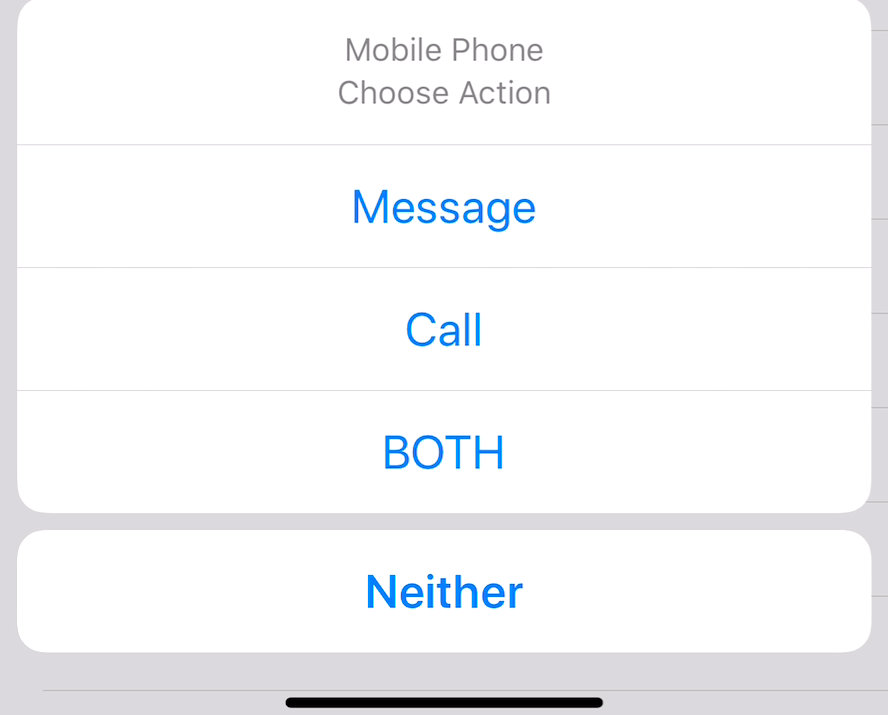
If you select a mobile phone number you will be shown a ‘chooser’ to select whether to create a Message action link, a Call mobile number link or both links.
‘Neither’ cancels the add Action link.
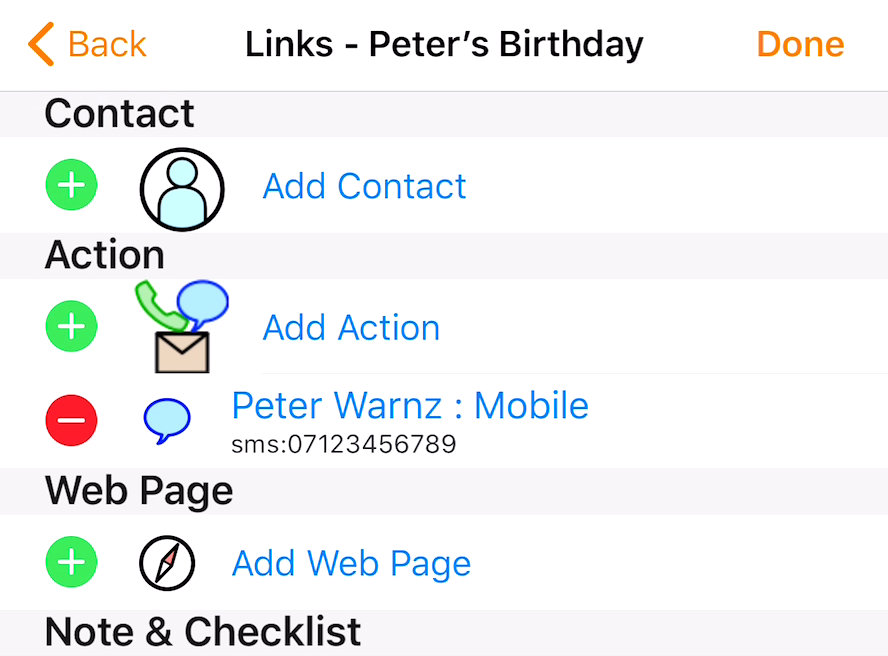
If you choose ‘Message’ a Message action link is added. The Message icon shows that this action creates a Message.
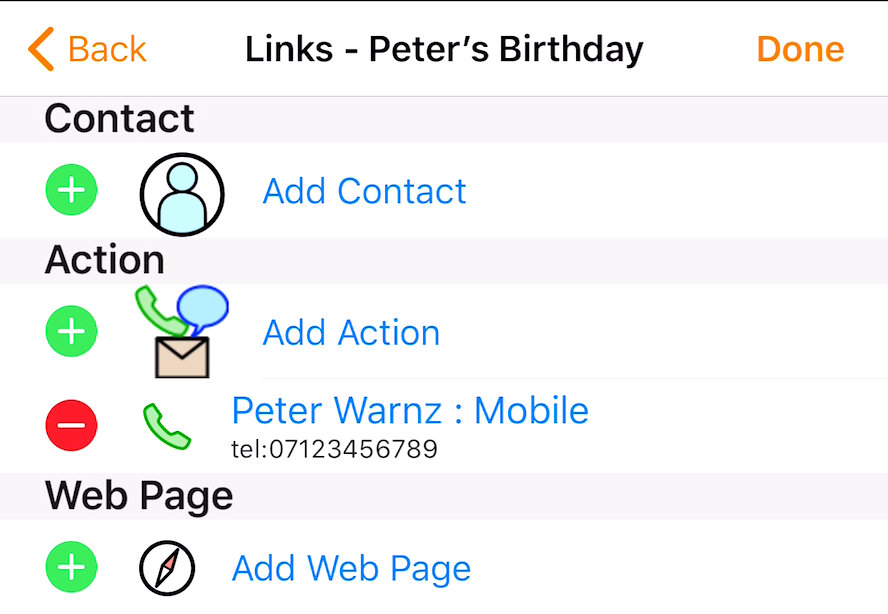
If you choose ‘Call’ then a Phone Action link to the phone number is added. Again the icon shows that this is a phone action link.
Similarly if you select a landline number in the contact then a Phone Action link is created (but without needing the ‘chooser’).
You can add as many action links as you wish. These act as single action links if no other links are added to the WarnZ.
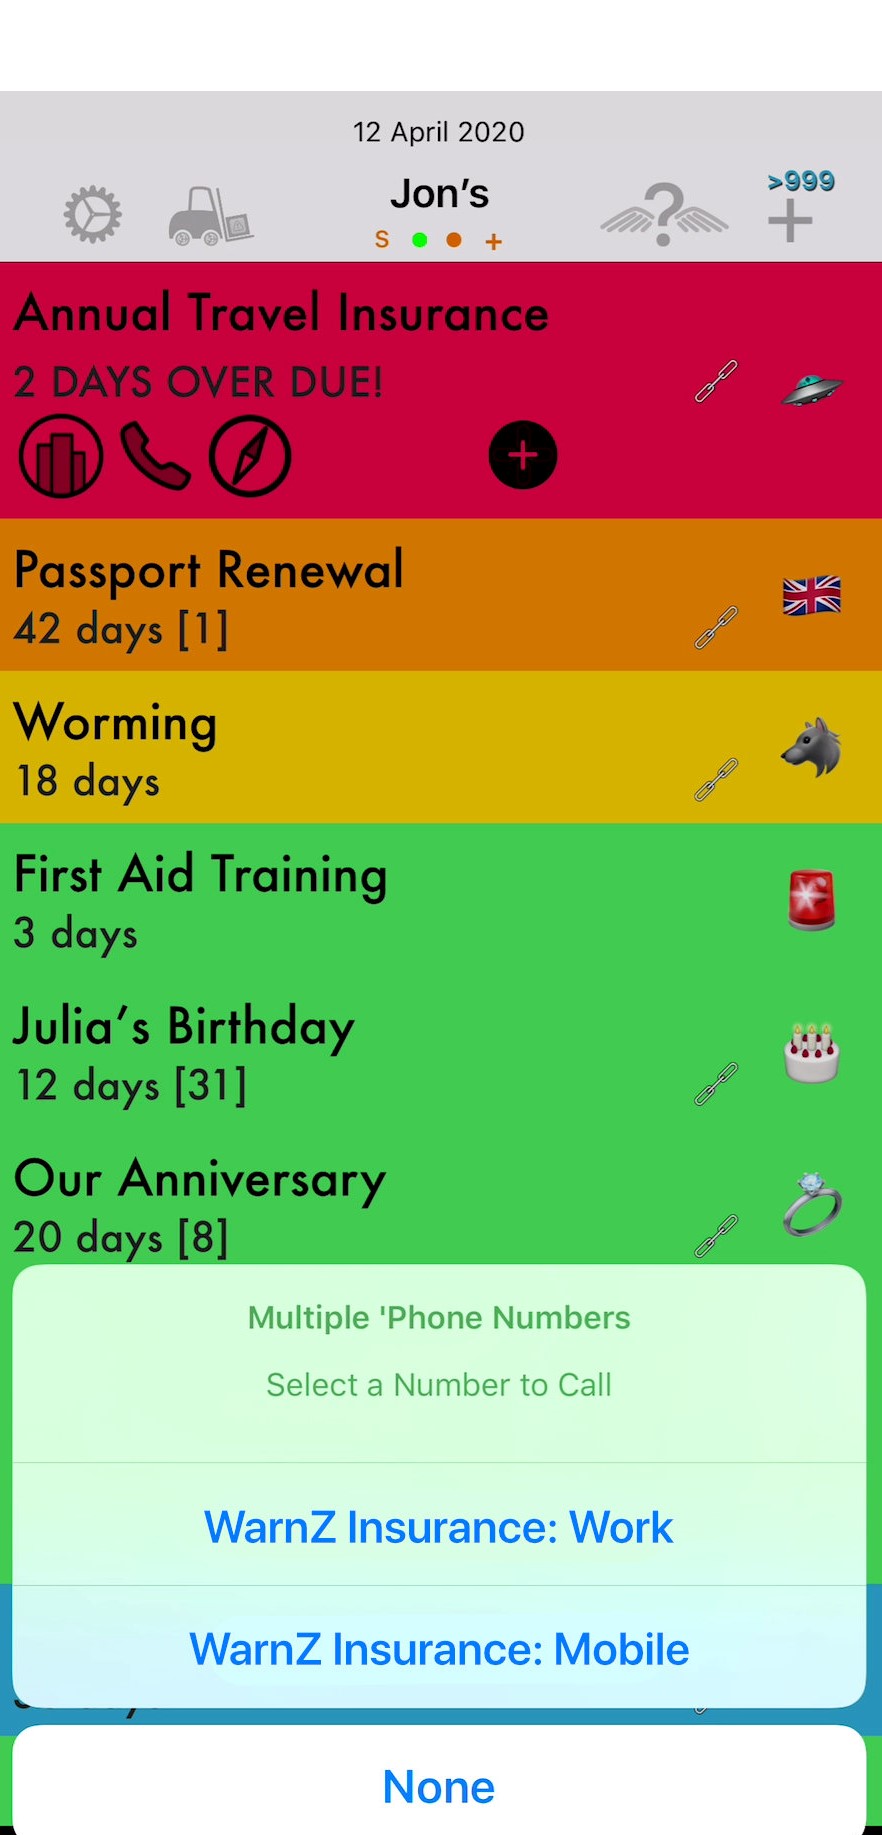
Tapping on the phone icon will show a dialogue box to allow you to call to the linked number.
Tapping the Message icon will create a new Message.
Tapping on Email icon will create and open new Email to the linked email address.
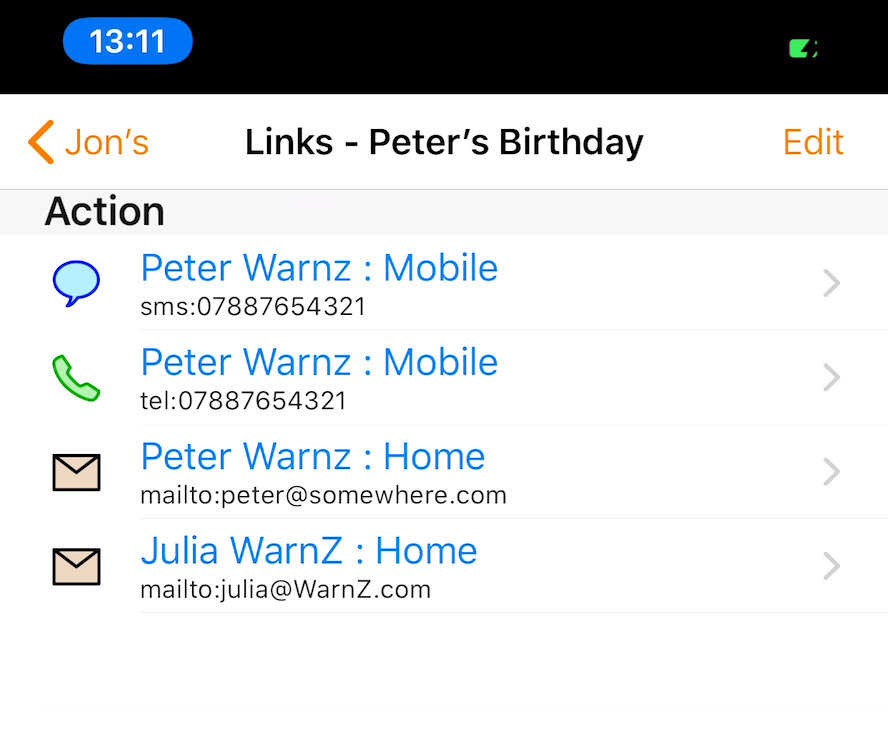
If you have added multiple email addresses: Selecting an email address on the 'View Links' page creates an email to that email address only.
If you have added multiple email addresses: Tapping on the Mail icon on the WarnZ (in 'Column View') creates an email to all the addresses.
Similarly with multiple Message addressees: if you tap the Message icon a message to all the mobile numbers link is created. If you wish to send a message to an individual mobile then select the number on the 'View Links' page (accessed by the link icon on the WarnZ).
If you have multiple 'landline' numbers added you will be shown a chooser to select the appropriate number.
Smart Actions
‘Smart Action Links’ are created if you have a Message or Email Action Link added to the WarnZ with any of the following links added:
Notes
Checklists
Images
Web address (URL) or search
Files
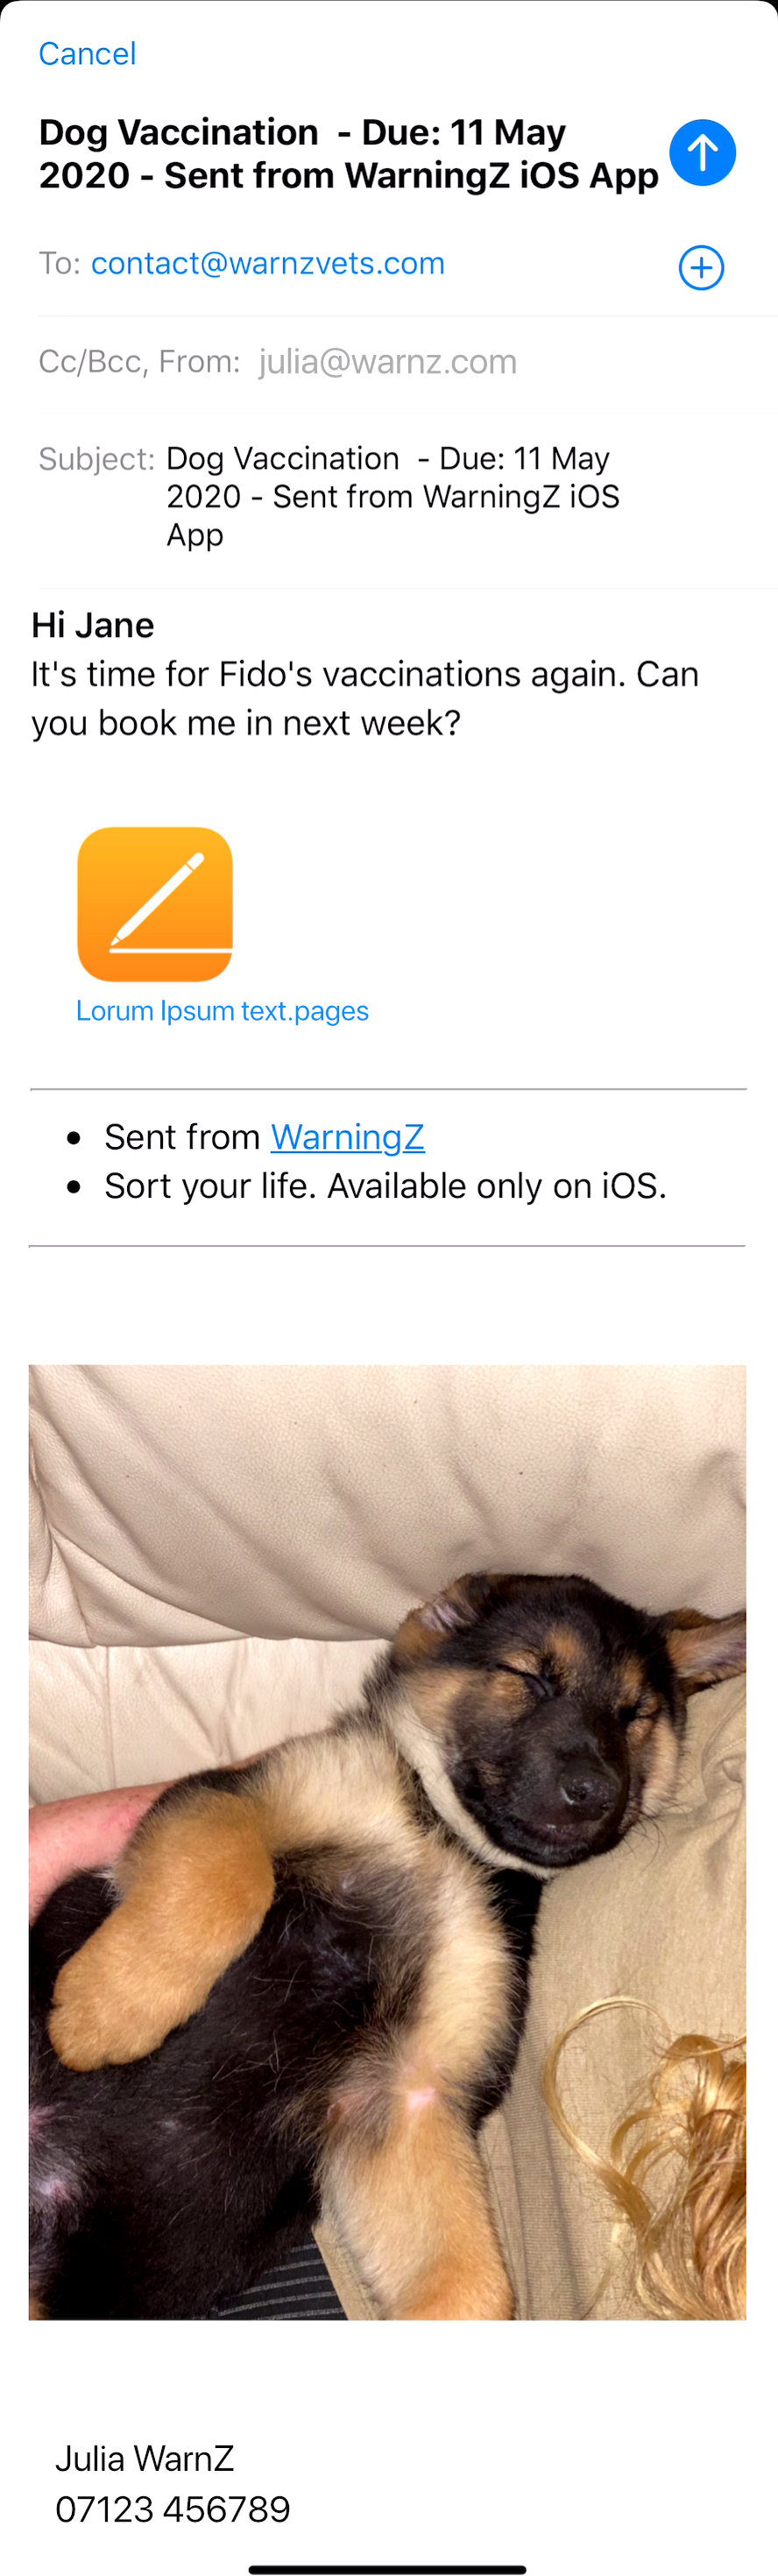
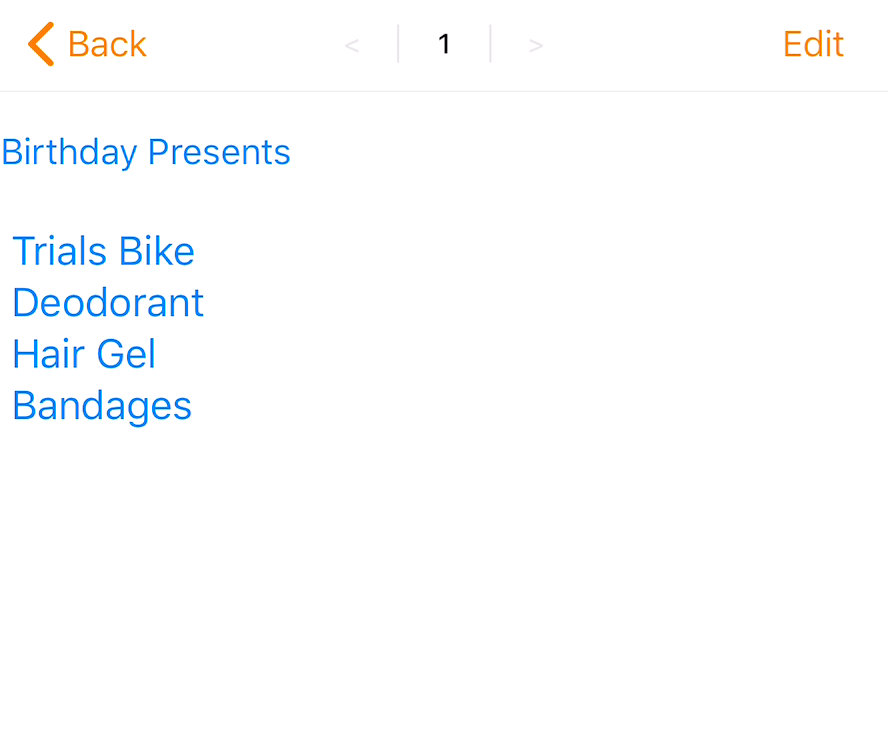
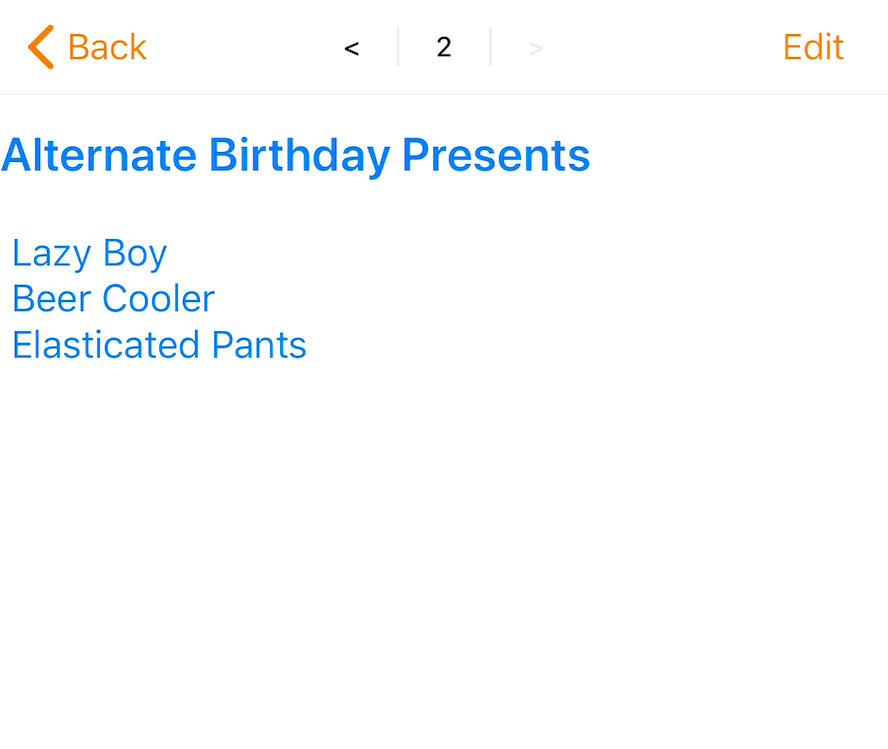
For this example links have been created to:
A Note with the title ‘Hi Jane’
An Image (photo) of a Dog
A Pages file called ‘Lorum Ipsum text’.
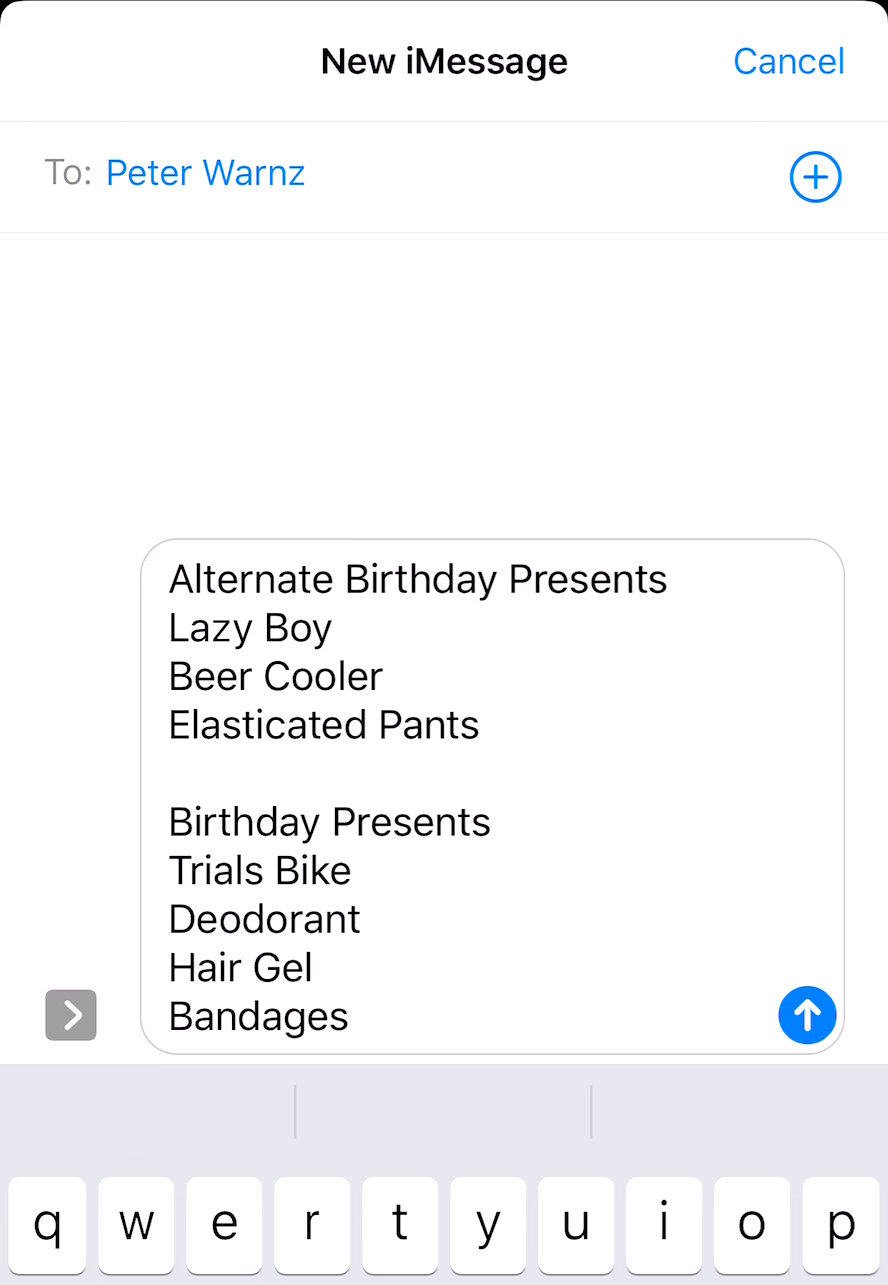
These multiple links will all be displayed on the WarnZ.
Tapping on the Note, Photo or File will open a viewer with the attached Note, image or file.
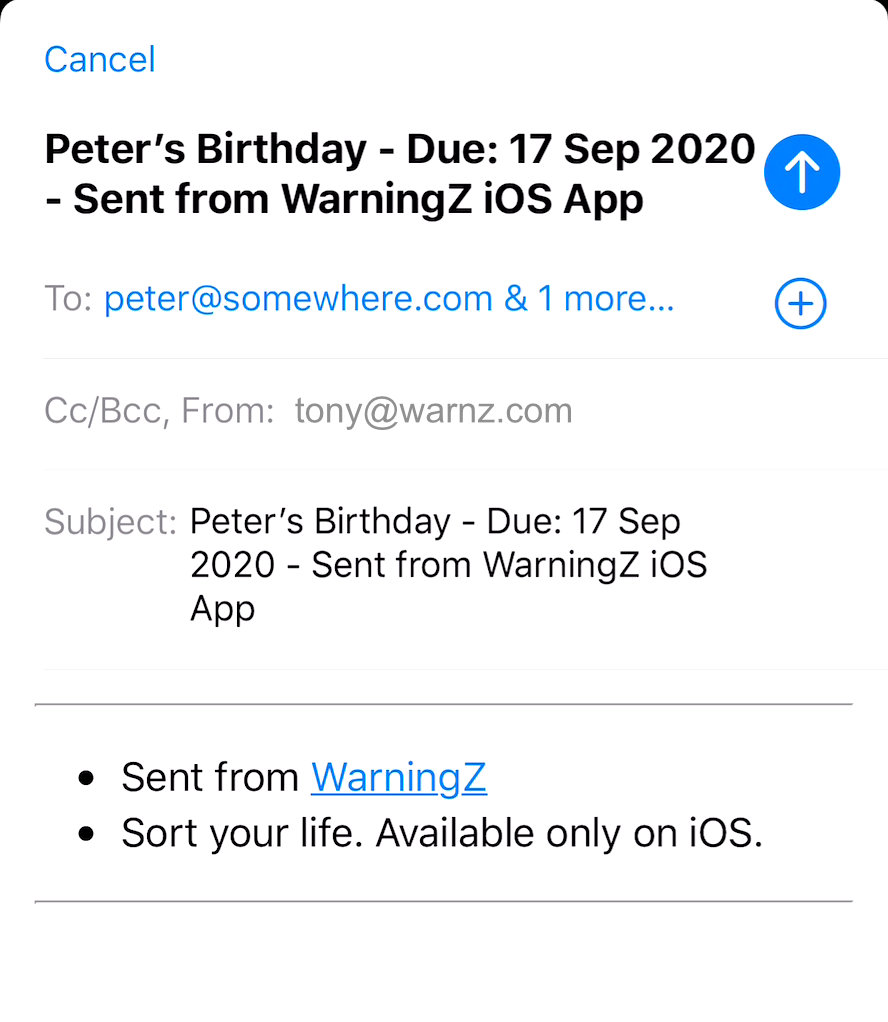
Tapping on Email will add the text of the Note to the body of the email, insert the image and add the file to the email as an attachment.
Tapping on Message will use the text of the note in the Message.
Smart Links!
For example:
The content of the Note titled ‘Hi Jane’ creates the text of the email.
The image creates relevant content.
And the file is attached to complete the information you wish to send.
You can set multiple email addresses in the Action Links; and WarningZ will create an email with all the addressees added to the ‘To’ field. (Addresses can be dragged to the CC. field if required).
Smart Action links will save you time and effort for all types of emails. For example:
Sending out reminders or newsletters
Sending files to multiple people.
Renewing Memberships.
Booking appointments.
And many more!
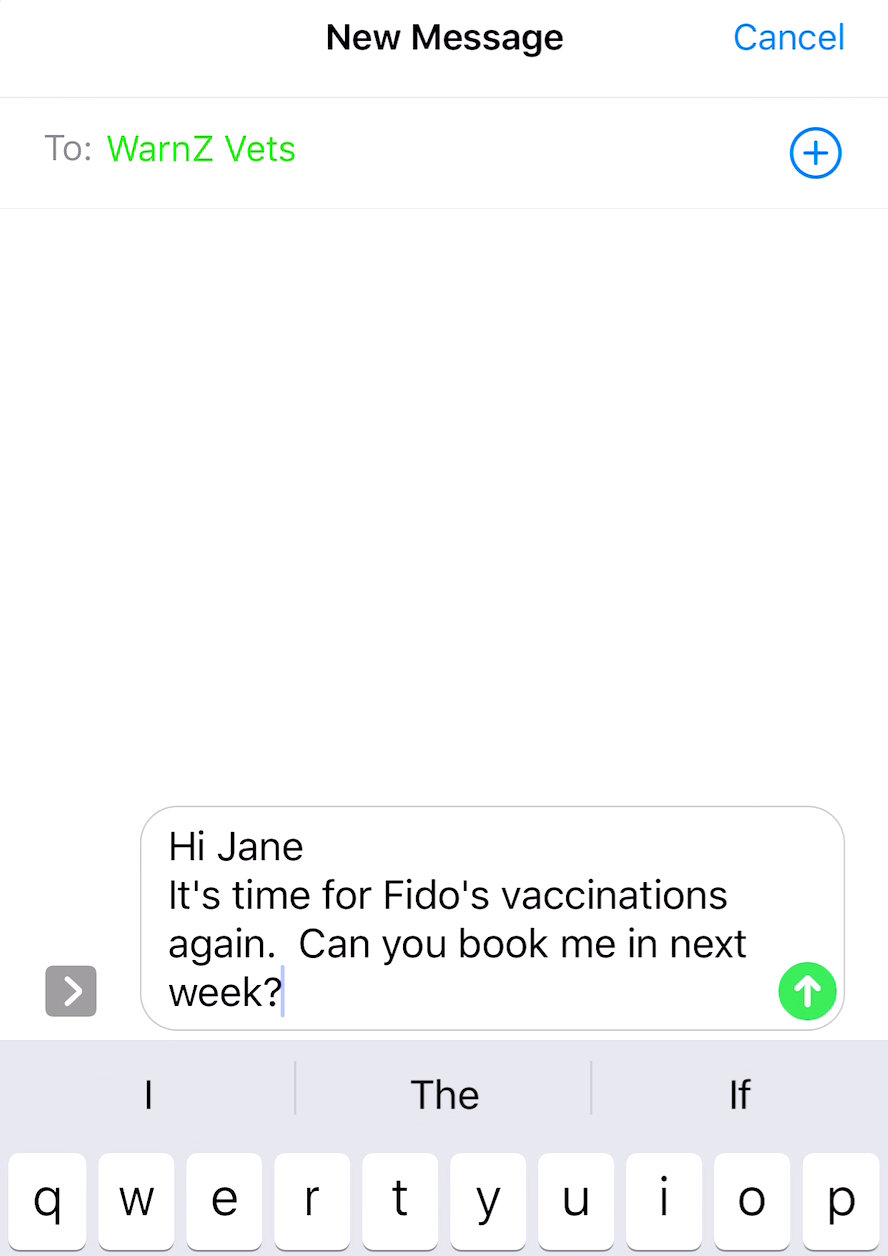
Similarly: If you use an Action link to create a Message then the content of any Note will be used to create the text of the Message.
You can use the Note to pre-compose the text of a message!
Linking to Web Pages
To add a web link to a WarnZ tap on the green + icon next to ‘Add Web Link’
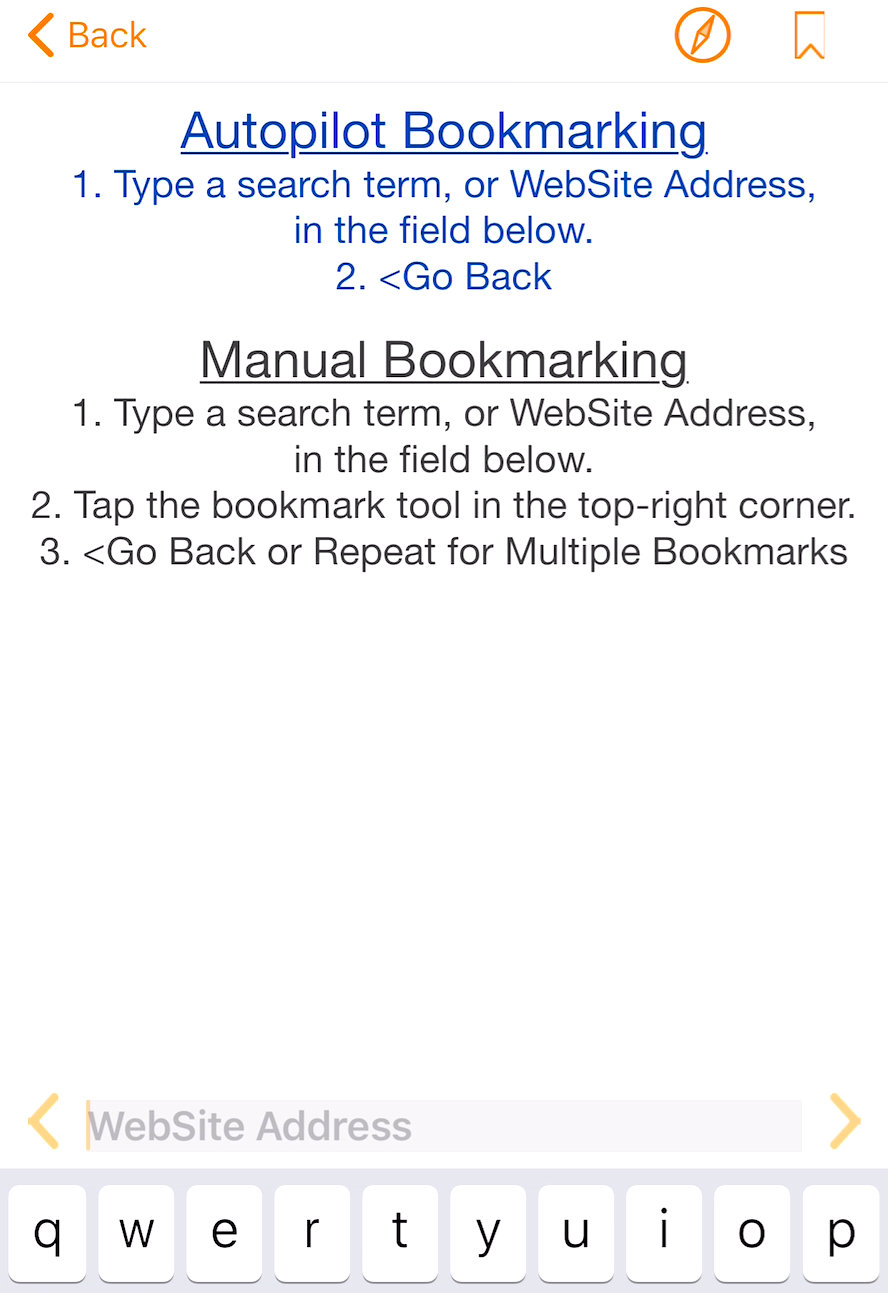
The web search / address entry page opens.
In the field ‘WebSite Address’ above the keyboard you can either enter:
A website address
Or
A word or phrase to search for….
If you enter a word or phrase WarningZ will automatically start a Google search for that item when you tap ‘Go’.
Your search will be saved as a link if you either tap on the ‘<Back' at the top left or on the bookmark icon at top right.
You will notice the bookmark icon flashes when you first open a web page or search. It does this to remind you to bookmark that page if that is where you wish the link to open.
The bookmark icon is also useful if you navigate away from the first page and you subsequently decide that the new page is the page you want to link to. Just tap on the bookmark to link to that web address.
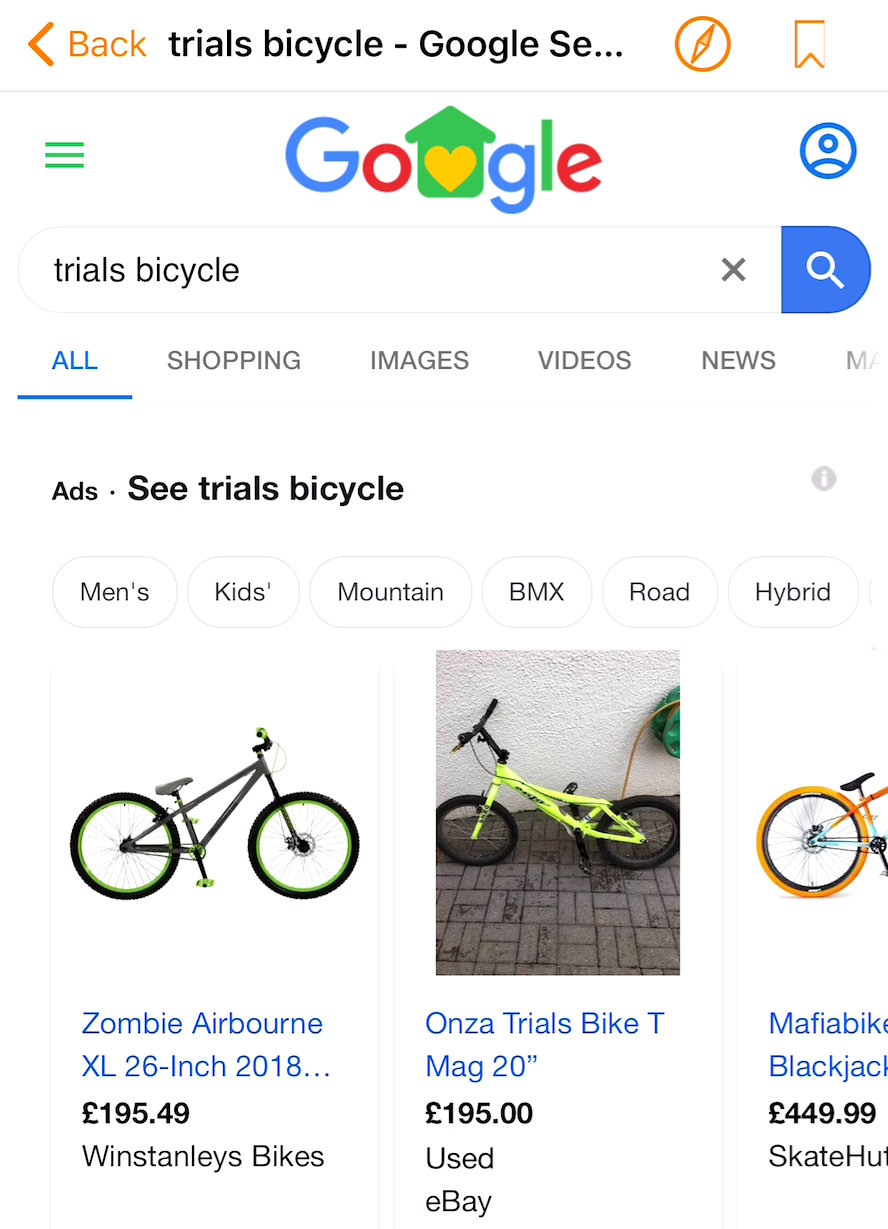
If you enter a web address (URL) that page is opened.
To bookmark the page as a link tap on the bookmark icon at top right.
Then tap ‘<Back' to return to the Links Edit page. (The page will be bookmarked if you tap the '<Back' button anyway - just in case you forget to set the bookmark).
The web page is added as a link to the 'Edit Links' page. To return to the column of WarnZ tap '<Personal'.
If you wish to check the link is correctly targeted tap ‘Done’ to access the 'View Links' page.
Access the webpage via the 'Safari' icon on the WarnZ
Or on the 'View Links' page tap by tapping on the link icon.
Web links are opened within WarningZ and can be navigated exactly as they can within the full version of Safari.
The only Apple limitation on the in-app browser is that when adding webpages protected by a password dialogue then Keychain (the Apple password manager) does not work, nor will pop up password entry boxes display. Once the page is bookmarked and viewed via a link then the browser and ‘Keychain’ work correctly.
Should you wish to change to the full version of Safari then tap the Safari Icon at the bottom of the page.
The option to use the full version of Safari is also available when adding a web page as an Action Link. If you choose to leave the 'in-app' browser: You will receive a notification that once you have opened Safari WarningZ cannot track or bookmark your navigation (but you could use the 'share to WarningZ' to create a web link as described the 'Share to WarnZ' section of this Tutorial).
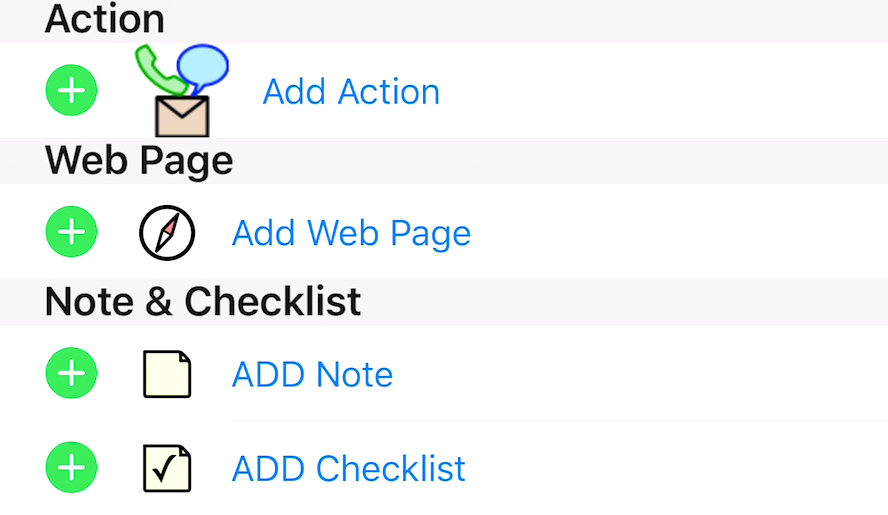
Notes
To add a Note to a WarnZ tap on the green + icon next to ‘Add Note’
Add a title and contents.
Tap ‘Done’ when complete
To edit or add new items to a note tap ‘Edit’.
If you have added multiple notes you can switch between them, without returning to the 'Edit Links' page, by using the < and > in the chooser at the top.
Any note you have created will be added to an email or message if the email / message is created using the icons displayed on the WarnZ in 'Column View'. You can use the text in the note to pre-compose the text content. Since all notes are added you could use each note to contain alternate versions of the text and then delete the text of the version you don’t need.
Checklists
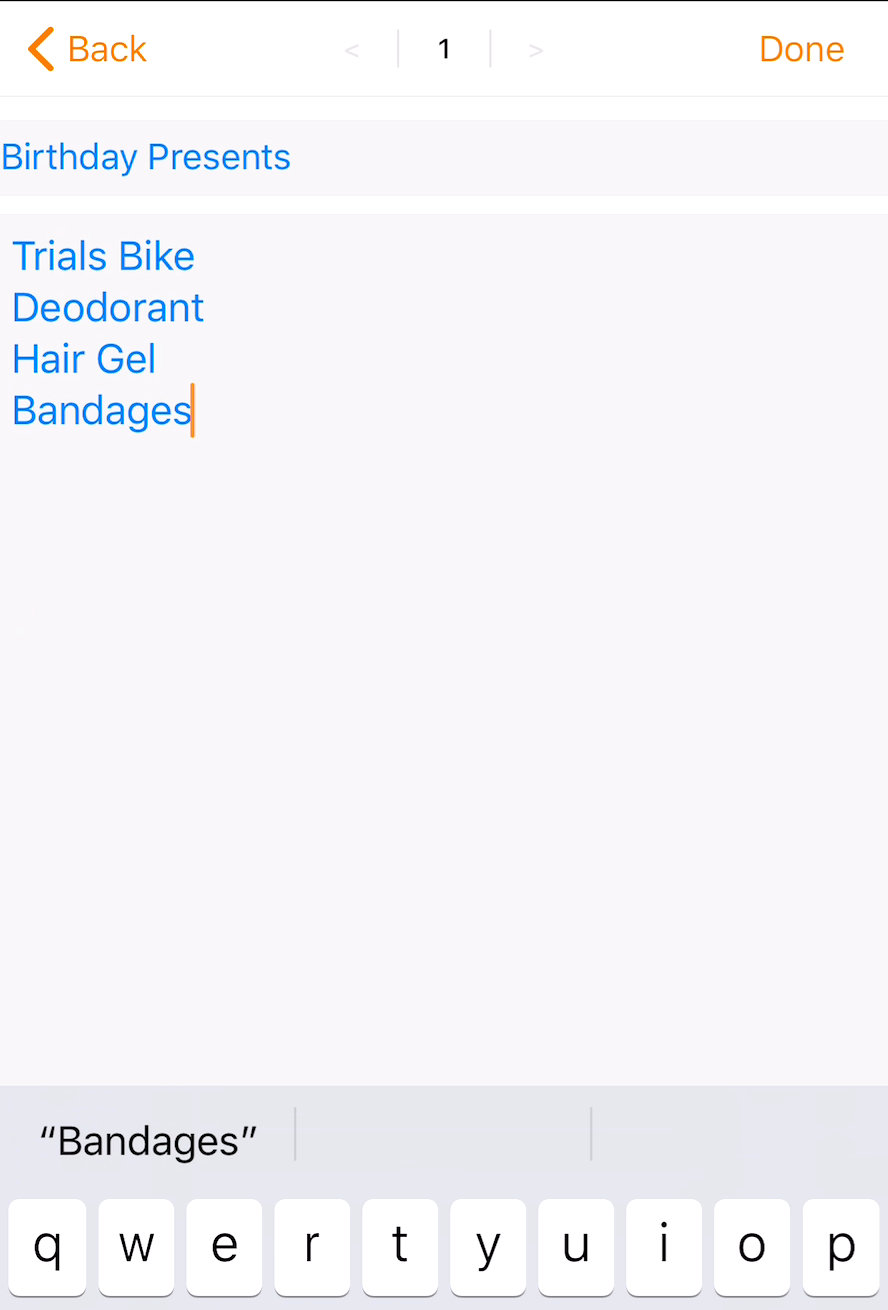
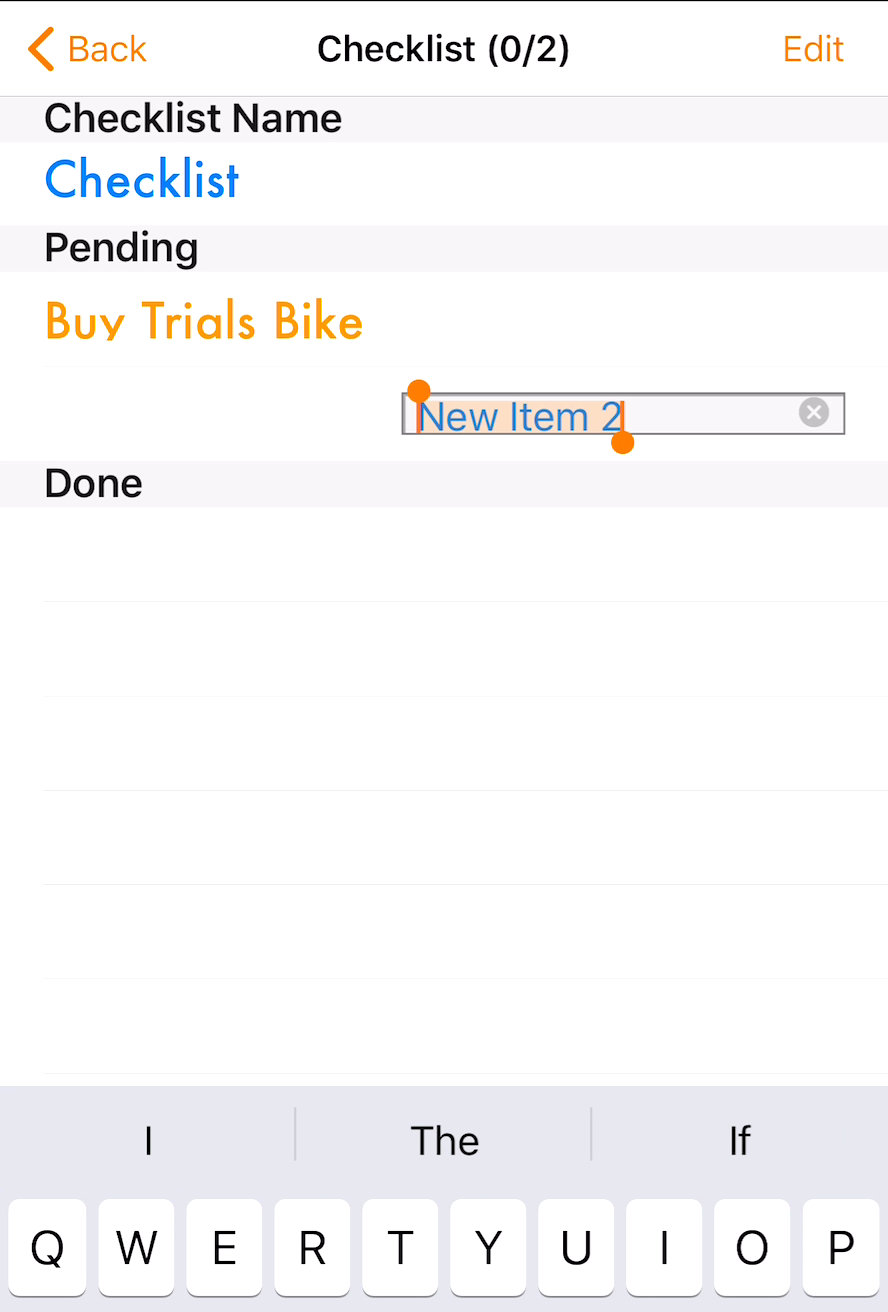
To create a checklist tap on the green + icon next to ‘Add Checklist’

The first item of the checklist is already highlighted on first open of the checklist so just start typing to enter your first item. Tap 'done' on the keyboard when complete. Or tap '+' to create a new item.
To Edit the Checklist name tap on the blue 'Checklist'
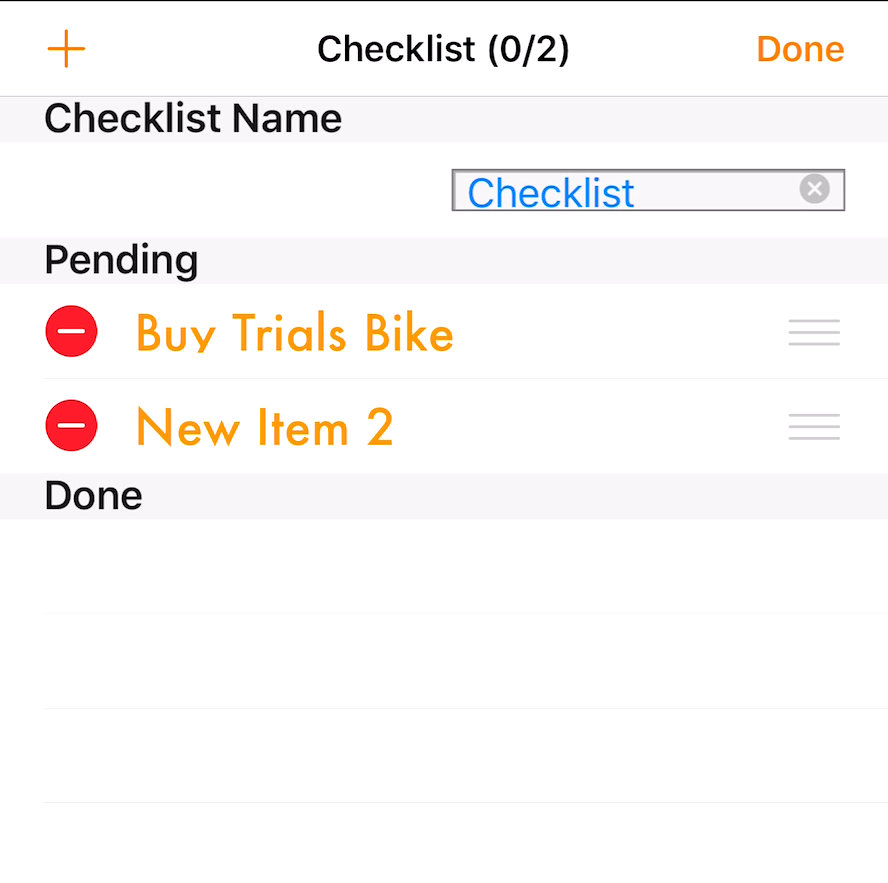
Tap the greyed out x to delete the checklist name and then add your own.
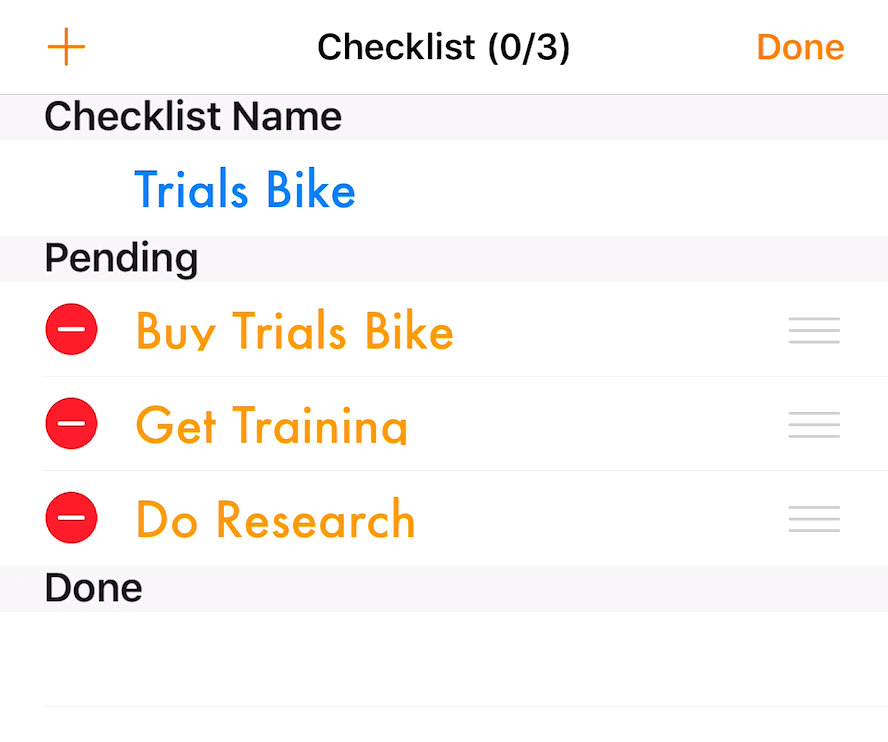
These items have been entered in the wrong order! You would 'Do Research' first.
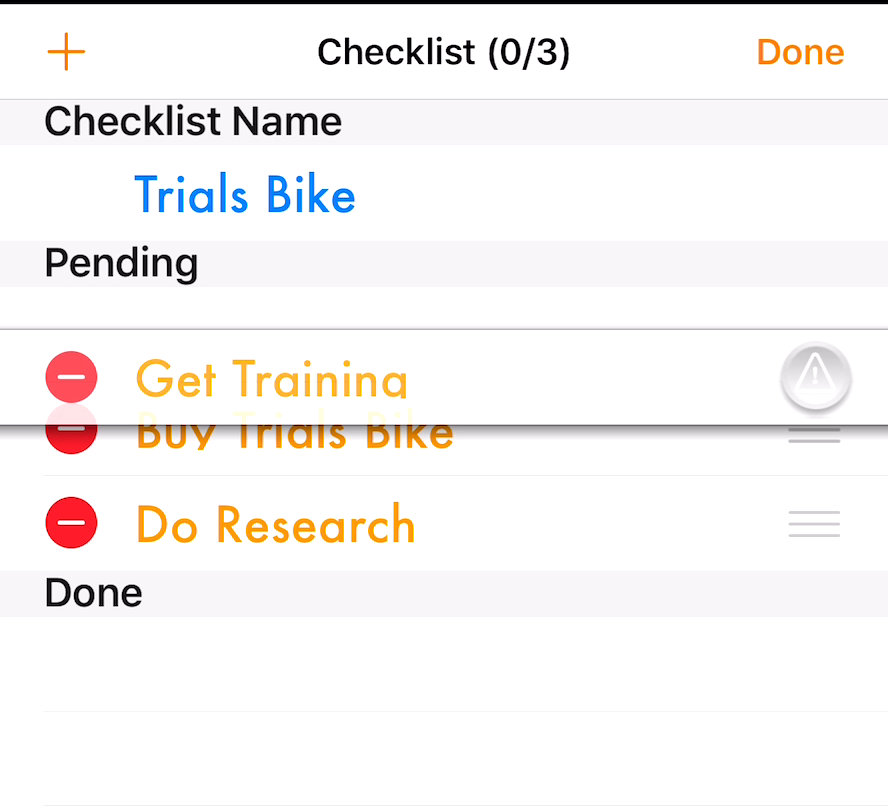
You can reorder them by dragging the item using the 3 horizontal lines on the right.
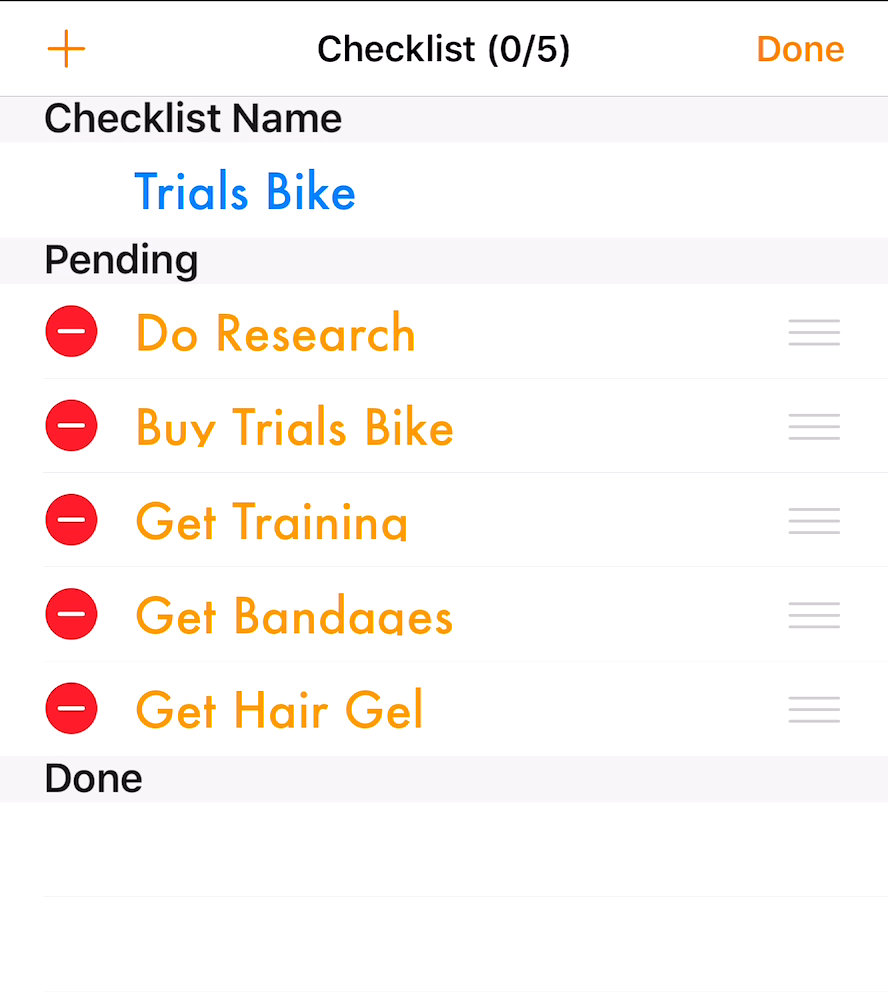
Keep adding items until your list is complete.
Tap 'Done' on the top left to exit the edit view.
The checklist is now ready to use. Tap '<Back' to return to the 'Edit Links' page.
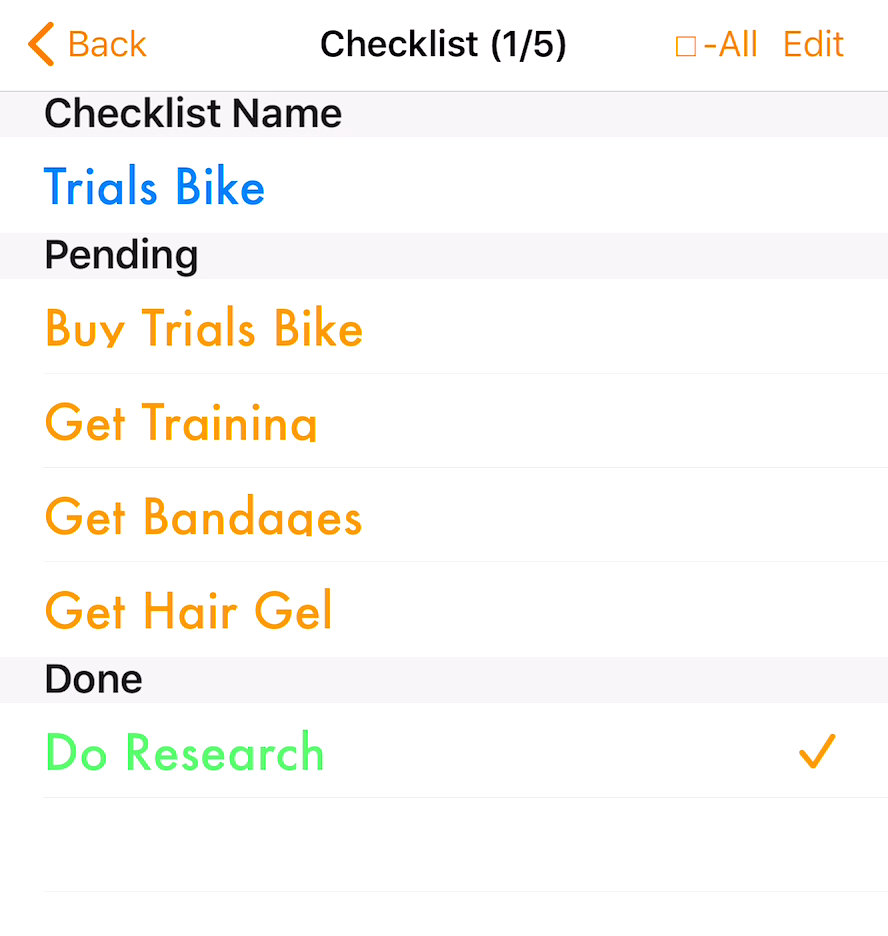
The ready to use checklist on the 'Edit Links' page. The (0/5) shows how many items in the checklist have been completed - in this case no items have be checked off.
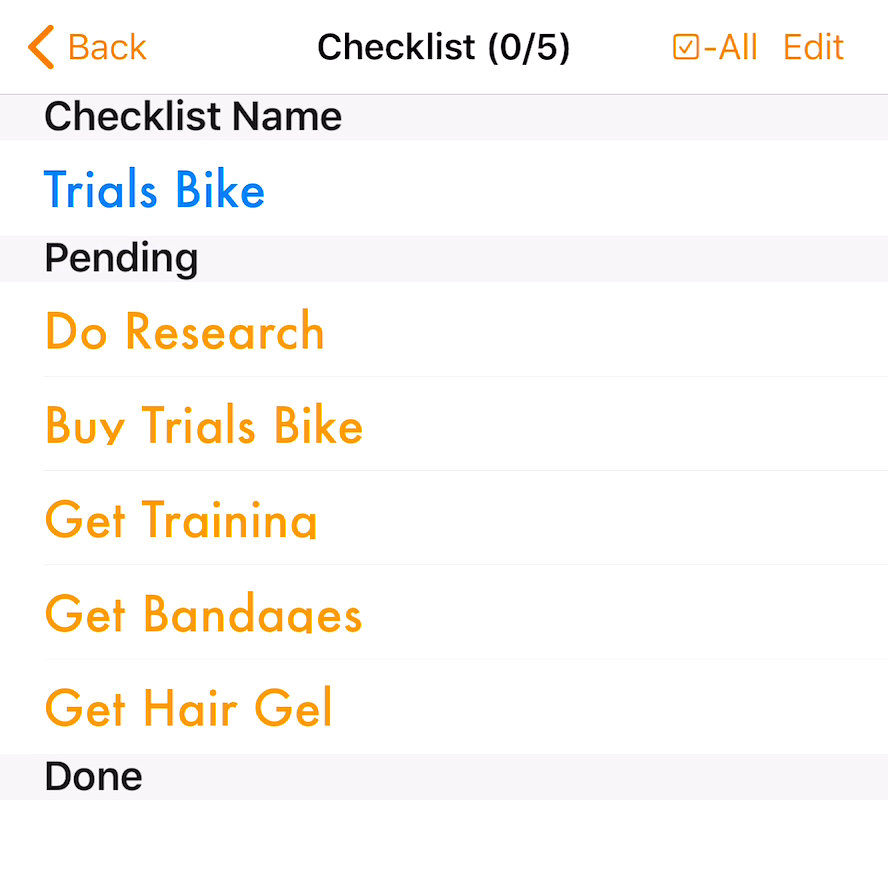
Tap '< Jon's' to return to the WarnZ column view or 'Done' to return to the 'View Links' page.
The checklist shown on the WarnZ as an icon. Tap on the checklist icon to update the checklist.
Or tap on the links icon to access the checklist from the 'View Links' Page.
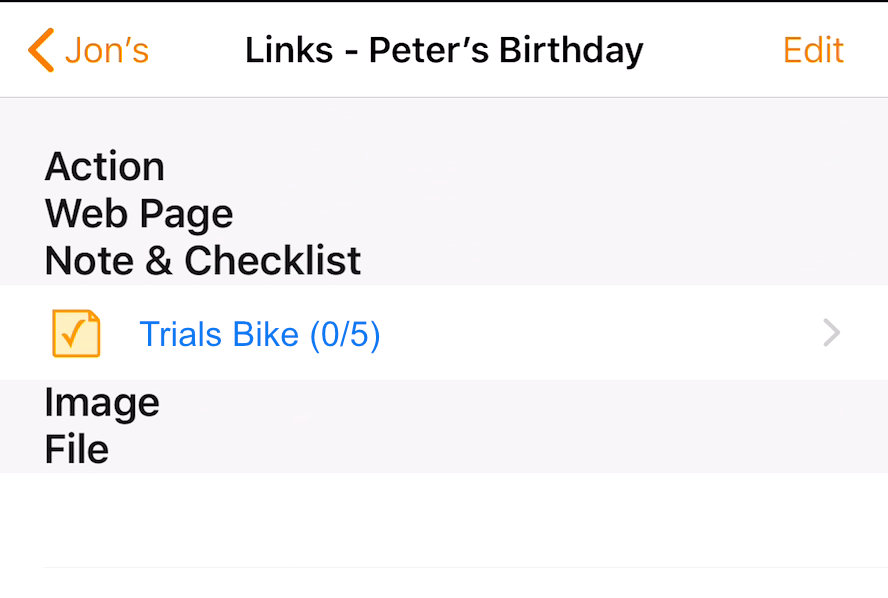
The checklist shown the 'View Links' Page. Again showing the number of items completed (0/5).
Tap the checklist to access it.
Or to add further links tap 'Edit' to access the 'Edit Links' page.
Items are now ready to be checked off when done.
To check off an item tap on it.
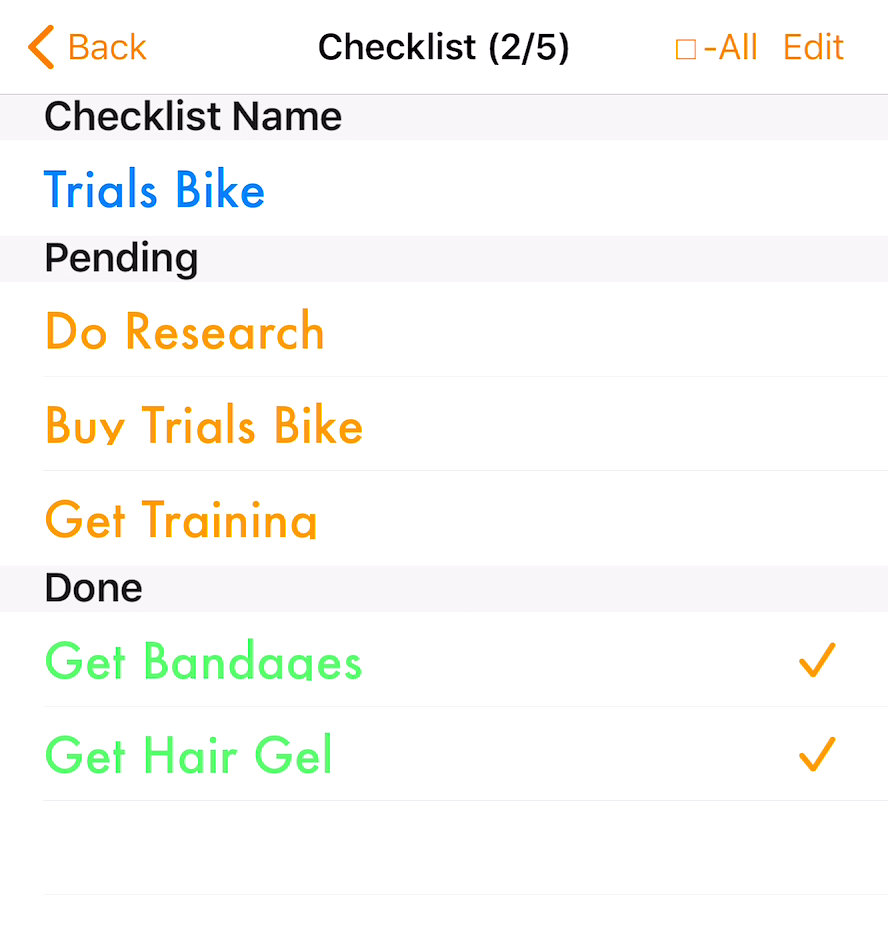
Once checked an item is moved to the ‘Done’ section and changed to green text. The title now shows 2 items completed (2/5).
An item can be moved back to the ‘Pending’ section by tapping on it (un-checking).
All 'Pending' items can be moved to the ‘Done’ section if the Tick box (top right) shows a ✓ inside a □ . Tapping on the '✓-All' means 'Done All' and all items will be moved to the 'Done' section.
Conversely all items can be moved to the ‘Pending’ section when there is no ✓ in the □. This will be shown when one or more items have been moved to the 'Done' section. '□-Tick All’ means 'Undo All' and tapping on it will move all items to the 'Pending' section.

Checklist items can be deleted in the checklist edit mode by tapping the red minus sign, and then confirming the deletion by tapping on delete.
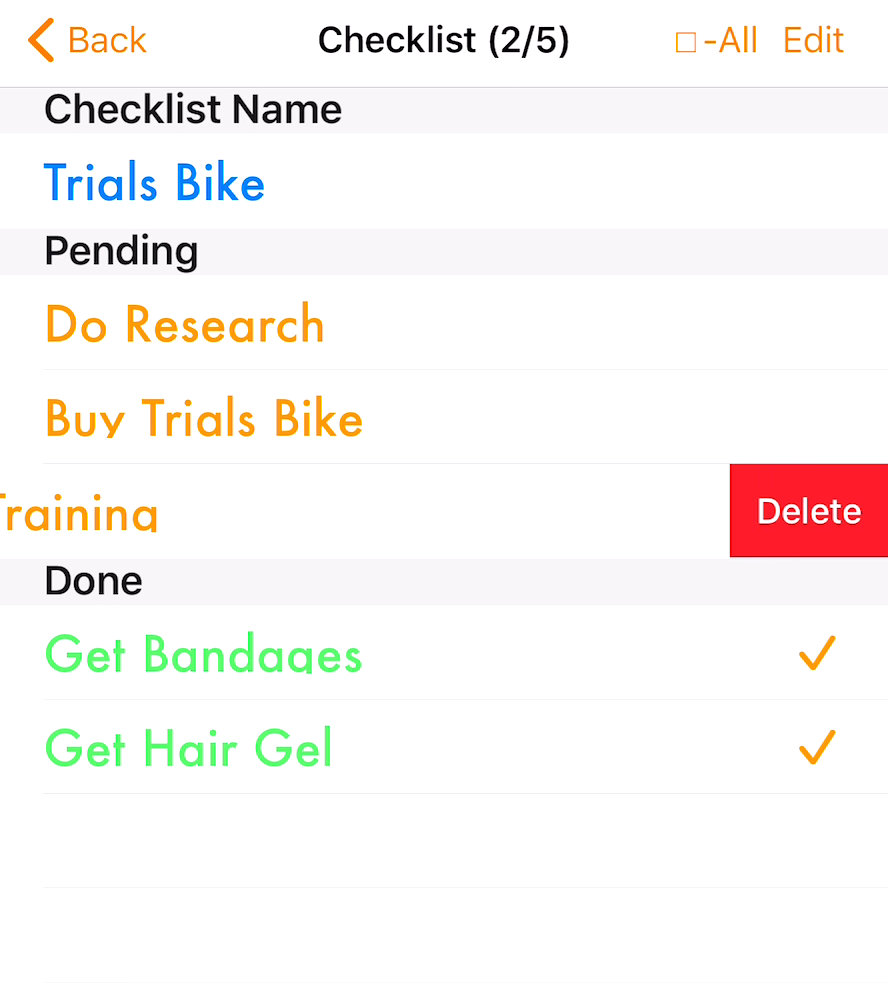
Or by swiping left on the update checklist page and tapping delete.
Images
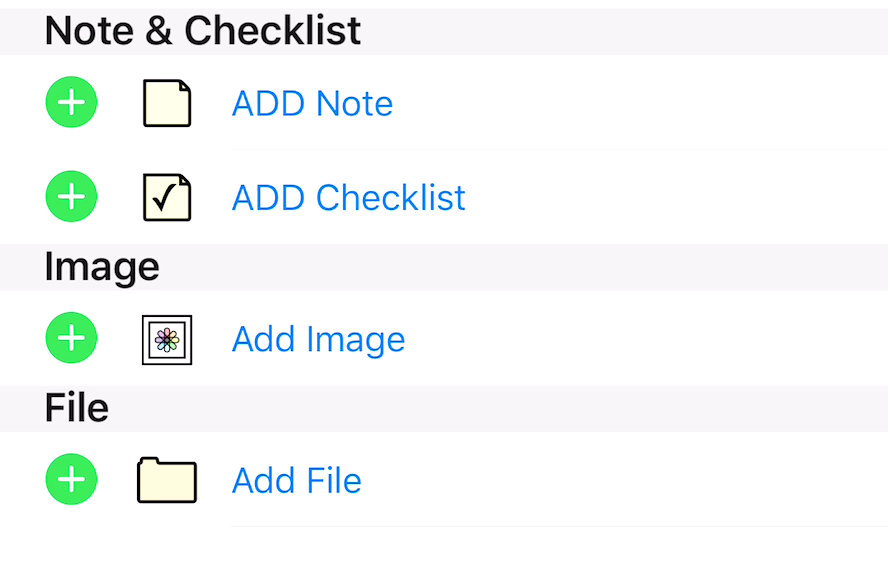
You can add an image or images to a WarnZ by tapping on the green + icon next to the ‘Add Image’ on the WarnZ 'Edit Links' page.
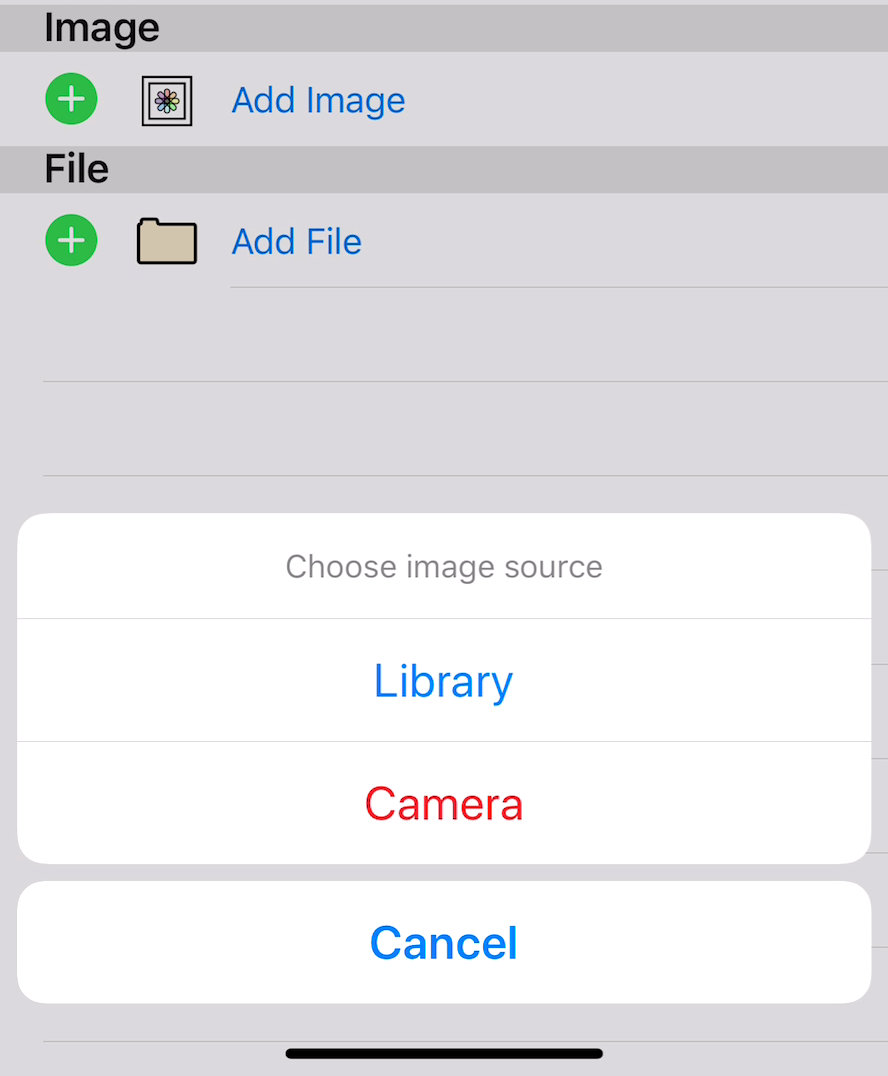
Choose which source (Library or Camera) you wish to add the image from.
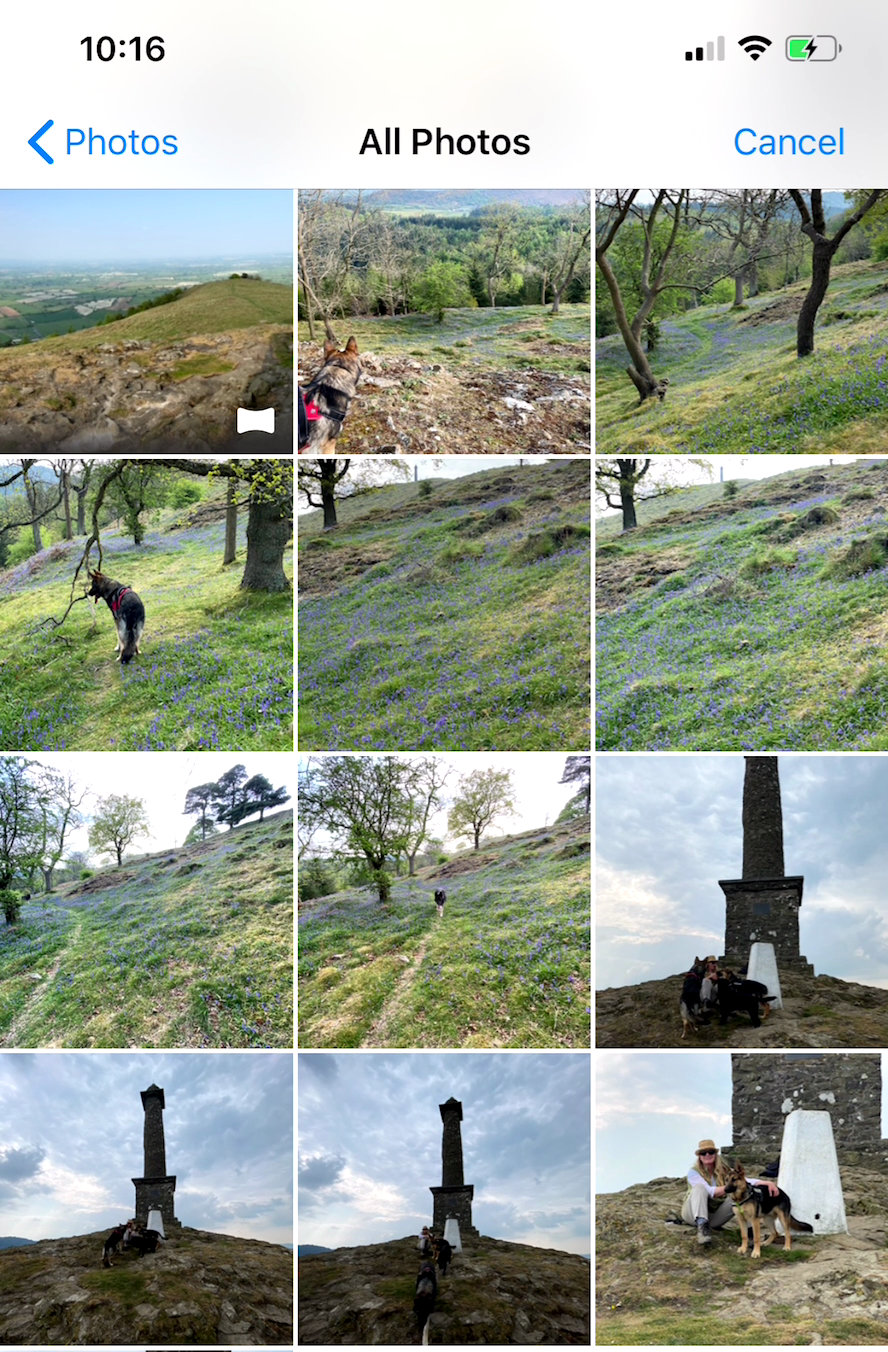
If you have chosen Library: Choose a folder from your Library and select an image.
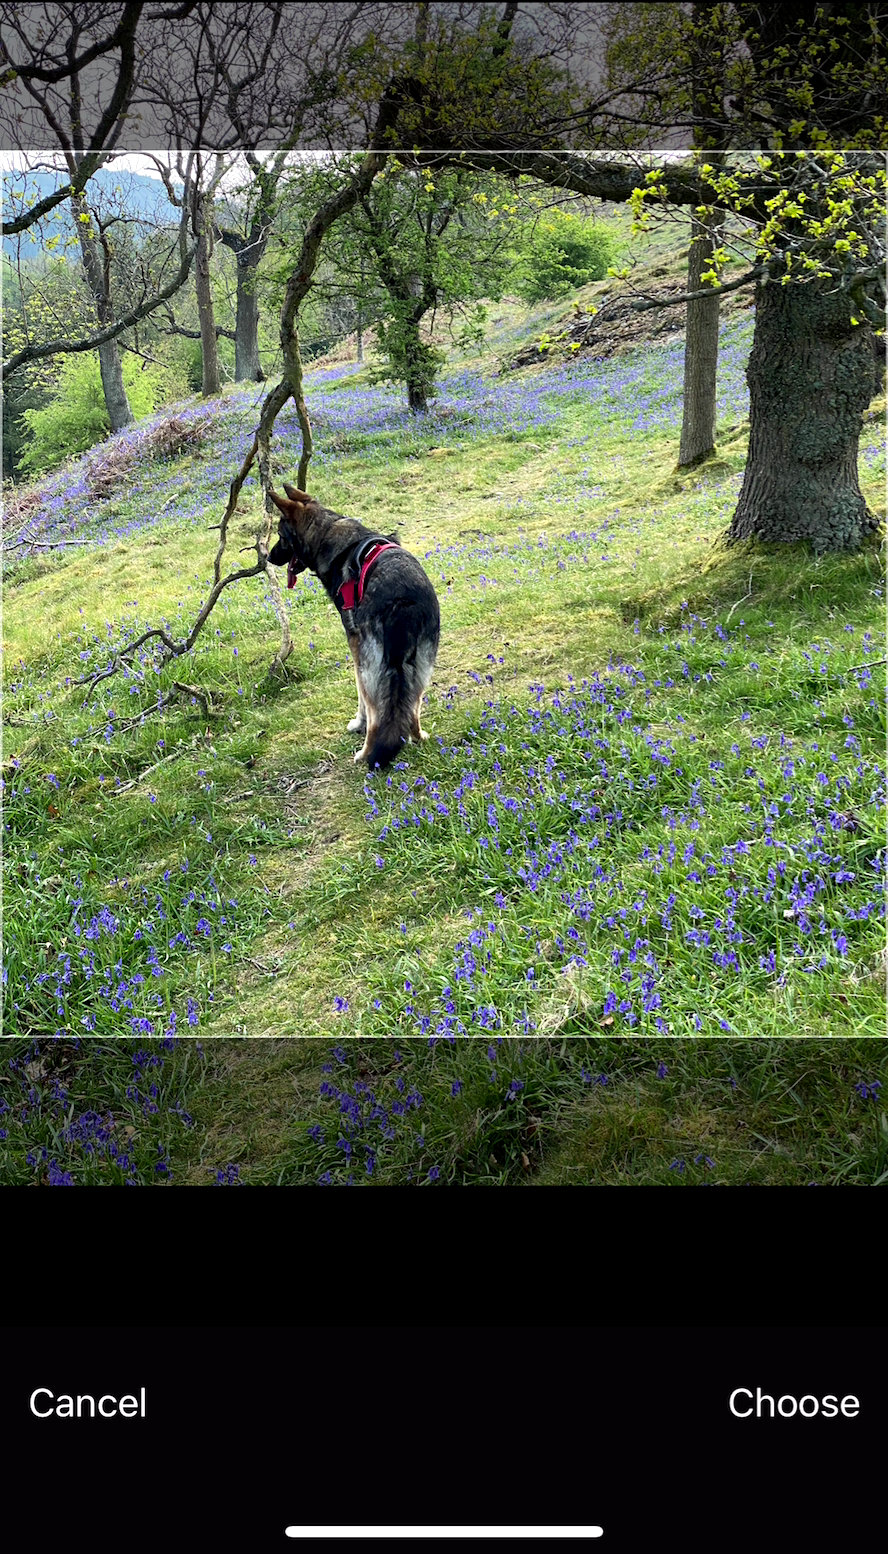
Confirm your choice of image by tapping ‘Choose’.
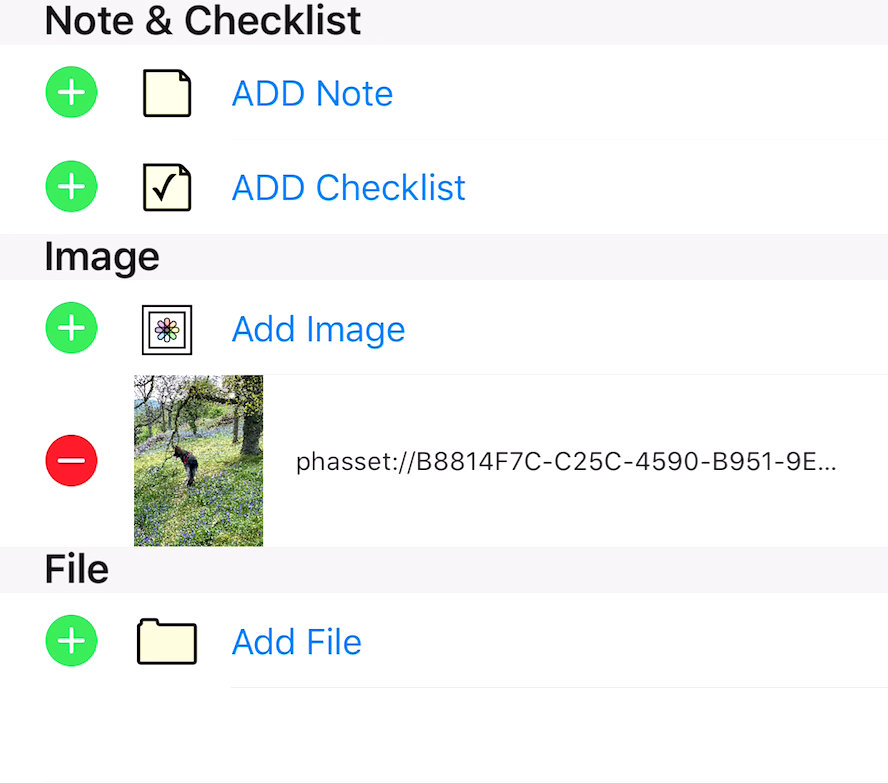
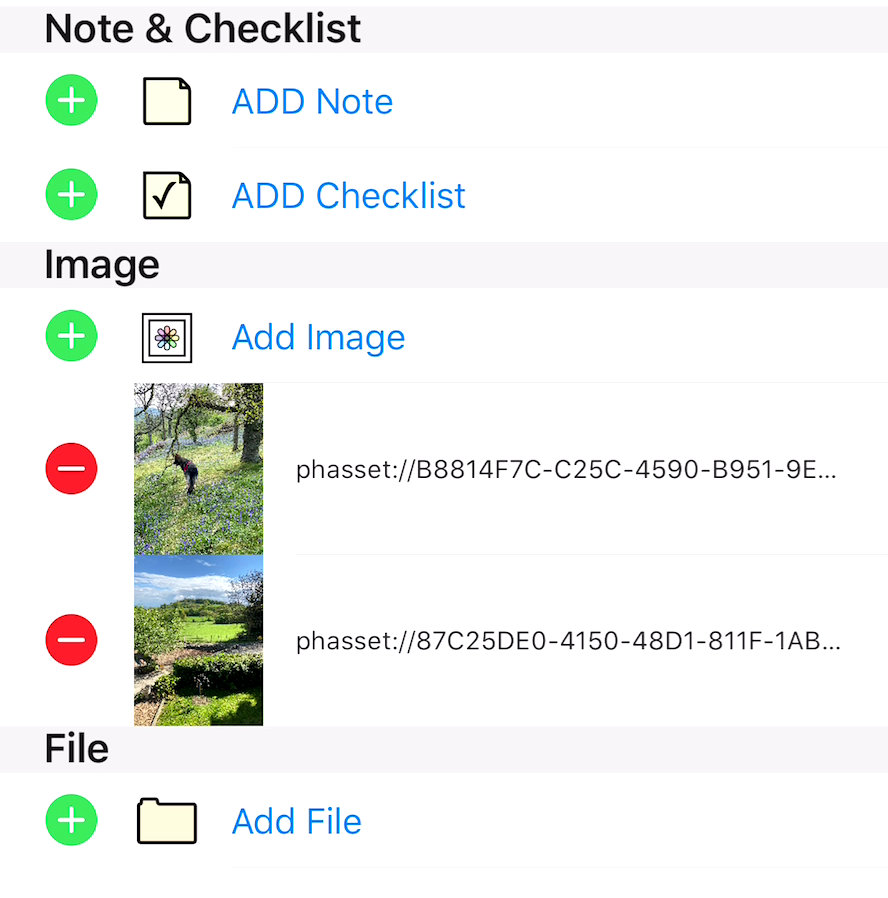
The image is now linked to the WarnZ.
Tap ‘Done’ to return to the 'View Links' page or ‘<Personal' to return to the 'Column View'.
If you have added an email or message action link attached to the WarnZ then, on the creation, your image will be added to the body of the email or message.
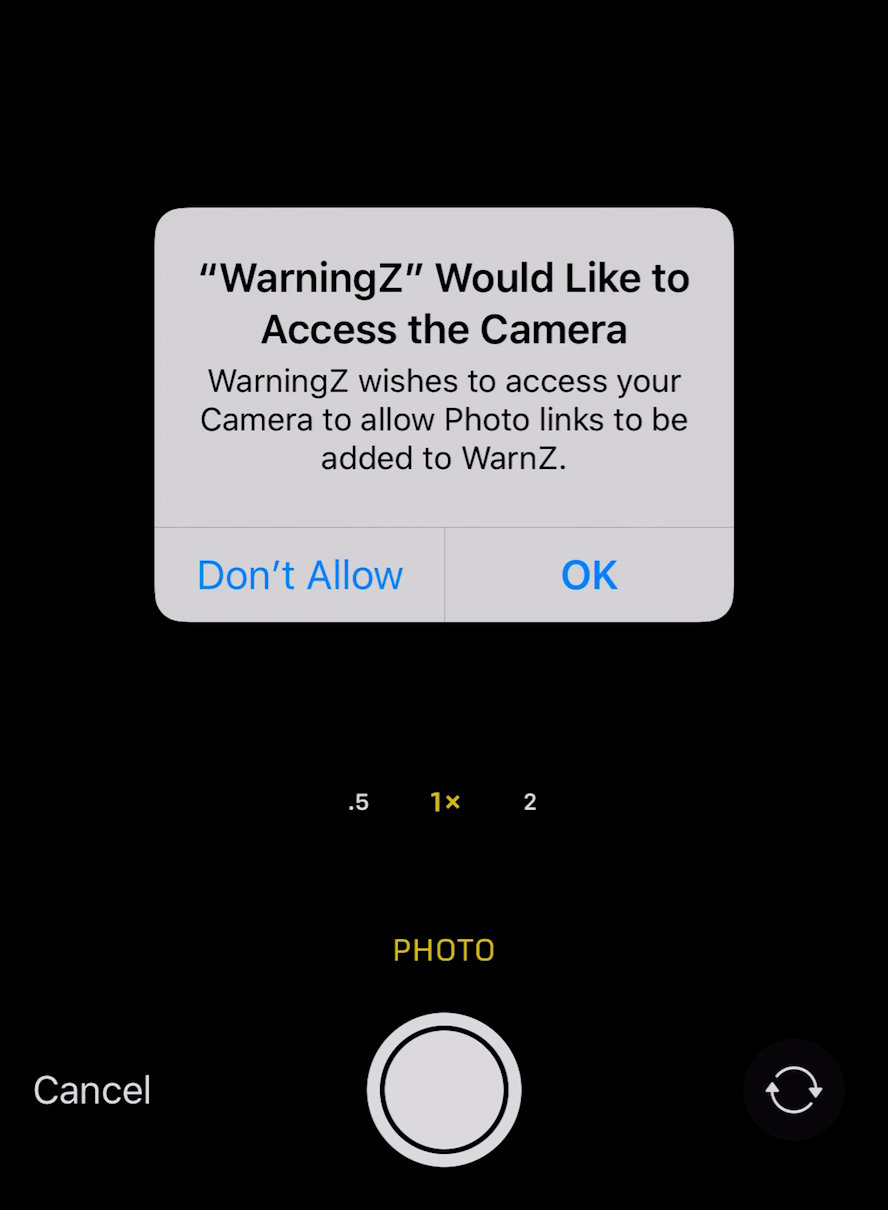
If you choose 'Camera' WarningZ may ask for your permission to access the Camera. WarningZ only asks for access to a device capability (such as the camera) the first time you attempt to use it.
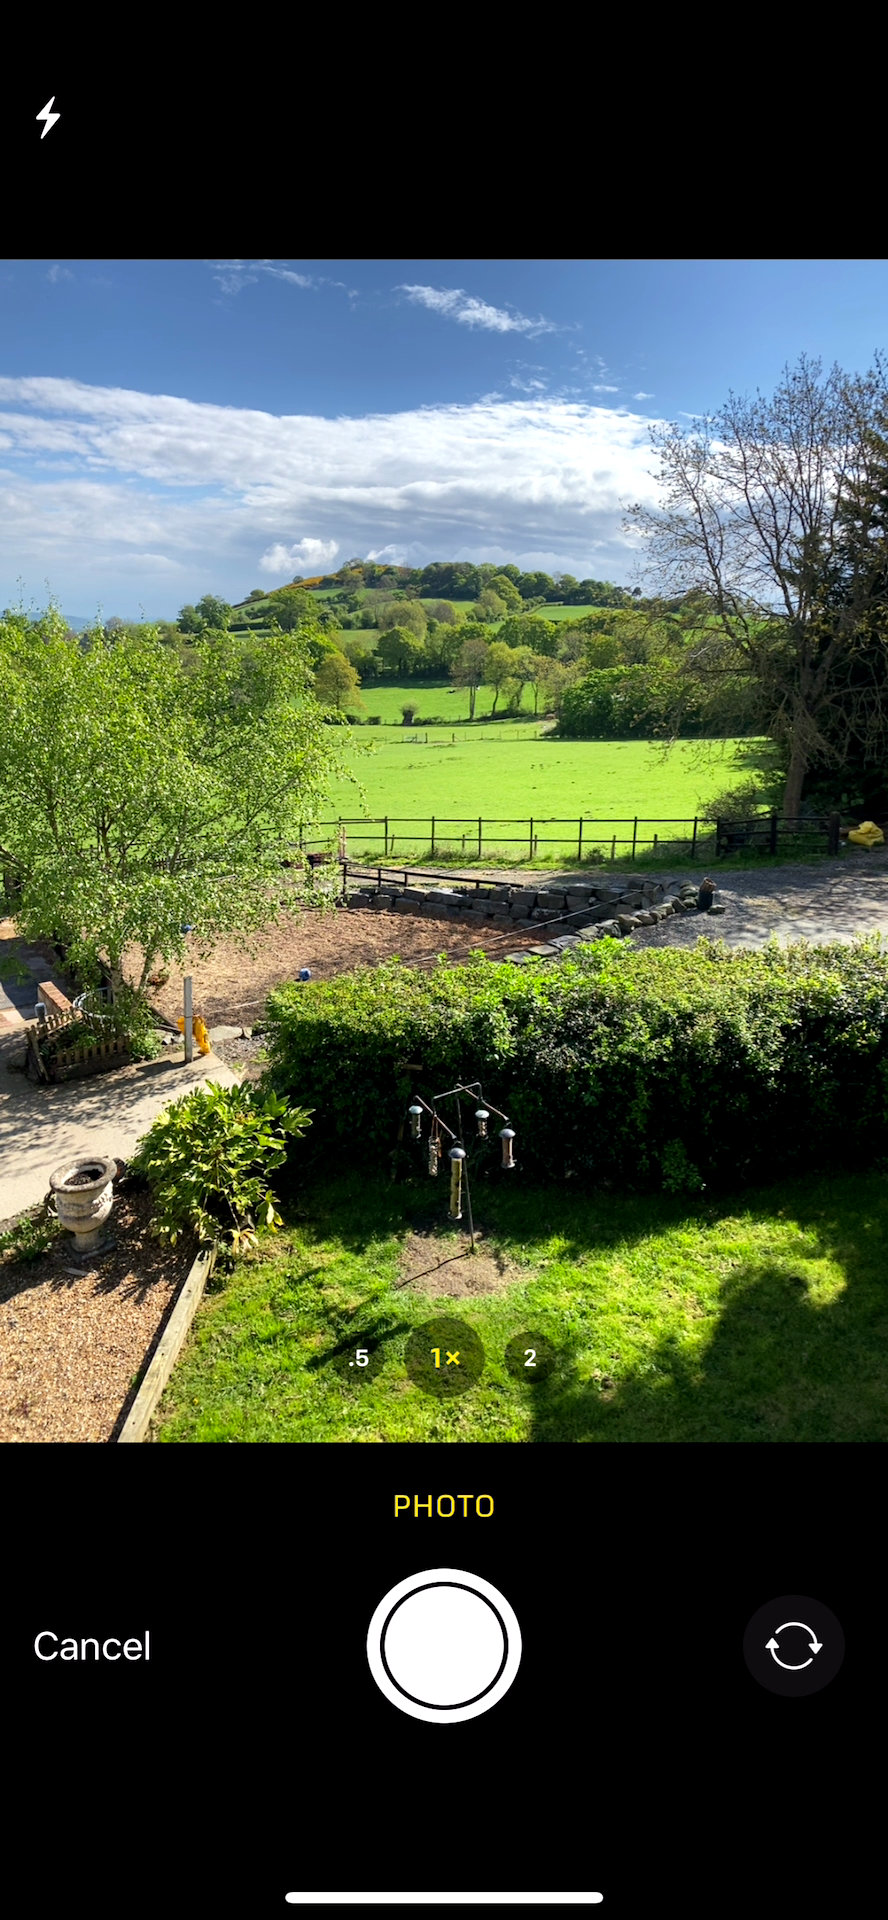
Take a picture.
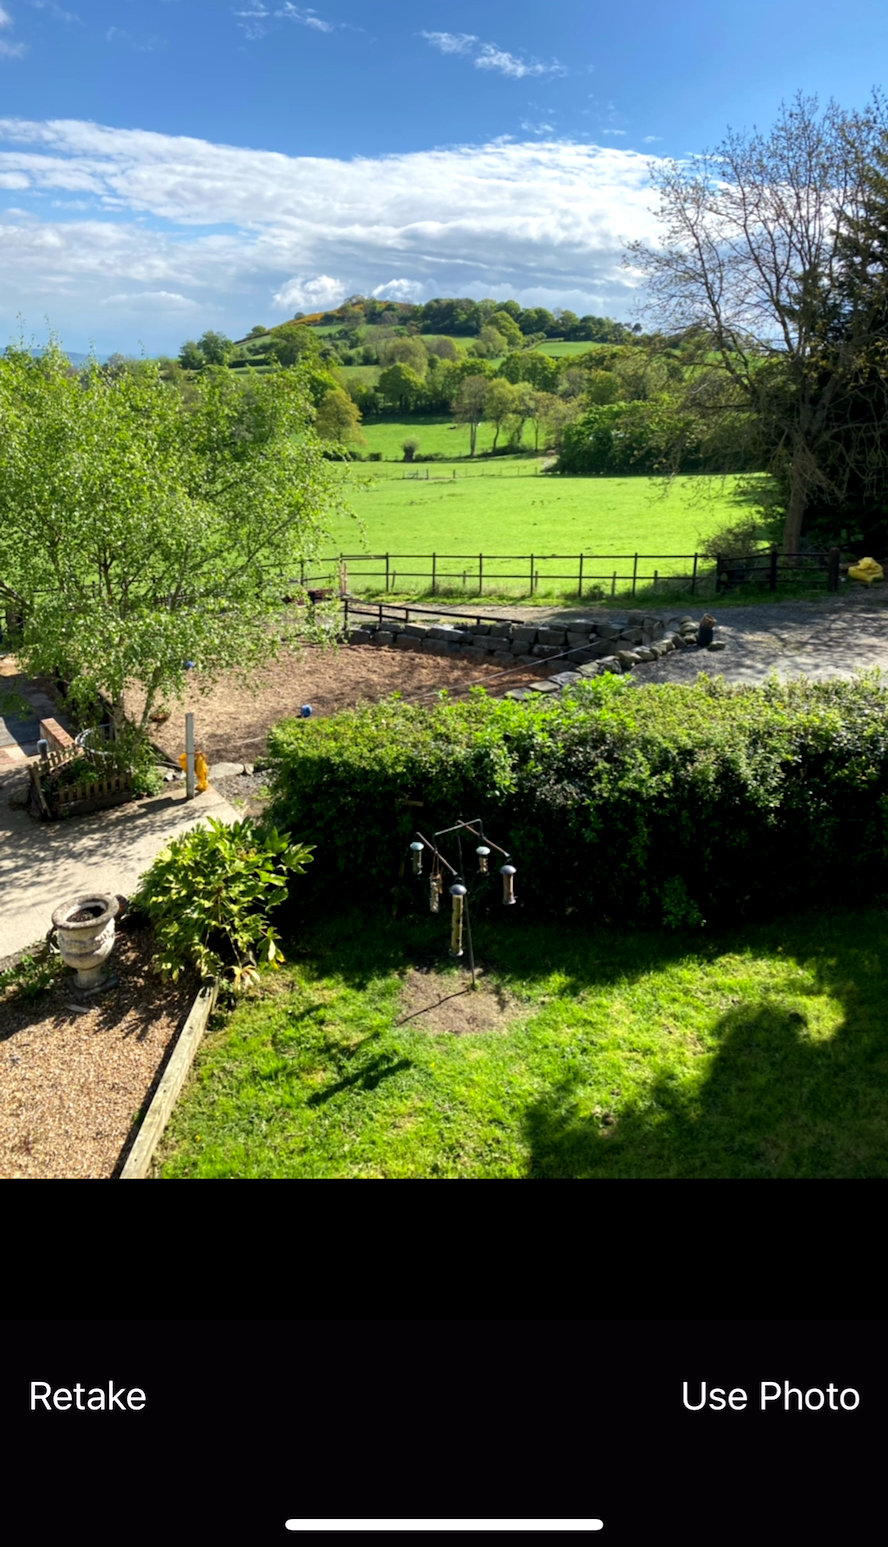
Choose whether to ‘Retake’ or ‘Use Photo’.
The Photo is added to the links.
Files
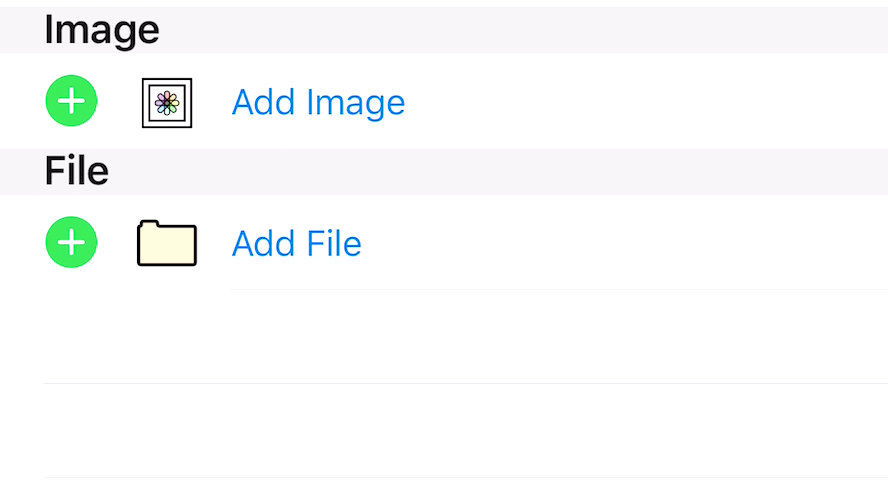
You can attach files to a WarnZ by tapping on the (green + icon) next to ‘Add Files’.
Files can be attached to WarnZ when they are stored on your device or when they are hosted by a cloud storage service. As a general rule: if you can see the files in the 'Files' App then you can link to them.
Some older Apps store files in hidden folders and will not allow access to those files from outside the App. They do this because they want you to work with those files only within their App. These Apps will not act as ‘Document Providers’ to 3rd Party Apps like WarningZ. Apps that will work with WarningZ are generally those that use or can synchronise their files with cloud storage. Therefore to ensure that you can link a file to a WarnZ it is best to use Apps (such a Pages, Word, Numbers, Excel, PDF expert etc.) that can store their files in the cloud.
The following cloud storage services are known to work well with WarningZ:
iCloud Drive (Apple)
Google Drive (Google)
OneDrive (Microsoft)
Dropbox
Other services should also work but have not been fully tested.
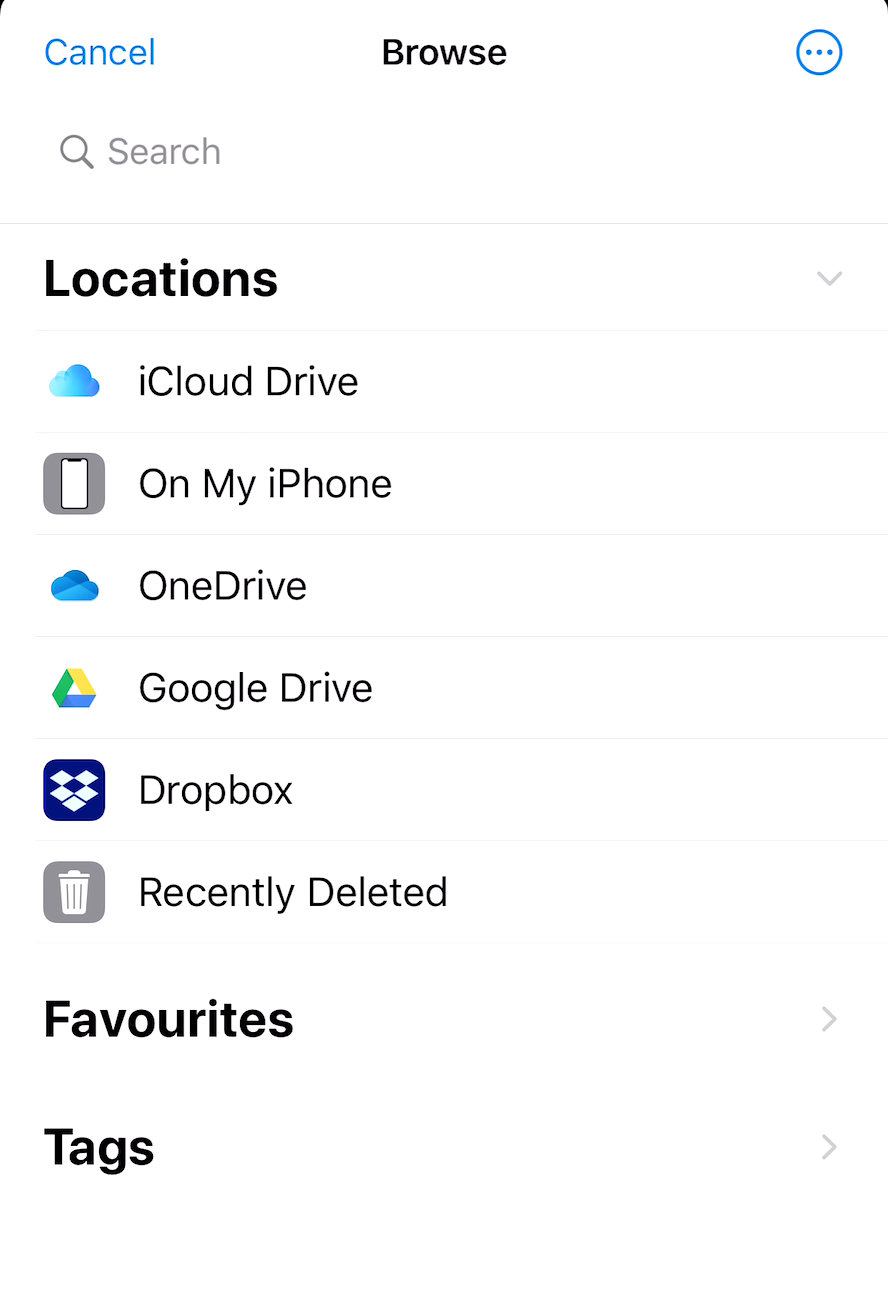
On tapping 'Add Files' the first location opened is for files stored 'On My Device'. To access other locations tap on '<Browse' top left or the 'Browse' folder bottom right.
Choose the device storage, a cloud storage or a document provider that has the files you wish to link to.
In this example:
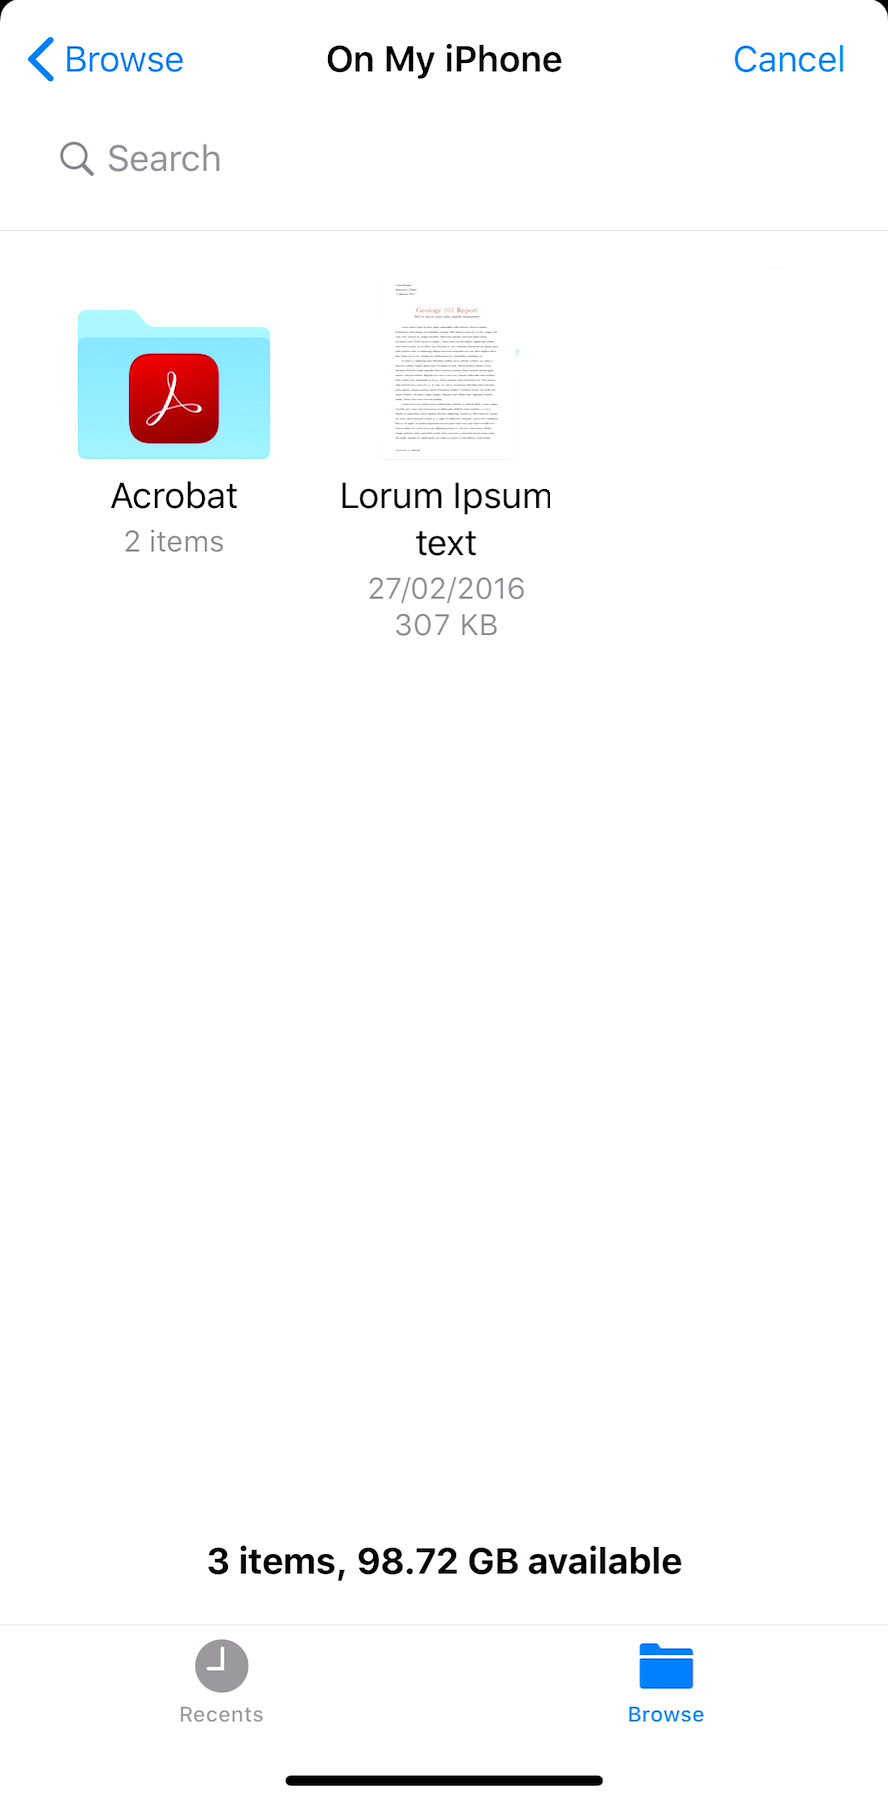
'On My iPhone' stores local files.
'iCloud Drive', 'OneDrive', 'Google Drive' and 'Dropbox' are cloud storage services.
If the service you wish to use is not displayed tap the circle with 3 dots ('More' menu) top right.
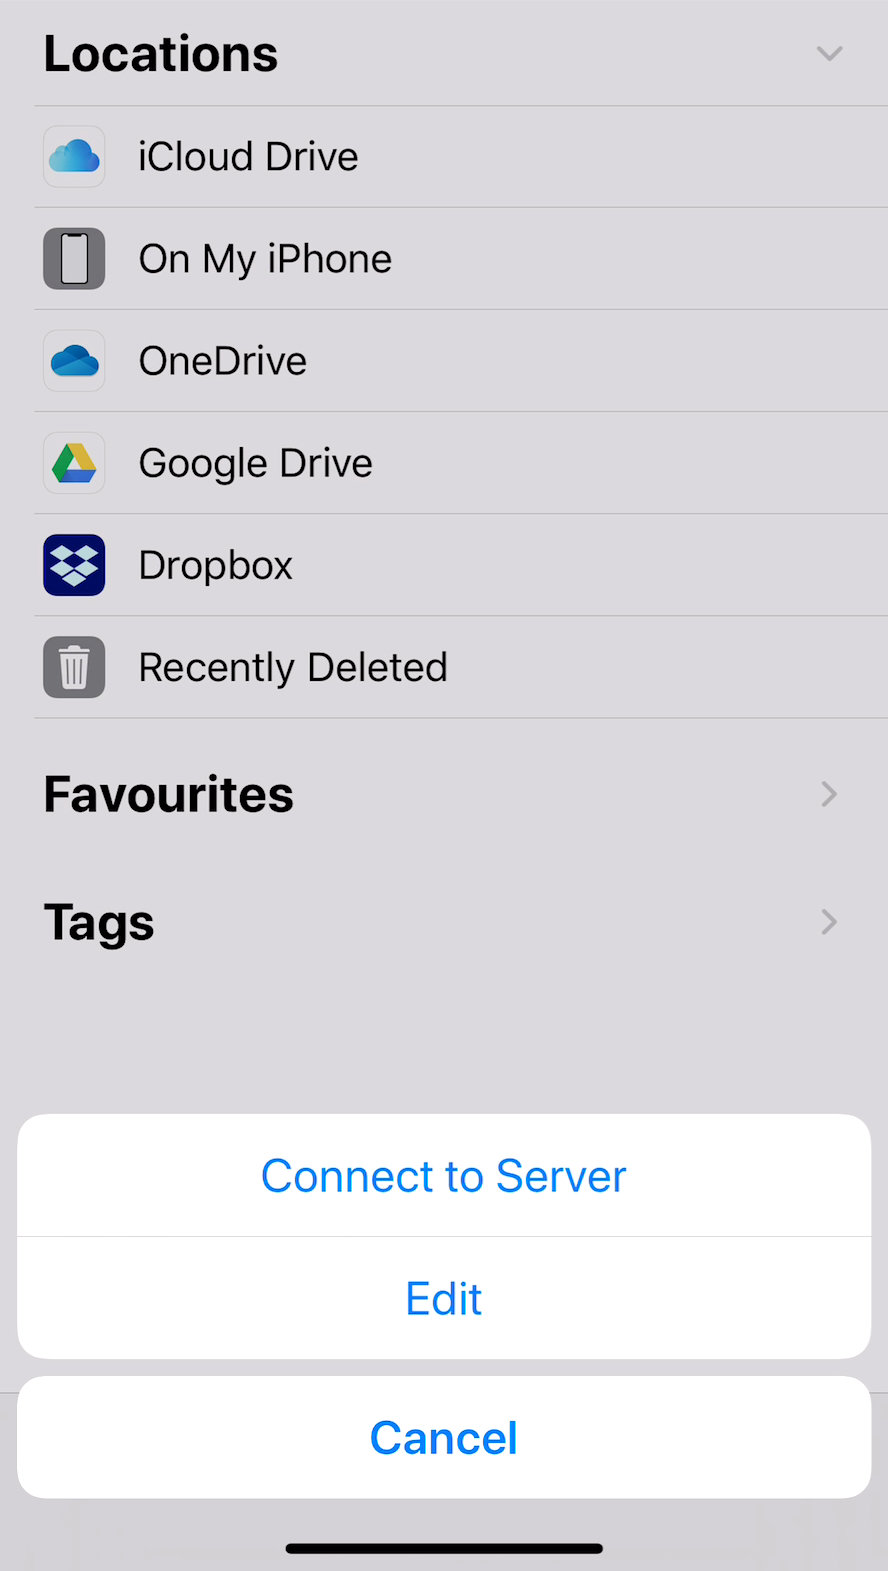
Tap 'Edit'.
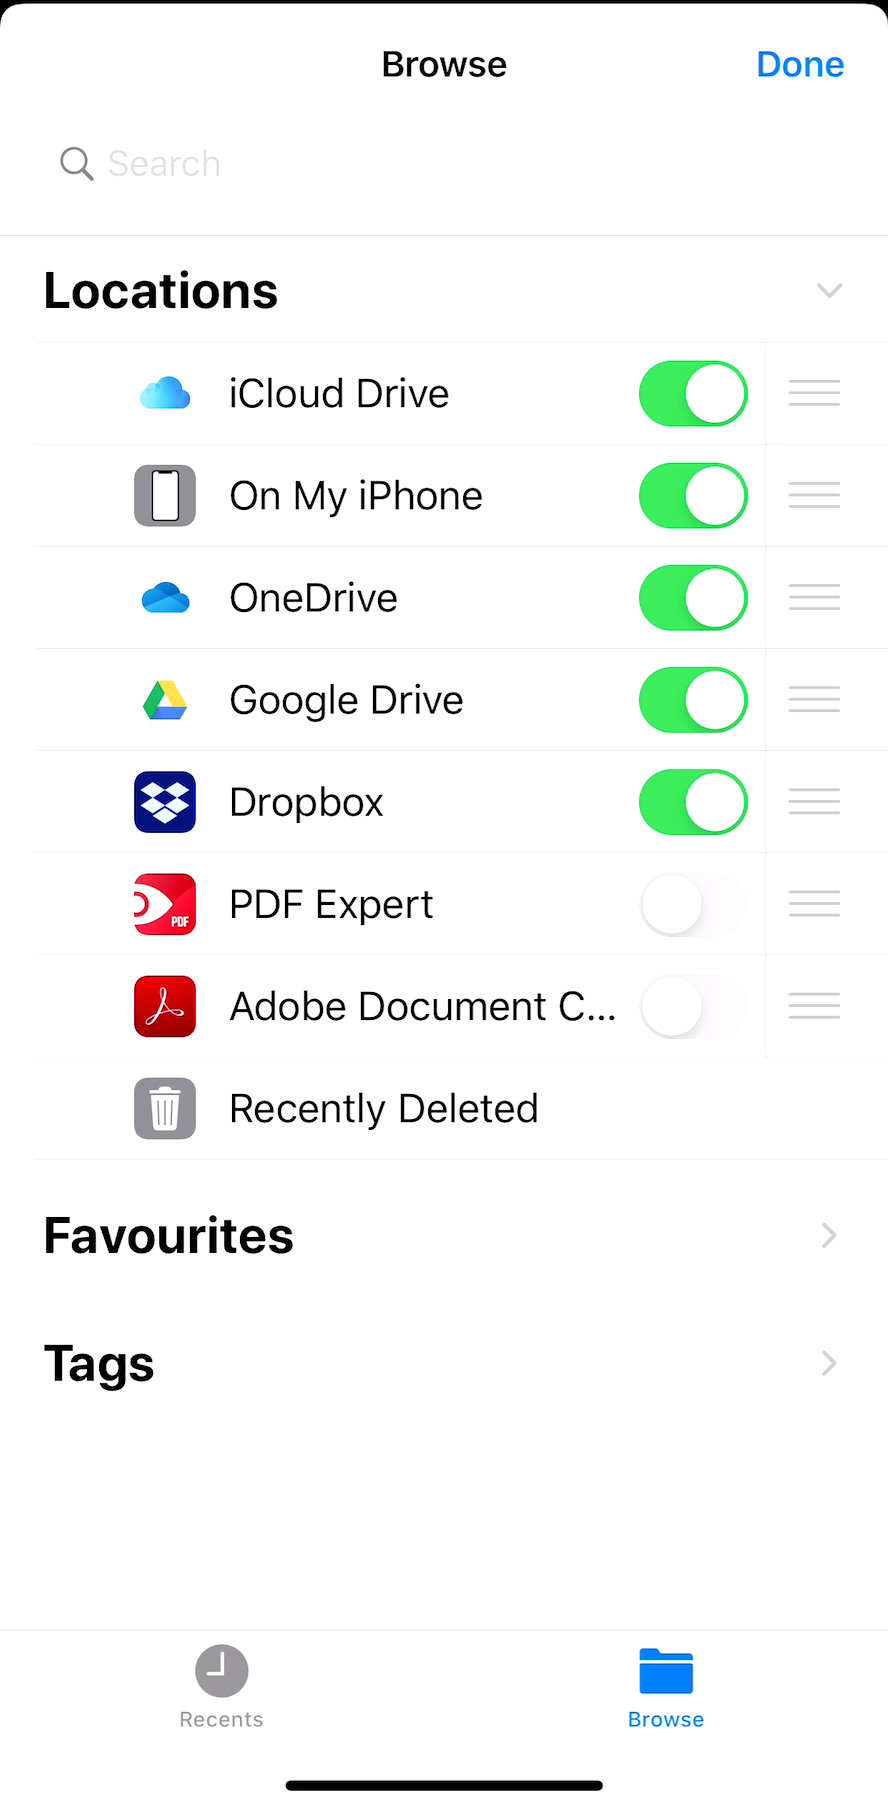
This will show any providers that are not currently available.
In this example: 'PDF Expert' is a document provider and allows WarningZ to access files that have be saved or created by it, and are stored on your device.
'Adobe Document Cloud' is another cloud service.
If you wish to link to files stored in their storage areas select the switch to on.
Important: To link to a file stored in a cloud service you must have the document or cloud storage provider’s App installed on your device. For example: you cannot link to Dropbox files without the Dropbox app installed. (You would be able to link to a file using a weblink through the dropbox web portal but this link would be created as a WarnZ Web Page Link not as a File Link).
To access some Cloud services you may need a service plan; although many providers offer free plans.
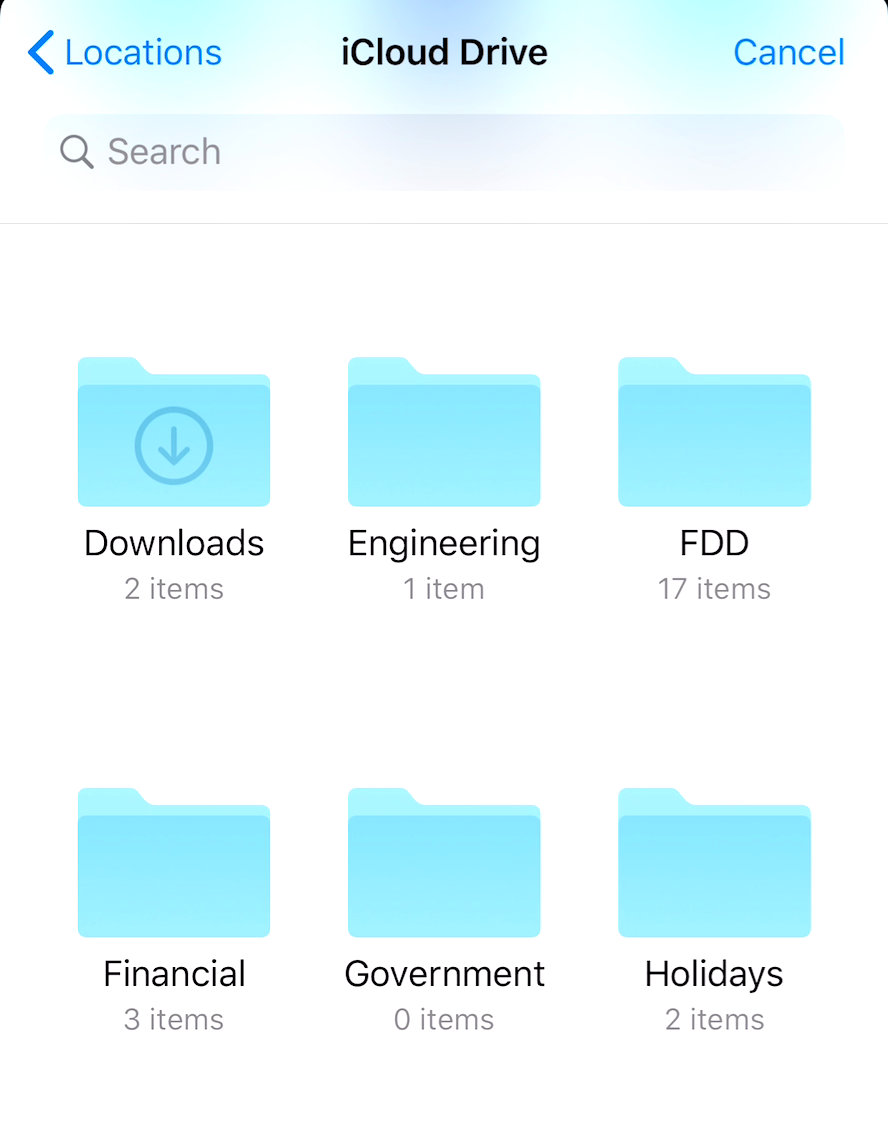
For this example: we have tapped on iCloud Drive which will display the iCloud Drive Folders.
In this view you can see various 'User' created folders (folders that you might create to organise your files).
Choose the folder in which the file you wish to link to is stored.
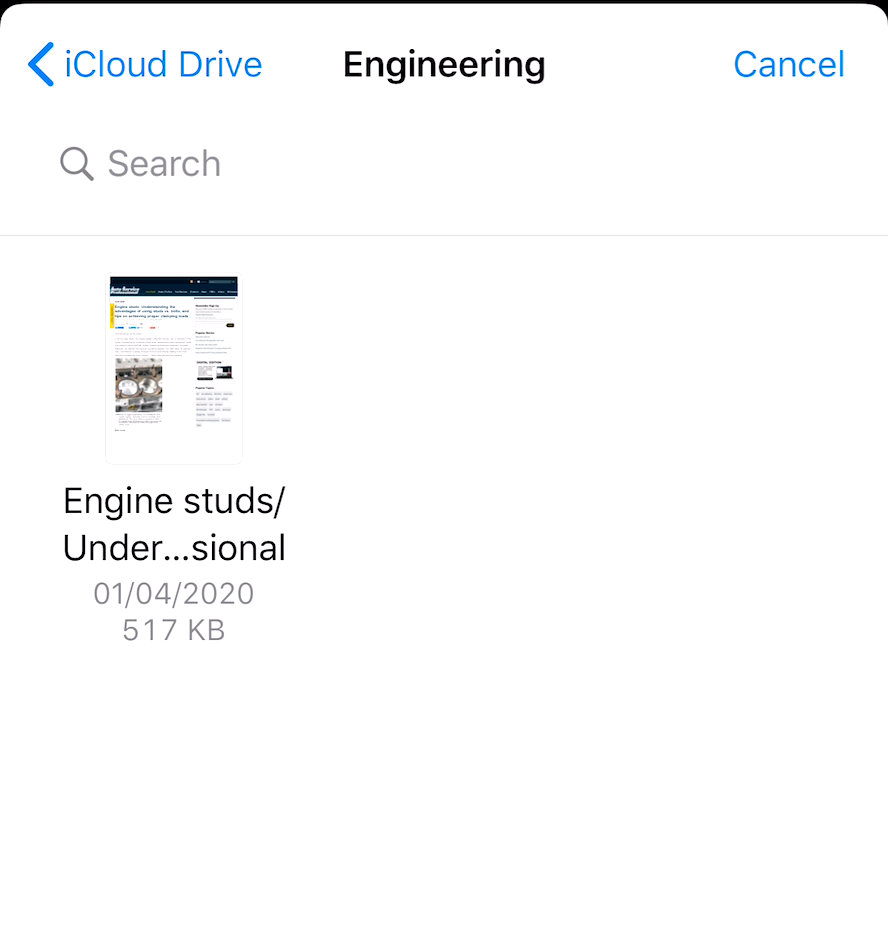
Tap on the file to which you wish to link. If WarningZ cannot link to a file (because it doesn't recognise the file type) then the file and its icon will be displayed in a light grey tint and will not be selectable.
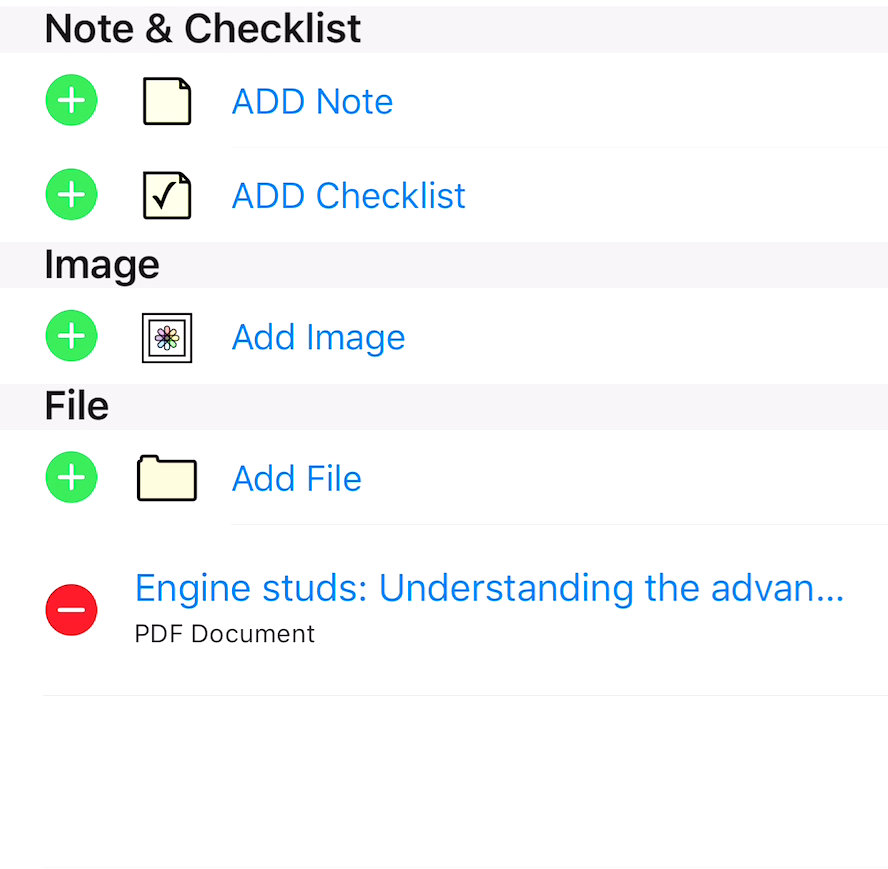
The file is linked to the WarnZ and can be accessed from the WarnZ links in the WarnZ Column View.
You may need a wifi or mobile data connection for any linked file to display if it is not also stored locally.
To access the file tap on the WarnZ file icon.
The Linked file opened in WarningZ
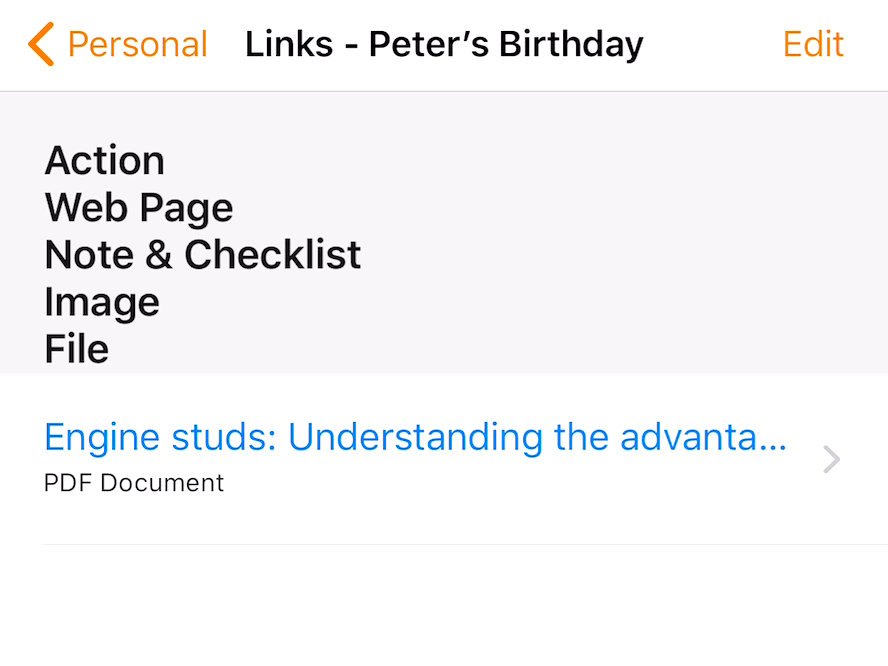
Or you can access the file from the 'Column View' by tapping on the link icon on the WarnZ to open the 'View Links' page
Tap on the File to open it.
Making Files Available to WarningZ
Most Apps now store their files on your device in locations that WarningZ can access and can then create links to those files. Some older apps may not allow this capability (they do not act as document providers). If these apps use bespoke file types then, even if you move them to an accessible location, there is a chance that WarningZ will be unable to link to the file because it does not recognise the file type.
If, when trying to link to a file using the process described in the previous section, you cannot locate the file then: The simplest method to make file available for linking is to email it to yourself and then move the file into cloud or device storage.
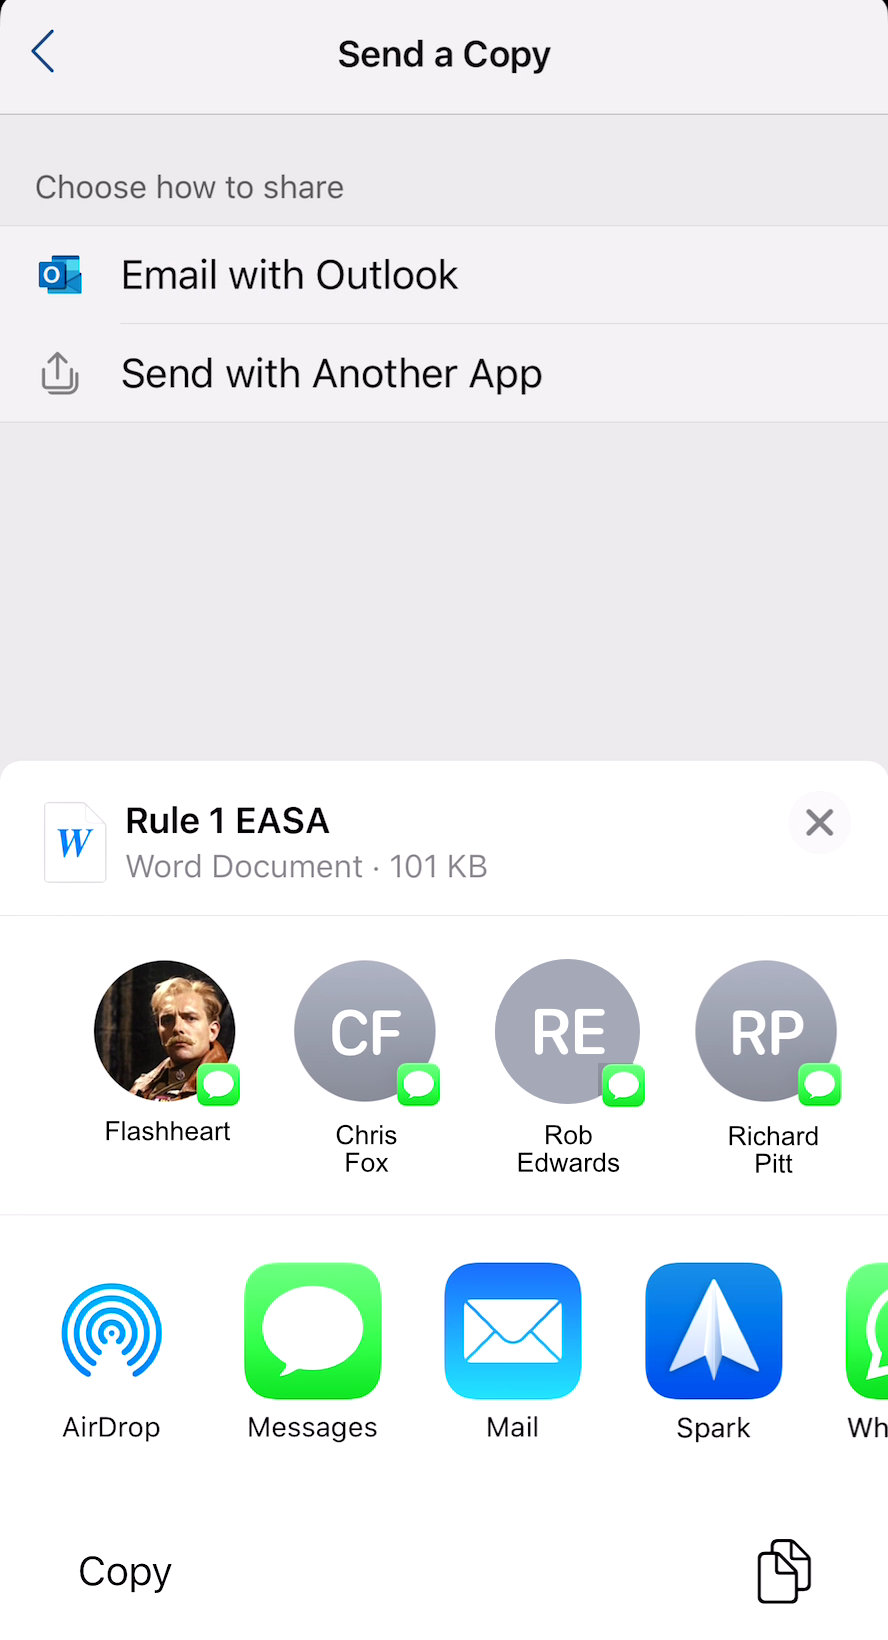
To do this: Open the App in which the file was created or edited. Use the 'Share' or 'Send' function to attach the file to an email.
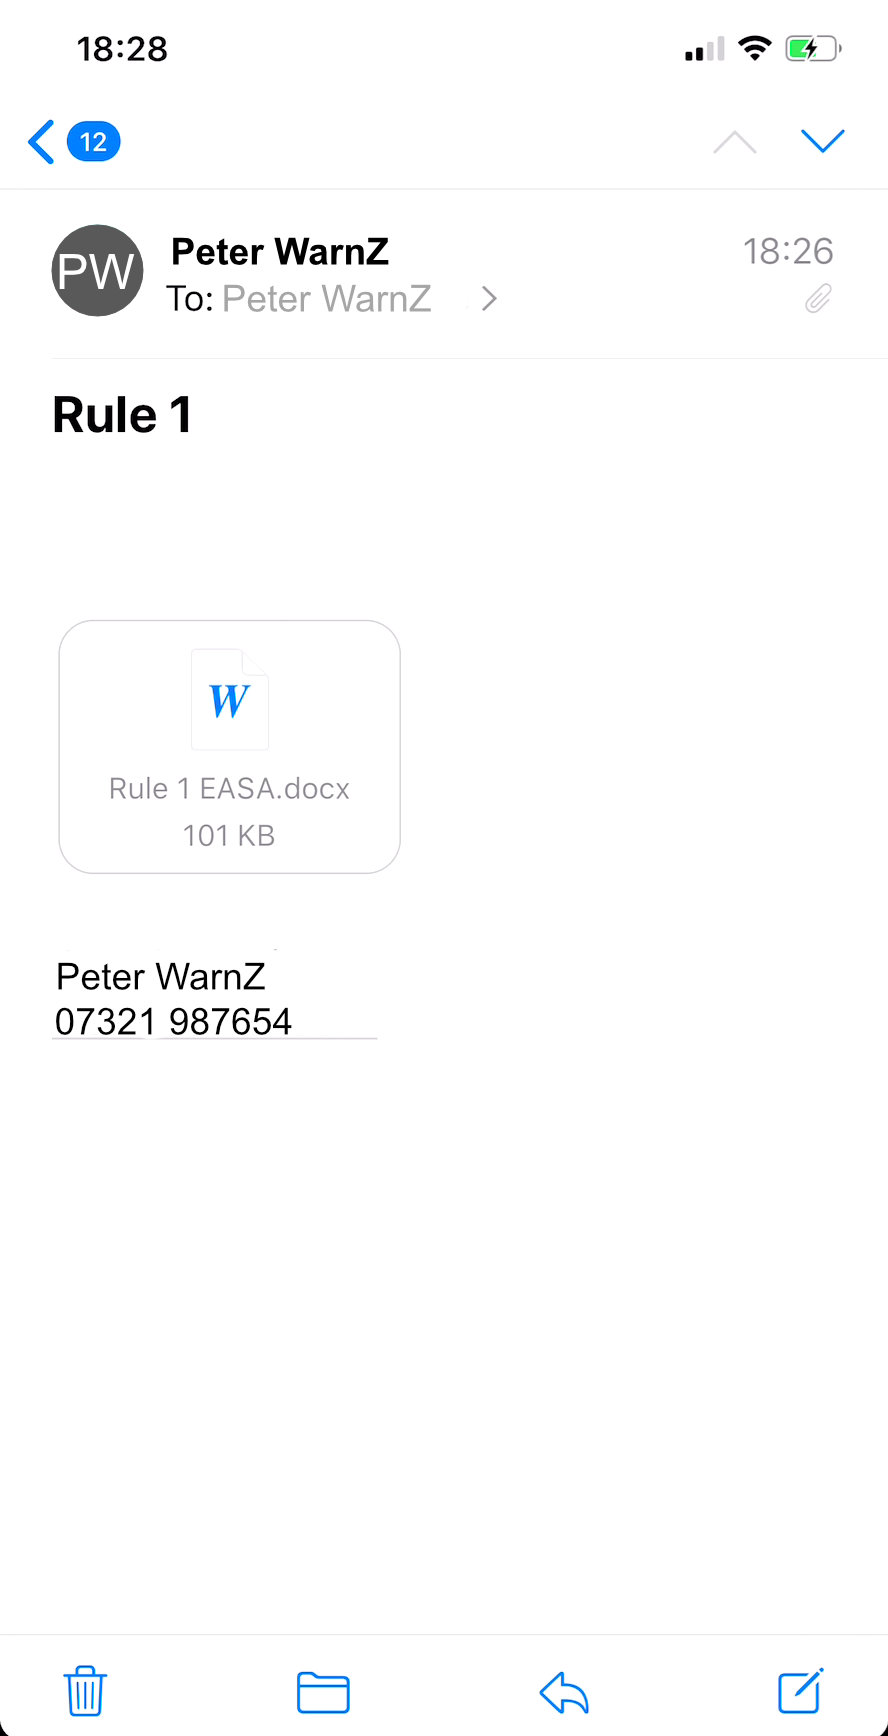
Send the email to yourself. Then, when the email arrives, download the file (if it doesn't download automatically) by tapping on the attachment and then ‘long press’ on the file icon shown in the email.
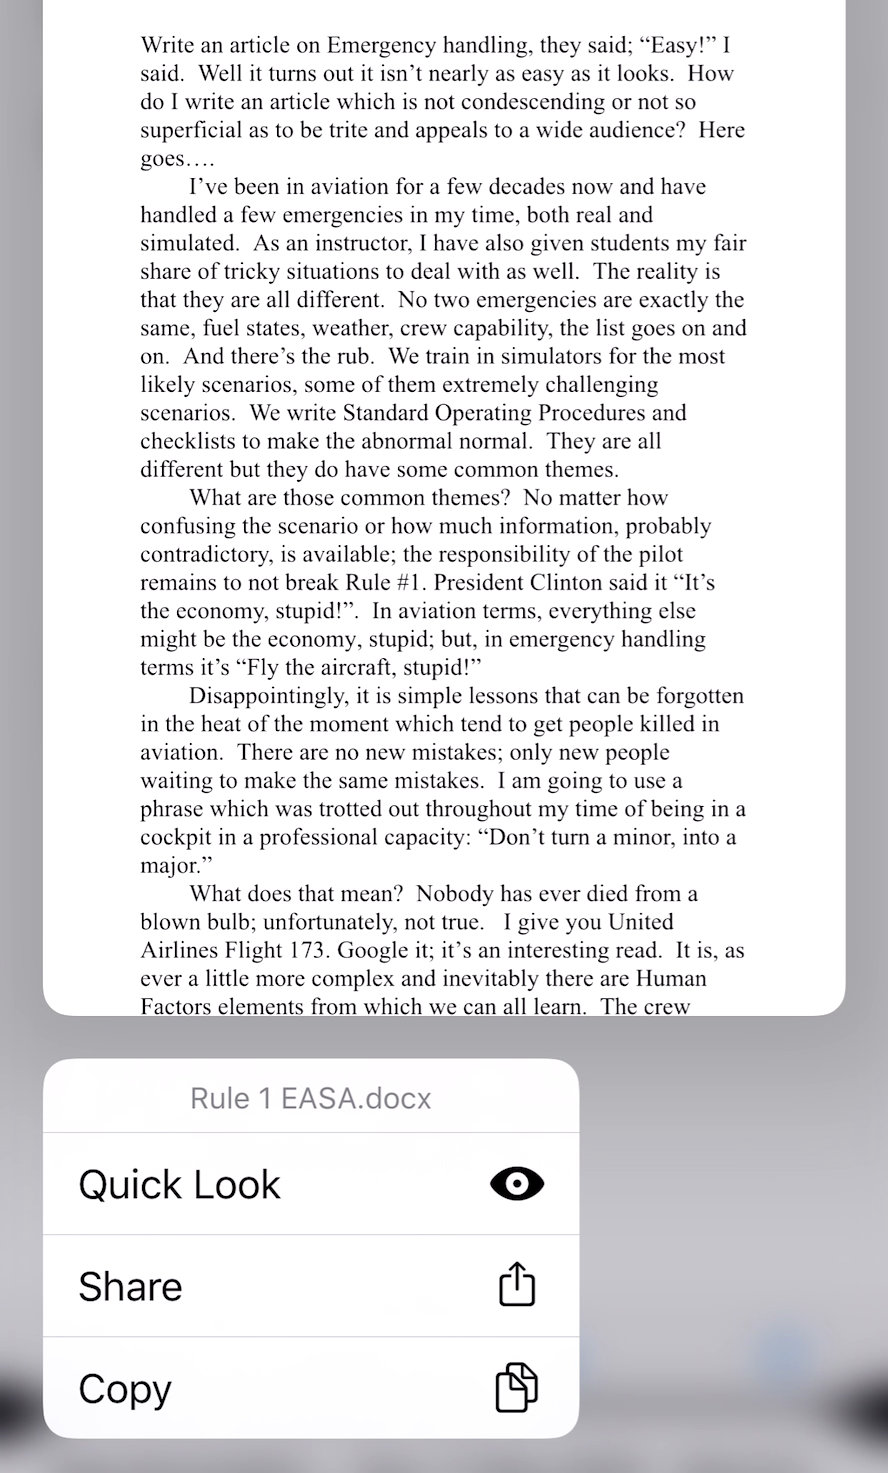
The 'Long Press' may show a 'Peek' preview of the file. Tap 'Share' in the options box.
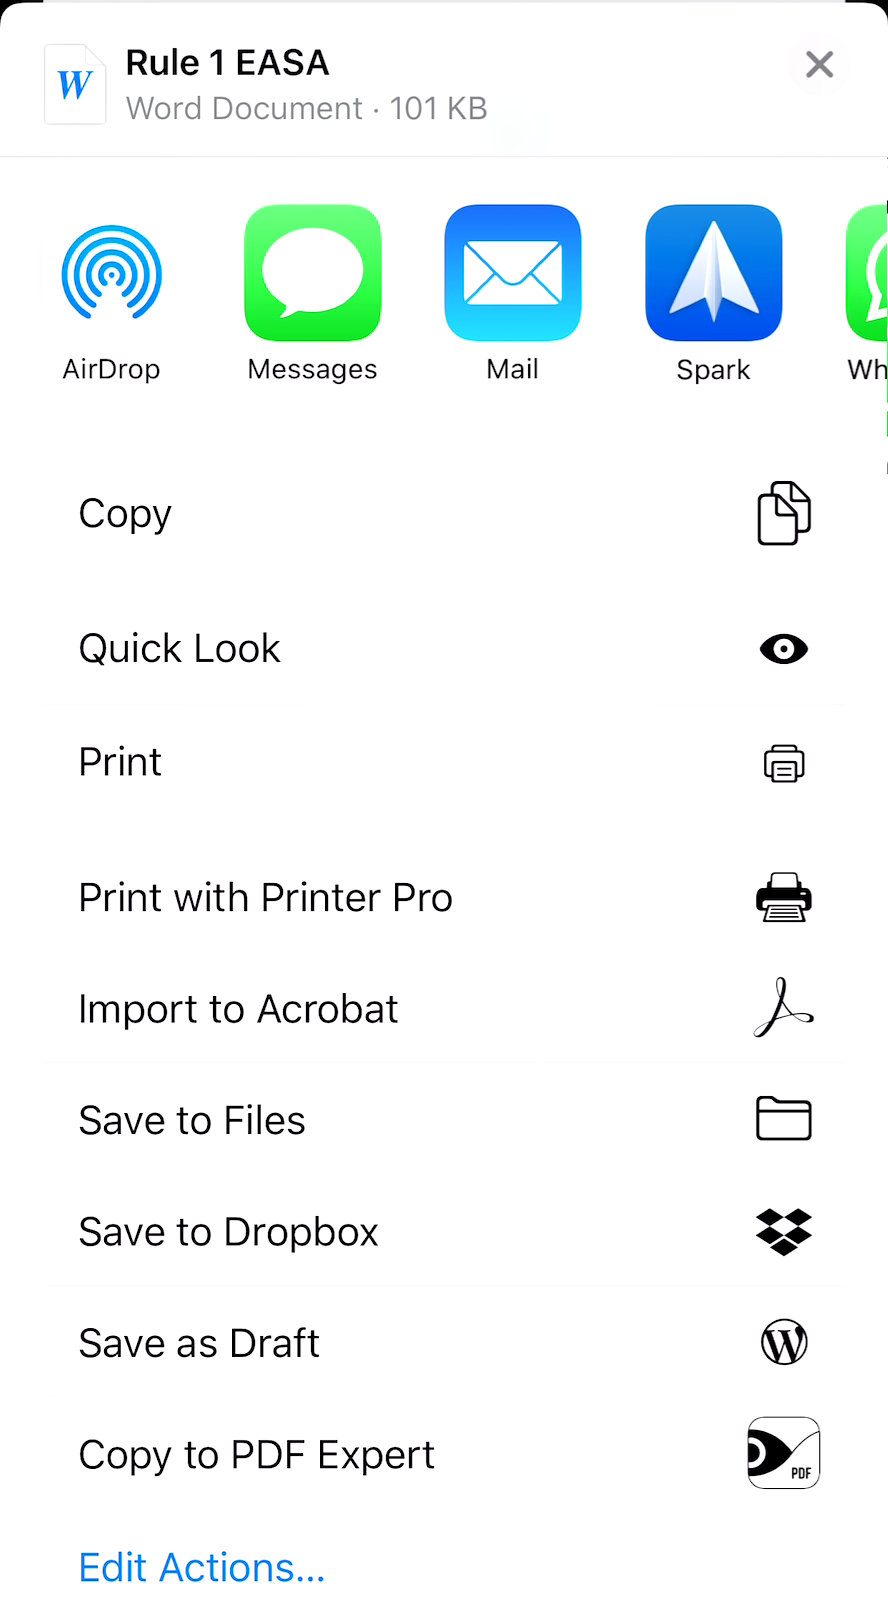
Chose 'Save to Files'.
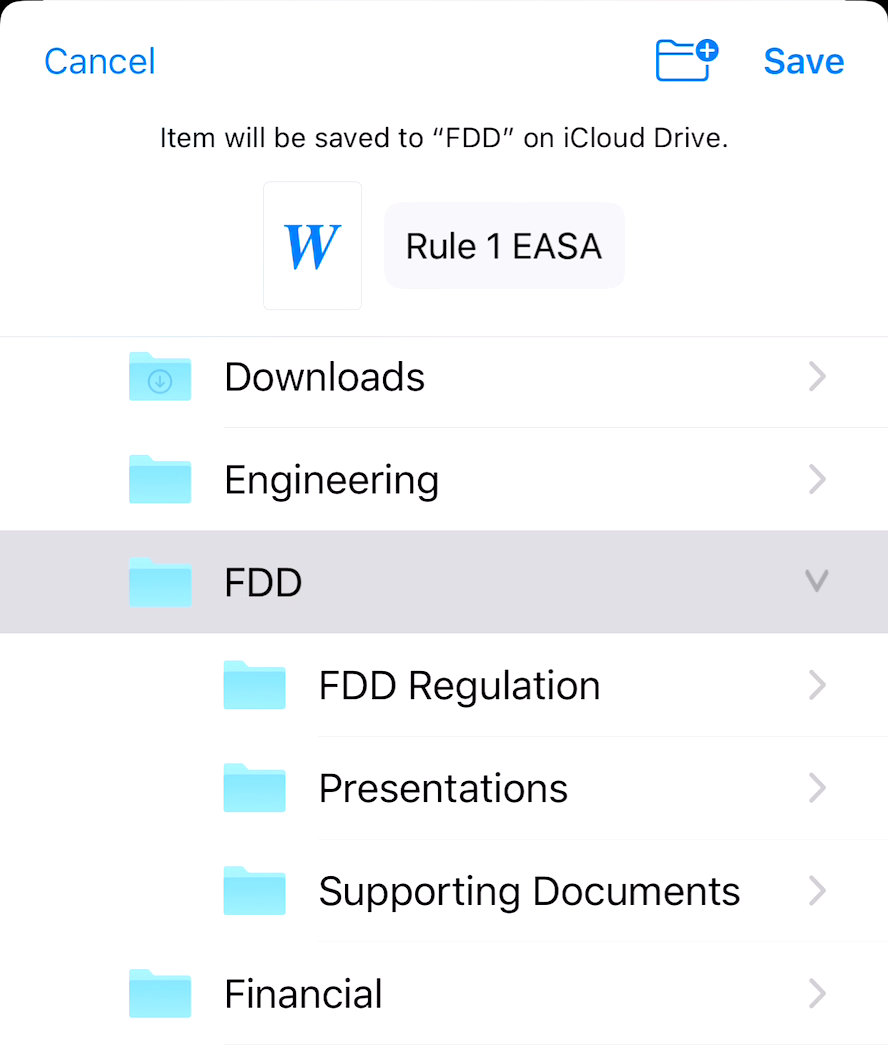
Chose a location to save the file and tap 'Save' top right.
The file can now be added as link in a WarnZ.